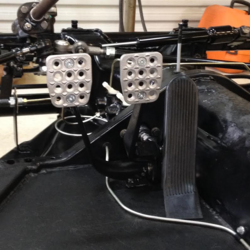
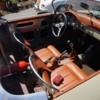
I thought I would start a thread showing the progress on my Speedster.  It's slow because I tend to get bogged down in the details, and always need more time and money!  Questions, comments and suggestions are always welcome.


____________________________________________________________


To begin, I did a few small jobs while the body was still on the pan.  During this time I also evaluated the project and made a list of things to be done.  This is when I fixed the butt sag and added additional rear supports, test fit the windshield assembly, cut-out and installed the steering column, mounted the engine deck lid which included making the inner hinge brackets, and reworked the door latches for smooth operation.


Engine lid hingesDoor latch inside driver doorDoor latch inside passenger door

I made the inner hinge brackets and modified the hinges in order to swing the lid up far enough to keep from hitting the body.  I used 5/8" diameter aluminum round bar for the new door latch mechanisms.  They are much better aligned and have a much smoother operation than the originals from CMC.

____________________________________________________________________


Steering column: 


Steering column opening 1Steering column opening 3Steering column opening 4


Steering column opening 7Steering column opening 8Steering wheel adapter

The metal VW steering tube slips snugly into the PVC that I glassed thru the firewall.  I made the aluminum adapter for the steering wheel and will have an ivory colored column with an authentic looking signal indicator switch.


__________________________________________________________________


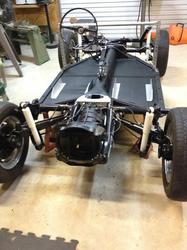
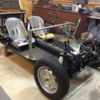
New sheet metal floor pans and 1x2 tubing support rails had been installed and the pan was blasted when I got the project.  I did a few additional weld repairs and wiped the entire chassis down with Ospho.  The front beam has been removed and will be replaced with a new, adjustable front beam and CB Performance Wide 5 discs.

Then I painted the pan with POR-15.  The rear trailing arms, torsion bars, spring plates, etc. were removed and reworked as needed.  I was anxious to get the pan painted before the freshly blasted surface could begin rusting.


 Pan1pan5


 ______________________________________________________________


Body removed from pan:


Body on sawhorses1Body on sawhorses2


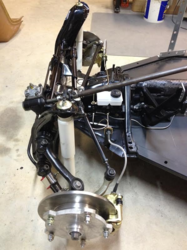
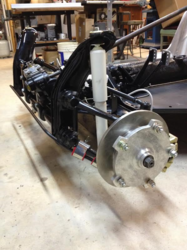
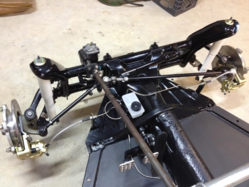
Reworking front beam assembly.  Cleaning, inspecting front torsion leafs (a handy trick from the Samba forums - chamfer the ends of each leaf to help when inserting the bundle into the beam!)  All new tie rod assemblies, ball joints, TRW steering box, steering damper, rag joint coupling and NOS ball joint drum spindles for the CB Performance disc brake kit.  Caster shims added behind lower front beam tube with longer bolts.  Waiting on parts from CB.


Front torsion barsFront torsion bars2Front trailing arms2


Front trailing arms1Front beam3


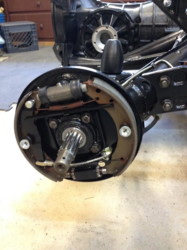
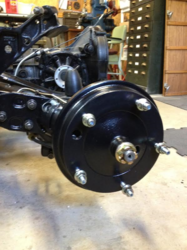
Assembling and pre-adjusting rear spring plates.  Final adjustment will be after final assembly.  Rear will have wide 5 drum brakes, using the IRS brake backing plate with early shoes and brake cylinders.  Plenty of stopping power for this car, especially considering the weight and the front disc brakes!


Rear spring plate adjustmentRear torsion bars2Rear trailing arms and shafts


_____________________________________________________


This cover was missing from the rear end of the tunnel on my pan.  I made one out of aluminum and will pop rivet it to the tunnel. Bolts cleaned and inspected, I am using OG VW Kamax bolts everywhere possible.


The cutout for the shift coupling will have a curved portion fiberglassed in to close the back of the opening.


Rear tunnel coverKamax boltsShift coupling cutout


_____________________________________________________


More to come!!


James

Attachments

Images (24)
  • Engine lid hinges
  • Door latch inside driver door
  • Door latch inside passenger door
  • Pan Before: Pan blasted and wiped down with Ospho
  • Pan After: Sealed with POR-15
  • Steering column opening 1
  • Steering column opening 3
  • Steering column opening 4
  • Steering column opening 7
  • Steering column opening 8
  • Steering wheel adapter
  • Body on sawhorses1
  • Body on sawhorses2
  • Front torsion bars
  • Front torsion bars2
  • Front trailing arms2
  • Front trailing arms1
  • Rear spring plate adjustment
  • Rear torsion bars2
  • Rear tunnel cover
  • Front beam3
  • Kamax bolts
  • Rear trailing arms and shafts
  • Shift coupling cutout
Original Post

Replies sorted oldest to newest

Originally Posted by Ron O, 1984/2010 IM, B.C. Canada:
Originally Posted by Alan Merklin - Drclock. Chambersburg PA:

James, 

You are on the right track, nice work and detail too ...all I can suggest is perhaps, leave out a couple of the smaller torsion bars in the beam for a smoother ride. ~Alan

I'll second that. 

i third that but don't just remove them. 


i took a few out, made 4 cuts for each torsion arm removed (making 5 pieces):


* two small end pieces that slip into the trailing arms

* one center piece to keep the centre adjuster snug

* two middle pieces used for recycling


that way the key points are correctly tight

Last edited by MangoSmoothie.ca

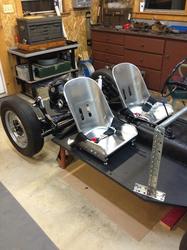
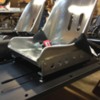
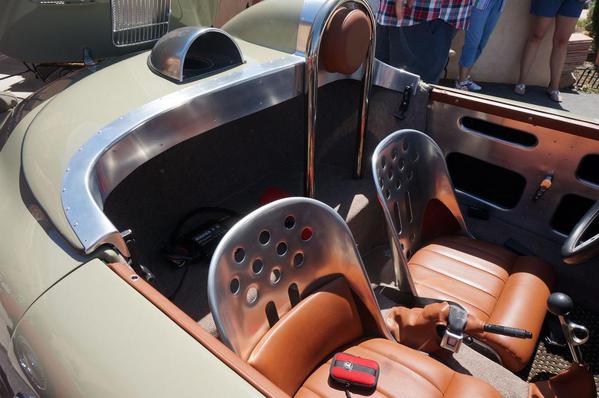
Wolfgang, we are on the same page.  I do not intend to cover them completely.  I even went as far as to punch the holes and slots in the back in a pattern that closely simulates the original Speedster metal seats.  I used pictures to layout and scale the locations and pattern.


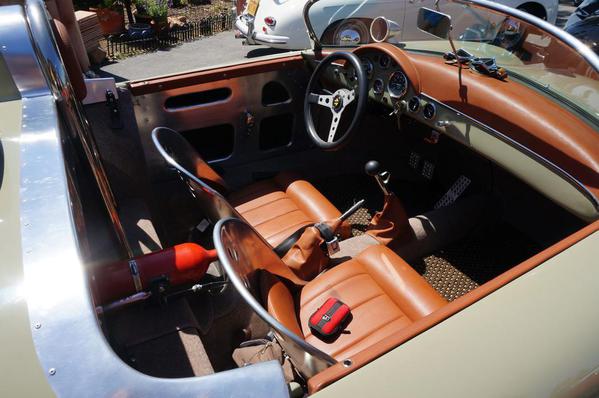
My current plan is to cover the front like a typical Speedster seat in a dark cognac leather.  But, instead of carpet on the back, I will leave the aluminum.  The upholstery will wrap and snap around the edges.  I don't want to leave exposed aluminum edges because the Texas sun tends to get metal surfaces really hot! 


I like your idea on tooling the seats backs.  I have done that on smaller panels before, in a smaller pattern.

Jim,


That looks awesome!  Great inspiration.  I love the colors and the aluminum, very similar to what I have in mind.  I'm curious about the door panels.  Do they just open to the inside of the door, or are there storage compartments built in?  Maybe just finish the inside of the door and use the entire area for storage?


If you ever have a chance, snap a few more pics of the car for me, please. Thanks!


James

More progress...about to get the body work complete. 


Body repair6

Getting pretty straight!  Fender lips removed, ground smooth and sealed with resin.


Body repair8

Everything underneath sanded smooth and coated with black bedliner.


Body repair9

All edges and exposed fiberglass areas sealed with resin.


Body repair12

Torsion bar holes cut and sealed.  Fits the original 356 torsion bar covers.


Body repair13

Ready to be finished with the bodywork!


Body repair15

Butt sag repaired.  Fender lips trimmed.  I hope 185s on 5.5" wide wheels clear!


Body repair16

All the ripples and high spots block sanded flat and straight.


Body repair17

Louvered deck lid fitted, beehives and reflectors mounted, all holes sealed with resin.  I am using a VW license light and mount for the outlaw look.  Also, '67 VW back-up lights...but I'm not sure about those. 


I think it may look a little too "busy" with all the lights and reflectors.  But, it may be better once it is painted.  I will also have a third brake light that has white LED's included and they can serve as back-up lights if I decide against these. 

Attachments

Images (8)
  • Body repair6
  • Body repair8
  • Body repair9
  • Body repair12
  • Body repair13
  • Body repair15
  • Body repair16
  • Body repair17

Leon,


The CMC front support was not with the car when I bought it.  I have built my own, a little different from CMC.  I used a 1/4" aluminum plate under the trunk floor and a 2x2x1/4" aluminum angle bolted under the plate.  I have brackets that bolt to the angle piece and attach to the tapped holes in the top of the front beam mounting brackets.  This supports the nose and stiffened up the trunk floor where my spare will mount.  It also provides extra support for the gas tank and I tapped holes for the tank clamps.


I also glassed in supports from the trunk "well" to the front nose of the car in order to stiffen up the body.


Front nose support


Thanks for the feedback!  That's what I'm looking for from all the experience in the SOC.  I want to try to do this right the first time. 


James

Attachments

Images (1)
  • Front nose support

Ted,


I love your car and really like the way black cars look.  But...my wife had a black Camaro once and that was enough.  They look great when they are clean, but it takes soooo much work to keep them clean!  You have done a great job with your car.  I wish I had half of your energy!  You get more done in a weekend than I do in a month.


My plan is to paint it Stone Grey 5710.  My favorite example is Scott Sloan's Outlaw.  I am building something similar.


James

"My plan is to paint it Stone Grey 5710.  My favorite example is Scott Sloan's Outlaw.  I am building something similar.


James"


That's the way to do it.  Have a specific car in mind that rattles your tubes, and work toward that.  As they say, imitation is the sincerest form of flattery, and Scott's IM is a car that needs to be imitated. 


Scott had a pure vision of what he wanted and Henry and his lads delivered it.

I read in your earlier post you were thinking of using white LEDs for a third brake light with the hopes to use them for double duty as back up lights. Make sure you check the laws in your state regarding lighting equipment. In California white lights can only be used as headlamos and at the back of the car for reverse lights. All other lights visible from the rear of the car have to be red except for turn indicators which can be amber. There are a few other exceptions for really old cars but those are rare.

Add Reply

Post Content
×
×
×
×
Link copied to your clipboard.
×
×