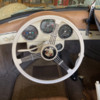
Last fall I thought I'd like to add a couple additional gauges to my Speedster, but I really wanted it to feel integrated (not an afterthought). Additional holes in the dash was out of the question, so I started playing around with cardboard.
After a while I came up with a shape I thought would work, but I still wasn't sure how to fabricate it. I could have done something in fiberglass, but talking with a friend at work he mentioned that he recently picked up a 3D printer and was looking for a project.
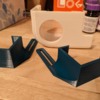
Fitting this work in on weekends and evenings it was a slow moving project, but eventually we put together a quick print throw away test model. Putting it in the car we were able to test and refine the approach to mounting, eventually landing on tabs at the front to hang on the dash lip, and couple t-track arms at the back that loop around the square tubing under the dash.
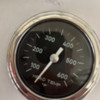
Last week we printed the full strength final model (it took about 24 hours all told to print everything) and I started working on the priming and painting. Yesterday I finished fitting everything into the car. Classic Instruments made the gauges (Head temp and Air temp) using the VDO style font.
I took it out for a drive this evening and it's rock solid, I'm very pleased with how everything turned out. The project took about 6 months start to finish, but was worth the wait.
Hopefully this provides some inspiration for someone else considering a 3D printing project, or looking for ideas on how to mount additional gauges.
I don't have the 3D models myself, but if others are interested send me a note and I'll ask my buddy to share them.
Attachments
Original Post


