Lifting the body onto and off of the chassis. I needed to do some test fitting before painting the body so reassembling the two parts was necessary. I saw a few pics of how others had done this before and figured out how to do it "safely." The first step was to reinforce the roof above the body with 4x4s and an additional 2x6 across the top. Lateral stability was provided by additional 2x4s between the rafters essentially making a box. Swinging my prodigious weight from the rafter and making monkey noises convinced me that it was safe.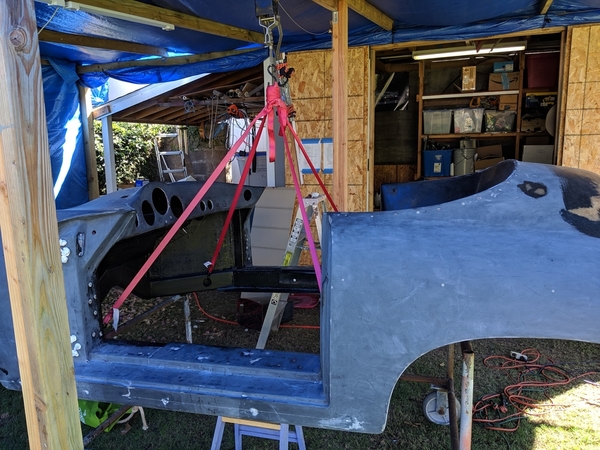
I then disassembled the top half of a come-along and fashioned a through bolt for the reinforced rafter. The come-along was attached to the rafter and four ratchet tie down straps (ratchets removed) were secured to the come-along hook. A good pulley system with tie-offs would work as well.
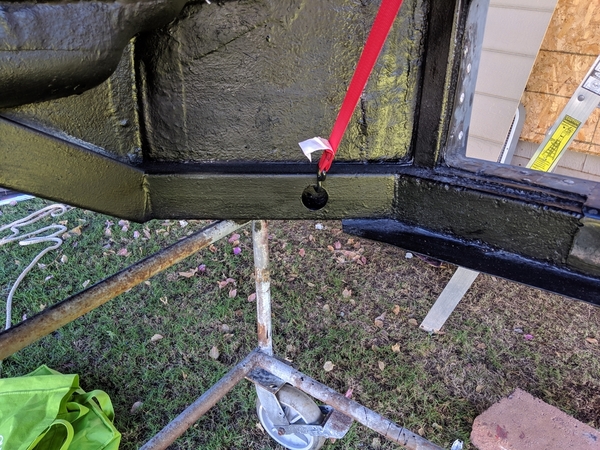
Two holes were drilled into the rear cross bar from the face of the lower package area. They need to be big enough for the hooks on the straps to rotate freely. The holes were roughly 6 inches from the outside edge of the package area. Look behind the cross member to make sure you aren't drilling into the bracket that goes to the engine compartment. Wider is better in terms of the stability of the body when lifted. These new holes will be covered with carpet so don't sweat it.
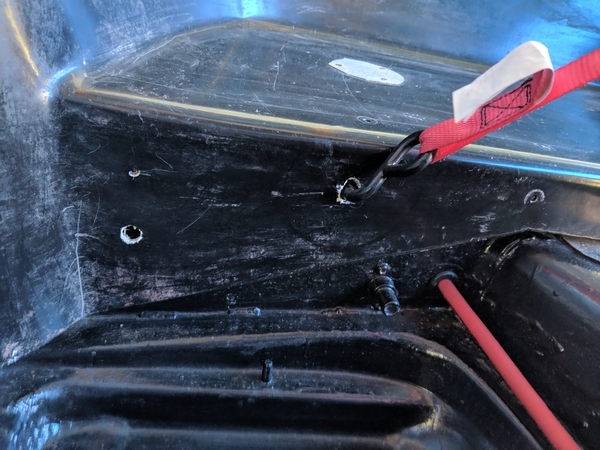
The front two strap hooks will attach to the holes in the frame where the heater vents attach. Keep the front strap lengths short enough that they DON'T TOUCH THE DASHBOARD!
There are two tricks to getting a level lift. The first is to shorten or lengthen the front and back pairs until they reach an equal tension level when you start the lift. Adjust the straps in pairs (front pair and back pair). I just strummed each one and listened to the frequency of the tone (higher is tighter, lower tone is looser). Roughly equalizing the tones give you what you want. The second trick is that as you adjust the strap lengths, you should try to keep the hook on the come-along vertical (not being pulled towards the front of the car or the rear). Otherwise, the body will swing forward or backwards when it is lifted clear.
Double or triple check everything and do a short lift. Swing the body just a little to make sure everything is secure. If you don't like it, lower it back down and adjust the straps or supports until you are comfortable with the safety of the setup. When testing, don't put yourself under anything, in case it lets go unexpectedly. I attached an extension to the come-along arm so I could stand clear when testing and it turned out to be useful leverage when lifting.
My come-along has a tab on top that needs to be flicked when you want to lower the hook. I tied some nylon survey string to the tab and ran it back outside the car so I could be clear of the body when testing the lifts and lowering. I added another string for pulling the lift ratchet back, too. This gave me more latitude when lowering (ask me if you get to this point and are confused about how that might work). The rough idea is to pull the string to disengage the handle and to raise it up near the top of its range, release the string and lift the handle slightly while pulling on the lowering tab string until it clicks back allowing the handle to get a full swing of lowering. I know, it is hard to explain...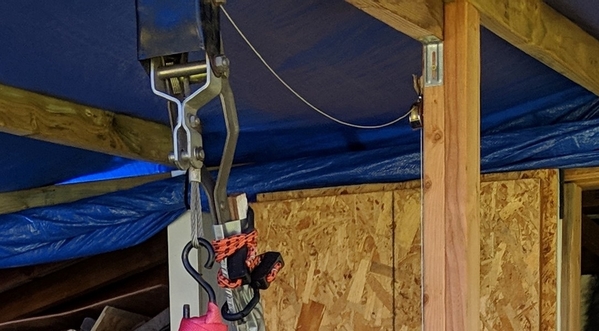
When you are set up for a safe and level lift, have someone else keep a hand on the body so it doesn't rotate. We were having 40 mph gusts when I was lifting last time and the body got excited about being airborne. Surprise, you can't lower it since it has rotated out of the support range so you need to just keep it lifted and block it somehow until you can get help. Or, you could avoid my mistake and just have someone helping. They don't need to be strong, just steady.
Alignment with the chassis attach points is important when lowering the body. Just go slow and move things a wee bit at the time. Inevitably, one corner will touch slightly before the others. Start that corner bolt loosely, it just becomes a locator peg. Swing the body until you get alignment on another corner and peg that one. It will probably help to have someone else either pegging corners or doing the slight lifting and lowering. Once you have the body square on the chassis, apply the nuts and lock it down. If it is the final lock-down, don't forget the sealing needed between the body and the chassis. Cheers,
Mike


