Speedster jobs list
Ok, first off, forgive the long post! There’s a lot to discuss, and the more info I give out, the more help and experience I get back, so I welcome all comments (useful, sarcastic or otherwise!)
So, having checked most of the car over since I got it home the other week (and had a major oil leak to deal with), here is a start of a long list of jobs for the winter, in order of priority to:
1. make it safe
2. make it reliable
3. make it desirable
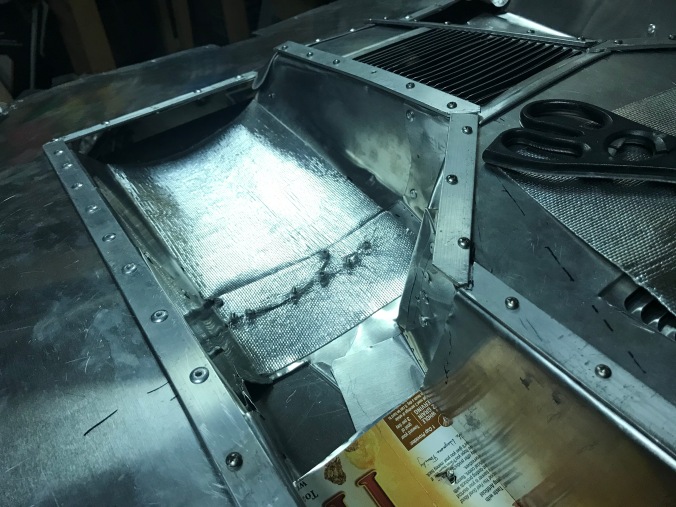
First off, the leaking oil cooler hose was fixed on Friday after picking up new hoses (thanks to Hyphose in Portsmouth for copying the old hoses). I’ve added more P-clips to better route the pipes more securely to avoid hitting the exhaust. I’ve also re-used some heat shield wrap as well for key areas.
Before I discuss other tasks, it’s funny how you often find one problem leads to another, because one shortcut for an old fix created a knock-on effect by fixing one problem only to create another.. I must admit I’ve been guilty of that in the past, either through lack of money, or time or just laziness! I’ve learnt the hard way that, at least for classic cars, do it once and do it right - its so much easier and cheaper in the long run.
Second main task is steering/suspension. Currently it’s far too stiff AND vague, so it’s a bit like a novice steering a barge down a canal, or ten pin bowling with the bumpers up.. Steering is nothing, nothing, over-correct left, nothing, nothing, over-correct right!
The steering box is covered in oil/grease, so whilst it’ll be ok for the very short term, I would like to fix this with new seals if possible, before filling with fresh grease. Is this possible? Is the steering box OEM? It looks like it to me.
Even a quick adjustment over the weekend has made for a vast improvement in reducing play. I took the steering damper off whilst checking this so that didn’t affect the tests.
Another problem is the steering column - the shaft itself is slightly bent so rubs on the column/tube once every rotation. So I need to straighten the steering shaft. I may also have to widen the hole in the bulkhead because I think it was cut slightly askew.
I’ve now relearnt a lesson I’d forgotten from my early Beetle ownership 30 years ago - removing the fuel tank makes life a LOT easier for any front end work! Last night I managed to straighten the steering shaft by literally putting the boot in - climbing inside and putting some weight on the high part of the shaft (I call it the shaft because it’s the inside part of the steering ‘column’, which I think of as the outside tube the shaft resides in). I then replaced the old urethane rag joint/ steering coupler with a rubber OEM version - much better!

Finally , I managed to properly locate the rubber grommet between the bulkhead and steering column - this was previously a bit bodged. I think I’ll still have to bore out the bulkhead hole, but that’s something to do in the depths of winter.
This brings me on to another problem - the last owner was 6’4” (I’m 5’7”) and he had the steering column shortened to cope with his long arms. This puts the steering lock/ignition key back inside the dash, which has had to be cut out to accommodate this.


This makes starting the car a real pain, needing a cack-handed way of holding the key to turn it. And even if I extend the steering column or buy an original column, I’ve then got a large hole in the dash to disguise.. I’d like to take the ignition switch and move it to the dash, but that would lose me the steering lock. Ahh, decisions, decisions! Perhaps keep the ignition switch and simply have a starter button on the dash? That would remove the need to twist the key past the ‘on’ position. This is low priority for now, though. I can put up with the occasional finger twiddling to get her started (ooh matron!)
I’m pretty sure the car has drop spindles - see pic below - running on 15” x 5.5 chromed Fuchs and the lower ball joint is almost touching the rim. If be grateful if anyone can confirm this from the pictures alone.
It’s also got torsion bar adjusters (the less easy ‘Avis’ option, of course). It all looks in good condition, I just need to get a spanner and enough brute force on the adjusters to get the nuts undone to lower the front. The limited access due to the body shell will make this more tricky, but it’s still achievable. I would like to drop the car another inch to get rid of the tyre/wheel arch gap and to level up the car compared to the currently nose up attitude.
Can I say a great thank you to this site in general and to all contributors in particular? Thanks for all your postings to date on this site - it’s a great source of experience and expertise, and I've learnt a lot in a very short time. Having a decent search function makes a HUGE difference - so thanks to all admins and devs behind the scenes.
I’ll make sure I get everything with a grease nipple suitably greased up, and I’ll try and check the ball joints - although the car is on axle stands and so the front end is unweighted, the ball joints look decidedly skewed. I’ll check this once the car is back on the ground again. It'll probably be ok, I'm just used to OEM, unmodified Beetles.
I think there’s a problem with scrub radius as well - but that’s down to the drop spindles and disc brake conversion, plus the wider tyres - 195/55/15 tyres placed further away from the steering axis means that, even with a perfectly smooth and frictionless steering wheel to track rod end movement, there will be increased friction. So, narrower tyres should help (185/60/15?), as will higher tyre pressures, but I think I can only do so much, if I want to keep lowered suspension with disc brakes and a Fuchs alloys.. Which I do!
I know I’m probably teaching most of you to suck eggs here, but I found this website which has a clear ‘Plain English’ calculator to compare changes, but for now I’ve no clear measurements on what extra offset I have due to discs, hub, wheels etc - to be honest I don’t care as long as the steering is bearable and not placing undue strain on the whole setup.
I’ve got a friendly manager of a local tyre/ exhaust fitting franchise who I will sweeten up with a few beers to see if he can help me with the no doubt multiple attempts to get the geometry right. Or at least get me a good deal on 4 narrower tyres - to my mind, 195-wide tyres are overkill for a Speedster, even a hotted up one (I fully expect to be shot down for this attitude - each to their own). I don’t want the car to ‘corner on rails’ - that’s part of the fun of driving old cars - you have narrower tyres and the limit is (hopefull) more manageable once reached :-)
Anyway, enough of geometry, steering and tyres.
As you can see from these pics, the larger diameter exhaust is rubbing away the fibreglass (fiberglass) - this is tricky because I can’t move the engine in relation the body and vice versa. I think I’ll have to throw this problem to the local exhaust specialists I will be seeing about the improved muffler/silencer, and see what they suggest.

Also, back at the front end, the fuel filter looks clogged with dirt/rust. The fuel filter in the engine bay was also dirty - a consequence of the car being used very little over the last couple of years. This sediment is no doubt contributing to the rough running of the twin 40 Dellorto DRLAs. So I presume I will need to clean the tank and fuel filters as well as blow the fuel lines through. I will probably replace all fuel hoses because the high ethanol content in petrol is not good for hoses that may well be 22 years old.

I’ll try and redesign the path of the fuel hose underneath the tank - the shut off valve from the tank is good so I can access the fuel filter more easily, but the filter location is low so all the fuel will drain towards it, and I feel it’s kind of aligned the wrong way, increasing the amount of fuel lost when things are disconnected. I can see it’s got a Facet electric fuel pump. Given Dellorto DRLAs apparently are susceptible to fuel pressure, will it make sense to fit a pressure regulator?
Gearbox - looks very oily!

It’s an AH (4.125 final drive ratio) and with a 1914cc engine I’d like to get some better cruising speed, so will look for a 3.88 R&P and maybe a .89 4th gear, as per @edsnova and @Gordon Nichols advice on that (thanks). I’ll get it cleaned off shortly and see where any further leaks come from.
So, the initial to-do list is:
Engine/ drivetrain
- Quieten exhaust system - important so I don’t become the noisy neighbour that everyone hates
- Better heat insulation between exhaust and oil cooler pipes/engine bay
- Check valve clearances
- Compression test
- Clean out fuel lines, filters and Dellorto DRLA 40 carbs (they’re filthy!)
- Add fuel pressure regulator?
- Clean/renovate fuel tank
- Replace all fuel hoses (they’re most likely 22 years old)
- Oil filler cap and top tube - replace filler top because the current one is holed and leaking (looks like a Type 2 version to fit the Porsche fan conversion setup)
- Replace pushrod tubes (lot of oil leaking from these)
- Upgrade distributor (hopefully get better spark/timing for the stroker engine)
- Fix tinware and seals to reduce gaps (it’s a bit of a mishmash in the engine bay, to be honest)
- Renovate/respray fibreglass fan shroud (it’s got black over red paint, both of which are nasty)
- Clean gearbox of oil and check for leaks
- Get gearbox renovated with higher gearing for easier cruising
Suspension/ steering/ brakes
- Raise rear suspension around an inch (luckily the IRS has adjustable rear spring plates!)
- Lower front suspension about an inch, to give level or slight nose down attitude (using the Avis adjusters)
- Check/replace brake pipes and hoses - they’re old
- Fix leaking steering box
- Straighten steering shaft - it chafes on the column
- Replace urethane steering coupling with oem rubber - done
- Brake hoses rubbing on tyres when on full lock - yikes!
- Get tracking sorted - once car lowered and steering etc sorted
- Possibly replace 195/55/15 tyres with 185/60/15, or even 175??
Interior
- Re-upholster seats to repair split in drive seat and sort messy carpet backs
- Add heated pads to seats and wire in to electrics
- Add usb charger socket under dash for phone/TomTom charging
- Add immobiliser (fob?) for security
- Remove all carpets/flooring, check for floor pan rust
- Add sound insulation where appropriate
- Change carpet from red deep pile to light grey/beige square weave
- Add rubber step mats to door sills
- Replace fixed seatbelts with inertia reel belts
- Fix dash brow and dash covering - it’s messily done and looks shabby
- Replace side window rubbers where the windows sit on the doors
Misc
- Replace knackered horn with air horn - will have to add a relay for this
- Most of wiring loom looks messy, some is poorly crimped (wires pulling out of connectors) , most wires appear too thin (need to check this) - don’t want a fire risk for the sake of some slightly thicker wire, so will look at upgrading wire and soldering all connections over time
So, not too much to do over winter! I’ll update here as I work through the list with anything interesting. Any thoughts appreciated as always. Thanks for reading if you've persevered this far!
Ciao!!
Martin