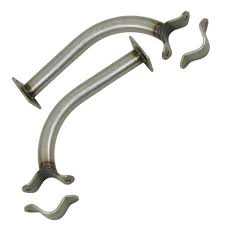
As mamy of you know the body arrived safely. Removed the pallet and placed it on my cart.
But i had to do a test drop to get some measurements.
I have most of the frame done...those pics later.Thanks 
 Speedster Owners - Automotive Enthusiast Community

As mamy of you know the body arrived safely. Removed the pallet and placed it on my cart.
But i had to do a test drop to get some measurements.
I have most of the frame done...those pics later.Thanks
Replies sorted oldest to newest
Your gonna have a lot of fun Brock ! When finished and driving it, you're going to get a lot of TUMs. (Thumbs Up per Mile). ..........Bruce
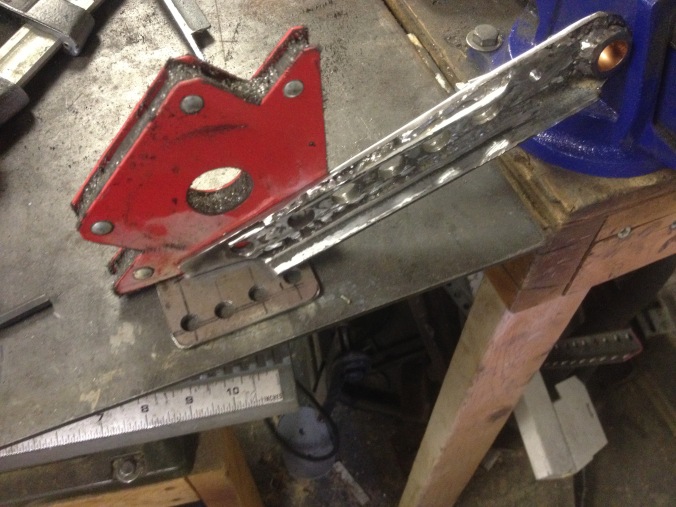
First stage of the chassis.....
Keep in mind that if you weld in flat floors ( Beetles have the "paint roller pan style dip") your head will be closer to the roof but with a coupe that may not be a concern.
Alan, yes it will have a flat floor (working on it right now) but i was figuring on adding a drop in when i find exactly where the seats will be.
@Brock B
Great news on being able to start your project, Brock! There will surely be many interested followers of your build. As a visual reference, here are a couple of pics of dropped floor pans one of our SOCers used in his Speedster to lower seat and sitting positions. ![]()


That wheel belongs in the Emory P car ![]()
Have you seen IM frames? They are substantially bigger box sections of steel. If your going to redo the pan you could really add to the rigidity by adding more substantial metal which would make the car safer as well...
Just saying. here is a pict of a Beam frame..


Sub framework....the VS / JPS framework is almost the same configuration as CMC FF etc. They are solid and well engineered. The super wide body speedster I had was hit on an angle by a Escalade . Despite the fiberglass looking worse than it was, the box frame work held up very well with a minor 3/4" pull needed at the driver's side kick panel base.
Well that is good news, our motorcycles sometimes cause me to ponder what if ....
Jim yes i am going to do something similar with my drop, 2" should be enough.
I think i should have went with 4" rails but its done now so no do overs. Mine is stout 2x2x3/16 and .060 thick foors and a coming soon full 10 pt cage......I just hope i never have to test it out!
Yes that is everyone's hope. I did think at one time about how I could reinforce the doors ... just saying.... fear can get you .
This stream of safety bits about our cars reminds me of when I was learning to drive, (officially & legally) with my dad. He was a great educator and a Dr. of Laws, high up administrator of our schools system, etc. He said, "as you enter the drivers door each time, picture yourself climbing into an eggshell." And, he followed it up with a basic law of physics saying, "no two pieces of matter can occupy the same place at the same time!"
So, in short, "don't drive like your in a bumper car at an amusement park!"
Happened on an accident that I wish I had seen happen. A Corvette was hit in an intersection and apparently started spinning. Pieces of all the exterior body panels were in the street at all points of the compass. The unhurt and very perplexed driver was still behind the wheel sitting in the remains of his car.
IaM-Ray posted:Have you seen IM frames? They are substantially bigger box sections of steel. If your going to redo the pan you could really add to the rigidity by adding more substantial metal which would make the car safer as well...
Just saying. here is a pict of a Beam frame..
Looks like SAS has similar box frame
They had a whole episode with autobiography for that crash.
Ok please lets not turn this thread into crashathon.
Painted chassis........

Bang... just kidding ... looking good
Are you doing the welding ? Don't forget to fabricate and install a Kafer bar set up Brock. How bout running a nice straight piece if 1/2" conduit front to rear for the wiring ? Steel fuel line or copper ?
I like that you're going to cut in seat pans later. Think about seat belt placement and reinforcement for them. Will you have a roll bar ?
Nice work so far Brock..............Bruce
Bruce, yes I will be doing it all welding, engine , body paint, interior ect.
Kafer bar? Never heard of that, please explain.
Seat belt will be done after seats, retractor will be bolted to the chassis, shoulder to the cage and latch to the tunnel.
Good idea for the wiring conduit!
Stainless fuel line if i can find a piece long enough.
Thanks for the help.
Since it looks like door hinges are mounted - it appears you have a steel sub-frame already in the body (just like CMC and others have).
WOW! Brock, you're moving quick, and looking good doing it!
A Kafer Bar ties together the transaxle, the frame horns and the upper shock mounts. There are a bunch of makers, but you have a welder, so you're set up for some home cooking' if you feel like it. Here's a picture of one.
Brock: It looks great! I used Por-15 on my chassis when I welded it all up in the early 80's, It still looks good and has not been stored in heated garages or even always under full cover! Just a suggestion. I have used it on old Bugs and Buses that I have restored to good success. I have no money in the game, just like the product!
P.S. Be sure to wear gloves! This stuff gets into the pores of your skin...
Jim
Wolfgang, it does have steel inserts in the hinge area of the body and doors. It does not come mounted though and i am still figuring how to drill the door correctly.
Right now i am thinking of setting my gaps and use a lil bondo to glue the door to the hinge long enough to drill. The add a nut plate inside the body for minor adjustments.
Michael, i have seen those just didn't know what they were called. Should be easy to make. Thanks
So does the coupe not have the huge inner rocker panels that pan based speedsters have? Those huge inner rockers always bother me on the pan based speedsters. I understand why they are that way to expand/make wider the beetle pan. Just don’t know why no one ever thought of just going with ghia or type 2 pans and making that inner rocker more like a real 356.
Safety Jim, i have used POR15 before it works good. This is Rustoleum rust stop spray and it has worked good in the past for me also.
Thanks
Also most of what i am posting happened a few days ago.......
Paul ,no this body does not have the inner long like a real one does but it looks like it would be easy to make.
Brock, could you post some pictures of the hinge area and inner rockers so we can see the details. Thanks, Rick.
PaulEnvemo posted:So does the coupe not have the huge inner rocker panels that pan based speedsters have? Those huge inner rockers always bother me on the pan based speedsters. I understand why they are that way to expand/make wider the beetle pan. Just don’t know why no one ever thought of just going with ghia or type 2 pans and making that inner rocker more like a real 356.
Well ,that is why if your going to bother welding up your own pan you could expand the floor area and make the sills the right size and then you will have more width to accomodate better seats etc. I don't know why one would not contemplate doing this at this build point.
IM and SE, have wider interior space including foot wells and it helps if your feet are size 12 or more... Feel free to disregard all comments. ![]()
Ray
BTW enjoy the build we will enjoy it as well. ![]()
Big feet..big floor pan.
I'm a big guy to so the more room the better.
Here is a pic of the front jamb and how the rear one is shaped like it would have been for the inner long.

Ray , im listening to everything being said!
Pan based car, big feet will be a problem with the pedals... post a pic of the body left kick panel area, there is a way to make a bit more room
You can even look up and there is a pedal cluster that seperates the clutch from the brake a bit more for wide feet and they can even put a roller for the gaz pedal if you want. (your choice)
Actually, it is a pretty cool setup as they even reinforce the clutch set up HOOK with an even stronger clutch arm to prevent breakage.
Anyway, tremendous possibilities for big feet. ![]()
Hi Folks, Some builders choose to make their own chassis. I have had a square tube subchassis designed that is rigid with a Beetle pan that is shortened. The subchassis can also act as a template for the builder that is shortening his own Beetle. This has proved efficient in Canada and Australia where it is much easier to modify an existing licensed VW instead of going through the special build process there.
The lateral "wings" on the subchassis match up to the rocker panels in the Coupe. I bond into the fiberglass a steel plate that is 36" X 3" X 1/4" into the rocker panels so the body can be bolted to the subchassis /chassis on the outer part and the chassis can be bolted to the inner part of the "wings". For heavier usage/ racing, I have a tube chassis which is more rigid.
Yes, there are steel plates bonded into the fiberglass on the doors and the A pillar for strength in mounting the doors. The best way to mount hinges ( as Brock figured out) is to glue hinges in place and check the door fitment prior to drilling and bolting on of the body.
Hope that helps with the questions asked.
Cheers,
Dr. Chris

@Chris Kleber,Kitman Motor When you sell a fiberglass body do you provide any build information i.e. instruction - supply list or does the buyer need to resource same on their own ?
Ray I'm pretty sure he is in bed, give him 8 hours! Lol
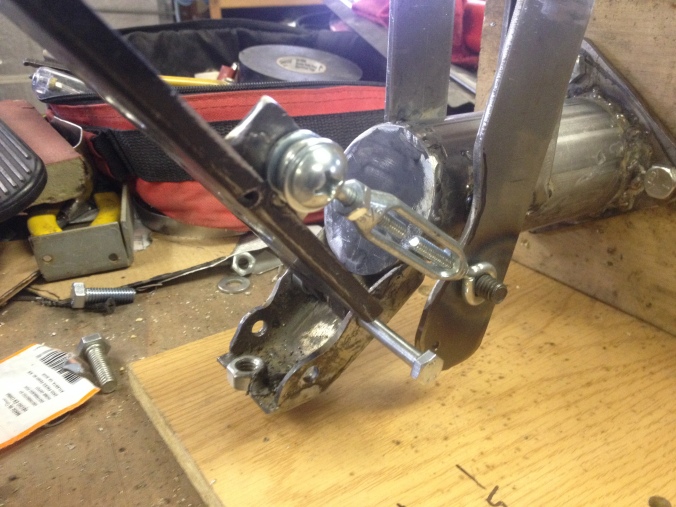
Part of the front shock tower bracing done.
Brock B posted:Ray I'm pretty sure he is in bed, give him 8 hours! Lol
The dark side of the moon ![]()
I've always been impressed by over building of the CMC/FF sub chssis. I'm guessing a Coupe doesn't need the rear bracing like the Speedster? The side pieces are used to transfer heat to the front of the car.


Reply to Alan,
Yes, we have full parts list with sourcing and part numbers. For overall general assembly, we usually send a copy if the FiberFab assembly guide From the SOC Resources library) for the builder to get the big picture. Everyone does their build a bit different.
CHEERs, Chris
Kitman Motors
Brock:
You sure build your cars faster than SAS.
Wolfgang, a coupe may not need any rear bracing but mine is getting something back there!
Bob, I try not to mess around to much don't want the project add to kick in before its done. 😎
One floor half welded  the other half fitted.
What gauge steel did you use Brock ? Is it stainless ?............Bruce
Bruce, its .060 so 12 hauge ish. Its mild steel but it had what looked like a phoshate on it to keep it from flash rusting so quickly.
Fully welded in

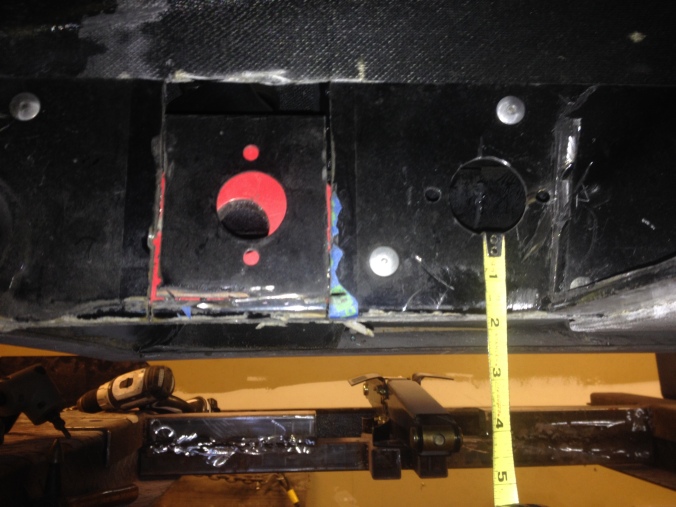
The Kitman chassis is 62” wide
great work Brock
Impressive progress.
12 Ga. ! ! Wow ! That ought to stay in place ! Having a flat floor to work up from has to be a pleasure with no surprises ! Welding to it shouldn't produce any wir=erd warps either. I like what your doing...............Bruce
Thanks Ian!
My chassis is 61.5! Not to bad for a guesstimate!
Edsnova Thanks!
Bruce , Thanks! At the end of the day it is fiberglass so i want to make it as strong as i reasonably can.
Front firewall cut and welded in.....

More 12 Ga. ? Your brake and clutch assy. will be sturdy ! Lookin good Brock !....Bruce
Wow, Dude! You're gong so fast I can feel the breeze up here in Oregon!
You might want to consider adding disconnects between the front beam shock towers and the cage you welded in. If you ever need to remove the front beam you will understand. I just Roll cage couplers on the parts I might have to take apart. Something like this
Michael, Bruce Thanks!
DWP , thanks but removing the beam is the last thing on my mind. I want this car stiff, the beam will most likely be welded to the lower part as well. The rear torsion tubes are alreay welded to the chassis on the ends and will also be tied in with the cage at the top of the shock mounts.
@Brock B- My apologies if this is already known territory, but before you weld the beam in place- do you know about the need for increased caster in the front suspension in these cars?
If stiffness and handling is what your after consider braces for the outer part of the beam. I have something similar to this on my “street Rail” and would do the same on a 356. It also what the off-roading guys use. Dave
ALB, i did not but after some reading they may have to go in...if they will now without cutting anything.
DWP They could be usefull.
Painted......an
 d the ball joints are out, they were loads of fun!
Here's photo of the lower front beam supports that DWP referenced. They are an easy add on to any Speedster or dune buggy. Made by Empi but not much for them to screw up. Easy bolt on but may interfer with front bumper brackets. The second photo is of their upper ones which probably isn't as easy to install on a Speedster.
CSP has a version too --- but much more $$$ - $199 Euros (and higher quality).


A further note on caster- ball joint Beetles came with 2' 30" (+ or - 30") caster while Porsche Speedsters had 5'. VW front suspensions, when lowered by adjusters, Select a drop or cutting tubes the car will LOSE caster and it can become a bit of a handful even at legal highway speeds and downright dangerous as you go faster. I have personal experience with this, at one time having built a Cal Look bug that was work to keep straight at 60 mph and was almost uncontrollable at 100 mph. I knew nothing about caster 35-40 years ago.
For a car to be safe at higher speeds there needs to be more caster than stock. Most people here that have addressed this run 5-6' caster. Normally this is accomplished with shims under the bottom beam. Gene Berg Ent. caster wedges http://www.geneberg.com/cat.php?cPath=12_384_2917 are 5.9 mm (.236") thick and will add 2.36'. If you're welding the front beam in don't forget to take this into account.
Hope this helps. Al
x2 on 5-6 degrees positive caster. If I were doing what you're doing I'd buy a set of caster shims (which are aluminum), duplicate them in steel, mock the beam up with them, measure for square and weld away.
Your car is going to be pretty heavy. Gravity is a good thing, but if you're expecting to drive your car over 60 then shims are REQUIRED! You'll need two on each side.
So let me get this right , each wedge is roughly 1/4" thick and adds roughly 2.5 deg of caster.
Jim says i need 2 PER SIDE, that ls 5 deg...is that correct?
So what will the total caster be AFTER the wedges are added?
The car will only need 2 sets of shims if it's lowered a fair bit with only adjusters or cutting the beam. Using 2 1/2" drop spindles doesn't change the caster, so even if you lower the front a little more with the beam then 1 set of shims is usually enough to get it safe at higher speeds. Usually this is checked when the car is complete and it's getting aligned, so if you're intent on welding the beam in place, be sure of where you are before committing.
The issues with drop spindles- they add 1/2-5/8" track each side, which some people don't like. There seems to be enough fender clearance in most instances. There are also some cast aluminum 15" wheels which just touch the bottom ball joint area. IIrc some Rivieras have this problem. I have heard of guys managing to clearance the area in question to fit.
Yoda out (for now, but know you can't get rid of me!![]() )
)
ALB Thanks but do you mean 2 packs (4 shims) or just 1 pack (2 shims) ?
I am going to use drop spindles, no going to mess with the bars on the front unless i have to.
Don't weld it in until your finished and after you have the correct geometry up there. The welding can be done with the fuel tank out and the wheels off later.
The 12 ga floor should be a nice small improvement to your CG too !..........Bruce
Brock: All of the shim sets I've seen are about 1/8" thick, which gives you 2-1/2º to 3º of increase. How many you use depends on where they get your caster to after install. On my last alignment, adding a second shim on one side wasn't quite enough but a third shim was too much so we cut a segment out of a piece of electrical conduit (about 3/16" wall) and there we were.
Most set-ups run two per side (or one 1/4" I guess) behind the lower torsion tube to get you to about 5º - 7º of caster. If you have a stock of thin-wall steel tubing (pipe) with the same ID as the OD of your torsion tube, you could make a set yourself - there's not much to them.
On a lowered car, they will greatly reduce bump steer and wandering at turnpike speeds.
Bruce, i hope the car feels tight and planted when done so yeah I'm thinking a little extra weight down low wont hurt.
Gordon, ok the ones i saw a pic of looked thicker than that , the top part is already welded so i will have to see how much the bottom will move.
Big-A$$ Pry-Bar, Brock.
All you need is 1/8" to slip the shim in there.
Lol yeah i have a couple about pinch bars 4.5ft long should do it!
Brock B posted:ALB Thanks but do you mean 2 packs (4 shims) or just 1 pack (2 shims) ?
I am going to use drop spindles, no going to mess with the bars on the front unless i have to.
With drop spindles most people only need 1 shim on each side of the bottom tube.
If you need 2 shims per side - be sure to purchase the longer bolts for the bottom as the OEM ones won't be long enough.
Drop spindles would change caster because the front of the car drops relative to the back. The change in angle would offset some of the existing caster.
A piece of a pipe wouldn't be the same as a shim. A pipe has a different radius inside and out. A piece of pipe would have a uniform thickness. A shim has the same radius on both sides - it matches the tube and tapers toward the edges.
Ok to much conflicting info here, 1 shim, 2 shims, .....
The ones i saw on youtube last night were atleast 3/16 maybe 1/4 thick not 1/8.
Guess i will just have to wait till it gets aligned to figure it out.
Anyways...balljoints and tie rods are on. Waiting for the wide 5 disc ,drop spindle  kit for the front.
Looks like the same folks make them all regardless who you buy from. I bought mine from Gene Berg. They were the only vendor who knew how much angle a shim added; I believe it was 2 degrees 36 minutes. When installed I wound up with 6 degrees and change. Gene's shims are about 1/4" thick in the middle.
I don't have drop axles. To get the handling where you can drive you'll have to install a front sway bar and a camber commentator on the rear.
That's all I know about the subject...
Did you press them in or someone else? I ask because there are notches that have to be lined up for the ball joints to move freely. Failure to do this will create a very stiff suspension, as the ball joints won't have proper movement. The first pic shows the notches properly aligned when installed.


The 2nd pic shows an improperly installed ball joint, and how it has self- destructed.


I would buy 2 pairs of shims and a pair of the longer bolts. The EMPI 22-2815 shims are like $12 a set. Install one set now and have the other on hand if alignment person needs them. An alignment place will NOT (most likely not) have a set in stock. They are about 1/4 thick in center.
Jim Gilbert - Madison, Mississippi posted:Looks like the same folks make them all regardless who you buy from. I bought mine from Gene Berg. They were the only vendor who knew how much angle a shim added; I believe it was 2 degrees 36 minutes. When installed I wound up with 6 degrees and change. Gene's shims are about 1/4" thick in the middle.
I don't have drop axles. To get the handling where you can drive you'll have to install a front sway bar and a camber commentator compensator (fixed it for you) if it's a swingaxle or anti- sway bar (irs) on the rear.
That's all I know about the subject...
You'll find that a lot in the VW aftermarketplace- most people will tell you "just use this; it works!" while Gene Berg put the effort in to understand why, and probably (a lot of the time) did the original r&d and originated the part or brought it to the VW world in the first place while everyone else is opportunistically making a buck off something they put no initial investment into. Al
PS- For any one doing the initial alignment on their car- read again what Greg (@WOLFGANG) said just above. The alignment guy, unless he's an old VW guy, won't even know what caster shims look like, let alone have a set on the shelf. Be prepared, and if you don't use them they'll sell here easily. Or, for the less than the $15 or so they cost, keep them in the garage on the work bench as a conversation starter ('cause I'd put money on no one else knowing what they're for!![]() ).
).
Ok, NOW I'm leaving...
Alb , i did the ball joints they are right.
I am going to get 4 shims 2 of the 1/4 and 2 thin ones and see what happens.
Yes Gene Berg orginated most everything perfromance wise we see nowadays for VW's.
What's a camber commentator? Oh, maybe it's a guy who responds to stuff. I hate spell check...
Jim Gilbert - Madison, Mississippi posted:What's a camber commentator? Oh, maybe it's a guy who responds to stuff. I hate spell check...
drives you crazy at times for sure... inserts words changes your thoughts...
Nice going on the build...
Jim Gilbert - Madison, Mississippi posted:What's a camber commentator? Oh, maybe it's a guy who responds to stuff. I hate spell check...
I didn't really think of how it ended up like it did, but that makes it really funny![]()
Must be someone who comments about camber....although we have not talked about camber. And before someone brings it up yes i have the front camber adjusters. 😎
Brock...This is all Michael is trying to say. Those shims fit the radius of the axle tube and radius of where the tube fits the frame up there. If it only needs a little more adjustment, I guess a flat piece of shim stock will do but it won't be as perfect and matching of a fit.................Bruce

Well mostly just waiting on parts but i did Easy Off then pressure wash and paint the trans.

You missed the arm ![]() . Nice job
. Nice job
IaM-Ray posted:Jim Gilbert - Madison, Mississippi posted:What's a camber commentator? Oh, maybe it's a guy who responds to stuff. I hate spell check...
drives you crazy at times for sure... inserts words changes your thoughts...
True, but for me, that is usually an improvement.
It appears to me that Brock is building one of these cars faster than the guys who build replicas for a living.
Ray, thanks ...waiting for the spring and bushing kit and the new output seals.
Todd, lol its this or mow grass lol......
Actually i mowed this morning for an hour to.
Brock B posted:Ray, thanks ...waiting for the spring and bushing kit and the new output seals.
Todd, lol its this or mow grass lol......
Actually i mowed this morning for an hour to.
You could cut that time down quite a bit with this:
Brock B posted:Ray, thanks ...waiting for the spring and bushing kit and the new output seals.
Todd, lol its this or mow grass lol......
Actually i mowed this morning for an hour to.
Are you retired? My tentative retirement date is 7:30 am, March 1, 2021. But then, who is keeping track?
My job has this irritating aspect in that it interferes with my life.
Robert, yeah saw that before...my zero turn Husqi is fast enough.
Todd, retarded? Yep pretty sure lol.
I havent worked for anyone but me in years, pay is a little in frequent but thats ok.
Brock B posted:Robert, yeah saw that before...my zero turn Husqi is fast enough.
Todd, retarded? Yep pretty sure lol.
I havent worked for anyone but me in years, pay is a little in frequent but thats ok.
I'm fairly certain you met RETIRED. Dang spellchecker.
Robert, nope i ment it....have to be something wrong to want to build cars all the time! 😂😂
Brock B posted:Robert, nope i ment it....have to be something wrong to want to build cars all the time! 😂😂
Ha! Nothing wrong with building a few cars now and then ~
Todd...If you're busy now, wait and see what happens when your are retired....Bruce
aircooled posted:Todd...If you're busy now, wait and see what happens when your are retired....Bruce
Probably due to proscratination at least for me in part. ![]()
aircooled posted:Todd...If you're busy now, wait and see what happens when your are retired....Bruce
I have no idea how I had time to go to work !
Spindles on....
Rotors painted, bearings packed and calipers installed. 
Your 40 hours, are they up yet ? ![]() Looking good.
Looking good.
 Master cyl. mounted and the front steel lines ran. Also started collecting parts for building the pedals.
You can get the M/C reservoir that pops right into the Master cylinder so you don't have the hoses and isolated reservoir. https://www.ebay.com/itm/EMPI-...d&frcectupt=true
Alan ,you can but i got the remote that will mount in the frunk with hoses down to the master.
Brock B posted:Alan ,you can but i got the remote that will mount in the frunk with hoses down to the master.
That's is what most use but the pop in type cleans up the frunk , just presenting an option :~)
"Building the pedals," eh. I like the cut of your jib.
Alan, the frunk is not oem lookinh anyway so no need to clean it up show level.
Edsnova, yeah the pedals i want are $1500.....yeah i can build em.
Please post pic's of your fabrication of the pedals ! Not a difficult job butI'm curious as to how you will take it from your mental concept to the finished product. Very admirable ! Don't forget to use CAD ! ..............Bruce
Bruce, i will post pics of them but im sure it wont be as easy as you or i think. CAD 😂yeah i dont have that........
I have made a set. It's not so hard. You can almost make them out of std. hardware and stock steel off the shelf. CAD for some of us, me included, means Cardboard Aided Design. You know, make your templates out of cardboard, trace that on the material and cut n weld........Bruce
Bruce hahaha i go it! Oh carboard cad , i use it all the time!
Pedals: Chapter 1 (starts about a third of the way down).

Chapter 2: Gas Pedal.
Chapter 3: adjusting the firewall.
 Chapter 4: re-bushing & installation.
There'll probably be a Chapter 5: redoing stuff cuz I screwed it up somehow...
So far: 60(ish) hours. Russ's Fibersteel set look like a good deal at $1500—at least to me, a first-time fabricator who just decided to wing it. I'm thinking Brock will do 'em better than I did.
Edsnova, great job on those. I was looking at the RLR ones not hydraulic.
Yeah CAD I use it regularly.......

Oh my God !.................Lightening holes ? There's a special person on here that has a fetish for them so be careful ! Use plenty of them ! You don't want him to rear his head and blow fire out of his lightened fire nostrils (or is that nozzle's ?). Good work Brock !..........Bruce
Brock B posted:Edsnova, great job on those. I was looking at the RLR ones not hydraulic.
Yeah CAD I use it regularly.......
Brock,
When you first started posting, I assumed you were like a lot of us-- a dreamer thinking this whole thing would be cheap and easy. In the course of a few short weeks, my mind is completely changed. You sir, are the man.
The cap pictured above is excellent. If you don't mind me asking, what is your plan to keep from burning up the internals of the cap when you weld it? I've always been a giant fan of this particular modification and I think it ought to be able to get done for less than the zillions of dollars it costs to just buy one.
Also: is this the pedal assy. you are looking to replicate?

Stan:
What is the source for that pedal assembly?
Panhandle Bob posted:Stan:
What is the source for that pedal assembly?
RLR: Ron Lummus Racing
Brock nice work for sure.
Bruce, Thanks ! Not even sure of it will have the lightening holes or not yet.
Stan, wow thanks so much ! The main rubber gasket comes out easily. Not sure if there is any other parts inside but i am only goint to tack it in 3 spots and have a air hose to cool it quickly.
If you don’t mind me asking: where did you get the cap and neck?
The cap was $12 came from ebay, haven't got the neck not sure if its made repro or not.
Thanks Ray!
Brock B posted:The cap was $12 came from ebay, haven't got the neck not sure if its made repro or not.
I don't want to beat this to death, but do you have a link?
Brock B posted:Yeah CAD I use it regularly.......
aircooled posted:Oh my God !.................Lightening holes ? There's a special person on here that has a fetish for them so be careful ! Use plenty of them ! You don't want him to rear his head and blow fire out of his lightened fire nostrils (or is that nozzle's ?). Good work Brock !..........Bruce
Ahhh, woke me up you did!
Make them big all the way across. And it's looking great, Brock!
I am guessing it was this one:
https://www.ebay.com/itm/Fuel-...e:g:v1wAAOSw2rhb9Lyh
I am hesitant to purchase it without the neck, because I have no idea what fits what. Here is a link to the cap and the neck together, which I think I am going to buy unless someone knows where to get the combo for less than $123.
https://www.ebay.com/i/161961238070?chn=ps

This guy, Spartan, http://www.project-spartan.com.../2017/12/3/fuel-tank used the neck from the photo.

So where, and how much?
First attempt.....dont know what grade this stainless is but its TOUGH!! Ruined 3 drill bits on this and they all walked. The center one moved so much i had to make it oval!

Cobalt are the right drill bits
New trans mounts and trans are in..


You may consider using a heavy duty engine cradle and trans strap. It will help support the horns from flexing under acceleration. 


Brock B posted:First attempt.....dont know what grade this stainless is but its TOUGH!! Ruined 3 drill bits on this and they all walked. The center one moved so much i had to make it oval!
I have known men who could weld tin foil together. Unless you're one of them I suspect you'll have a problem welding dissimilar metals of dissimilar thickness without blowing holes in the cap. (I'm guessing that the car is not stainless) I'll sing your praises when you get it done. Post a photo.
I seem to remember that the stamping for the handle was made in a T fashion and riveted to the top.
Best of luck
And I don't know what your engine choice is, but a transaxle mid-mount always helps to support everything and keep the nose of the transaxle from trying to swing up under heavy acceleration with 2,110's or larger engines. Berg makes a nice (although pricey) one that several of us have used and like. GB-643
Jimmy V, seen those may upgrade to one later.
Jim G, we shall see.......
Gordon, also may be a upgrade for later although im guessing its mostly for drag racing where a hard launch is the norm.
True, but at least run a Rhino front tranny mount cushion. It's made of Urethane, rather than rubber, and resists the torque (up and down) of the nosecone mount. Rubber cushions tend to get mushy and tear apart with a 2,110 or larger displacement. It's cheap insurance and easy to install at this stage of your build.
Yeah here is a test piece, lighter stainless and metal as close to the cap thickness as i could find......... that's mig btw not tig. Not perfect but not bad for the first try.
Here is a pic of the (I believe) rhino mount I am running in my Speedster. Carey had mine switched to this during the conversion.


Gentlemen,
It would appear that in addition to being fast, Brock is also good.
Nice welds, man.
Welds are  approved !

Jimmy v, thanks i will look those up.
Stan, thank you! I try.....
Alan, AAAAAYYYYYYY 👍👍👍 thanks!
Walka, Todd Thanks guys...
Well it went about as well as figured. Whatever crap metal this cap is made of does NOT like to be welded. I cleaned off the galvanized coating before hand hoping to get it good.
Well after much cleaning up and some cussin here is the result........
I have always found that Cussing really helps..........
Looks like you were more accurate with the holes in the second version, too.
Dude that looks great!
Ain't it fun how these little detail jobs end up taking hours and hours?
I love it! Carry on!
Gordon, yeah sometimes it does.......
Got ahold of some original qw frames just to use for a pattern, fit the opening really good just got to order some stainless to make them.
Dude.
DUDE!! ![]()
It's all looking pretty spiffy!
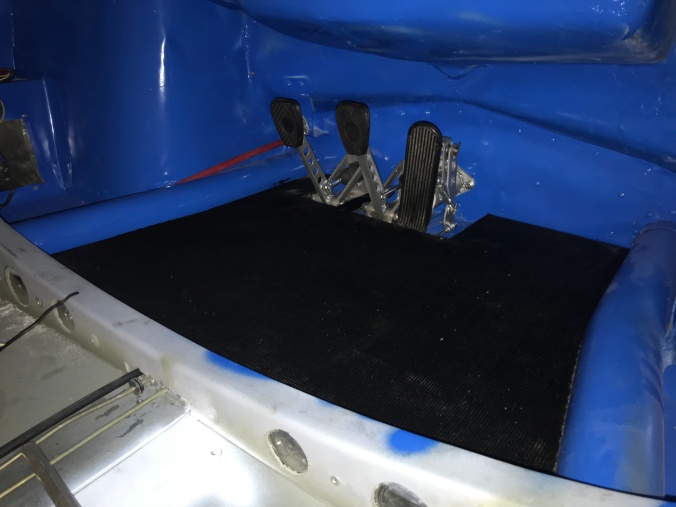
Started the pedals......

Have you seen these guys Pedal assembly upgrade
Ray, yeah saw that its where i got the idea for the cable stud instead of a hook and making it wider.
Did you also look at this brake pedal bracket? Nicely done.. brake pedal light switch
THe switch used is pretty standard and is compressed in FOR OFF and fully adjustable not to mention easily available.
I also like the wide pedals and the throttle pedals they have.
Ray, had not seen that but i have a new hyd one and im not to sure the mechanical would work with what im making.
HA !!!! Pillow Blocks. !! What a clever shortcut !! Strong as hell too !! Are they bushing or ball bearing. ?? You can place them where you want them within reason. Very good choice Brock.................Bruce
Holy Cow! That brake light switch is remarkably over-designed.
I just used a floor-mounted 1937 - 1955 Chevy stop light switch. Less than $20 bucks, mechanical (rather than those hydraulic things that fail every 18 months) and took about half an hour to install, including running a new wire for it.
I do like that pedal assembly up above that fits the existing VW pedal mounts. And having the pedals a bit farther apart would be nice, too, plus the clutch cable pivot is really cool.
Bruce, greaseable bearings, the brake pedal will have a oil lite bushing though as it obviously has to be independent of the clutch pedal.
I was thinking a hollow shaft and a bearing supported shaft thru that ...........Bruce
I am thinking about installing this switch:
I inquired about it and it does seem to be a good fit as well.
BTW you can make it yourself but this guy did all the work already for you and it should work well without all the running around to make it.
He sent me the instructions. I can send them to anyone who is interested.
"BTW you can make it yourself but this guy did all the work already for you and it should work well without all the running around to make it."
That looks slick...... It'll take you over an hour to fab one up and into place if you DIY it from scratch, plus you still have to buy the switch!
Even at $20/hour of your time, $35-ish for that kit is a good deal.
Bruce, over complicated and hard to make but it would work also.
Brock, contact Jonathan (you have his number)
We have stainless 304 window frames for rear quarter windows and door windows for our kit you bought. 11 gauge base 18 gauge , stailness welded. We waterjet the frame components.
We are moving toward including the window frames with the kits. Just sent a set to Ian in AUS
Cheers, Dr. Chris
IaM-Ray posted:Did you also look at this brake pedal bracket? Nicely done.. brake pedal light switch
THe switch used is pretty standard and is compressed in FOR OFF and fully adjustable not to mention easily available.
I also like the wide pedals and the throttle pedals they have.
Super nice. Thanks for the link.
I used one of their pedal clusters although not the wide spaced unit. I like that they got rid of the hook for the clutch cable.
I installed the Big Boy pedal extender (wide placement) on the car I'm building. Installation was straightforward and pretty easy. I was impressed with how sturdy the parts were. I have only used it for test drives so no long-term impressions. I think I'll be glad to have the extra space for my size 11-1/2s.
Stan Galat posted:IaM-Ray posted:Did you also look at this brake pedal bracket? Nicely done.. brake pedal light switch
THe switch used is pretty standard and is compressed in FOR OFF and fully adjustable not to mention easily available.
I also like the wide pedals and the throttle pedals they have.
Super nice. Thanks for the link.
Your welcome, you might want to know that IM on my car has wired in a small microswitch attached to the floor with a roller end that presses up against the brake pedal cluster and when you press the brake the brake light goes on of course when it rocks away from it.
Since we have the panel you cannot see it but it is there. I can only think that the micro switch is/was more reliable than the stock pressure switch.
Heck, even my antique Chevy switch is better than the stock pressure switch.
Hand signals are better than the stock pressure switch.
I don't know. I've only had one fail, and I happened to be down at Cory's house at the time. Swapped it out with a spare I had in the tool bag, didn't even bleed it after the swap. Maybe it depends on where and who made them?
That's 43,000 miles with only one failure. I do change my brake fluid every two years like you're supposed to. Plain old DOT 3/4 works just fine. I usually buy Valvoline synthetic.
I watched the brake light switch video from the Big Boy pedal guy. It seems amazingly complex. I just ordered this switch: https://www.aircooledevolution...d-brake-light-switch
Rear brakes are on and plummed up......got to finnish the pedals next.

Some red Koni Classic adjustable shocks would look good. You can get them very reasonably priced at the shockwarehouse.com I think mid $40-50.00 each range.


I used a banjo fitting at the caliper.
I like the colour of those Konis![]()
paknt must be available ![]()
These calipers are floating, a solid line is a no no! If this rubber one dont hold up i will upgrade to braided later. Yeah Konis are a must!
Michael McKelvey posted:I used a banjo fitting at the caliper.
Me too. Depending on the exhaust, you'll need it.
My Calipers have Banjo fittings and steel braided lines via Special Edition.


Sorry Brock.......I didn't mention that the ones I installed were banjo's with a 90 degree steel tube stubbed out to connect the flex hose. Just like Jimmy V's and Mike's. For those who aren't too swift about brake line connections you do not connect solid steel lines directly to a floating caliper or any moveable component. The flexing will eventually crack the tubing. A flexible piece of hose has to be inserted between the two to allow the flexing to occur with no damage.
Brock...You're doing really nice work and it's refreshing to see your approach with differing regularity.......please proceed !!!!!.............Bruce
Jimmy V , i cant seem to find the Koni classic on there....link please.
The price was higher than I remember. I looked up my invoice from earlier this year and I paid $97.61 each shock front or rear. Here is the link for the shocks to fit your IRS Beetle suspension. Sorry for misremembering the price. It happens more and more as I get older. https://www.shockwarehouse.com...p;selected_year=1969
OUCH.....! The KYBs at $35 each sound way better with a can of chevy orange! 😂 And maybe a wing decal......
Parking brake cables cut and adjusted, all i can do today is wait for fedex to find my box with the cv boots and trans seals in it!

Is is possible to silver solder those cables into those cable ends? I have always wondered..........Bruce
I had KYB gas shocks on my Speedster and hated the harshness of the ride. The car actually bounced when riding over small bumps, they didn't take the shock out of the road imperfections. The Koni shocks made a world of difference. They can be adjusted to suit the cars weight and your driving style. Stock Monroe shocks for a beetle are better than KYB gas shocks in my opinion.
aircooled posted:Is is possible to silver solder those cables into those cable ends? I have always wondered..........Bruce
After I am sure that I have the correct length, ( work the handle 6- 8 times ) I remove the cables and reattach with JB Weld and the allen set screw.
Jimmy V. posted:I had KYB gas shocks on my Speedster and hated the harshness of the ride. The car actually bounced when riding over small bumps, they didn't take the shock out of the road imperfections. The Koni shocks made a world of difference. They can be adjusted to suit the cars weight and your driving style. Stock Monroe shocks for a beetle are better than KYB gas shocks in my opinion.
So even with Subie the KYB rode harsh? My thoughts were the added weight change the behavior? Are the koni coil over?
thanks
In the cables i used a lot of loctite 609 retainer and the set screw. That stuff makes red look like spit.....
Shocks, maybe the adjustable konis are worth it.....we shall see.
For future reference consider
Push-pull.com
They make custom cables.
I have had all my brake cables made there, both street rail and Bajas.
Dave
Access to this requires a premium membership.
Supporting members have donated about $4.00 a month ($49.00 US per year) paid annually.
AUTO RENEW: You membership will auto-renew after 12 months. If you prefer not to auto-renew, you can cancel your premium membership at any time and it will remain in effect until the end of the 12 months. To cancel, sign in at SpeedsterOwners.com and navigate to: (Your User Name) > Premium Membership.
PLEASE NOTE: Your credit card will receive a charge from CROWDSTACK PAY, the payment processor, not SpeedsterOwners.com.


