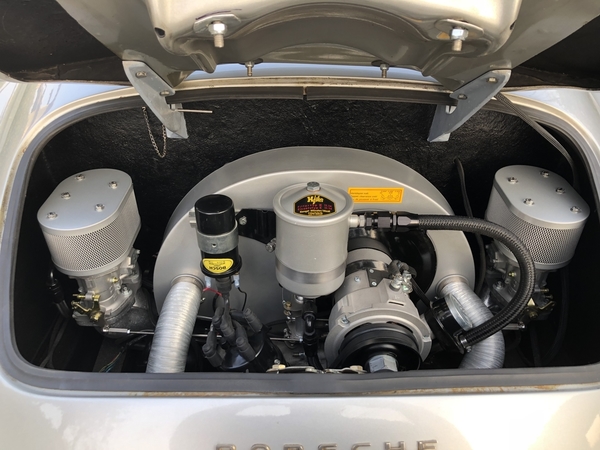
Since I'm waiting for parts to my motor I started thinking about paint/powder coat themes. I've seen a few VW motors on the internet but curious as to what members are doing here. If there is a thread already covering this topic, please point the way. 

I'll start off with my air motor and no paint in sight engine compartment. Let's see yours! 

EngineBay_01EngineBay_02

"All I need are big dreams and open highways..."

Attachments

Images (2)
  • EngineBay_01
  • EngineBay_02
Original Post

Replies sorted oldest to newest

People have done a variety of things for engine compartment finishes- body color (or black) paint, and polished aluminum or stainless panels are popular.For painting the engine tin, some people emulate 356 tin with a silver or grey shroud, there's body color (or an accent to compliment it) and of course black always works. I don't have any pics of it but I remember Stan's engine compartment, and of course there are many others. The important thing is for it to look (at least) somewhat finished without dressing it up too much- these are simple cars, afterall. Too much chrome (to me, any way) just looks cheap and tacky.

Hope this helps. Al

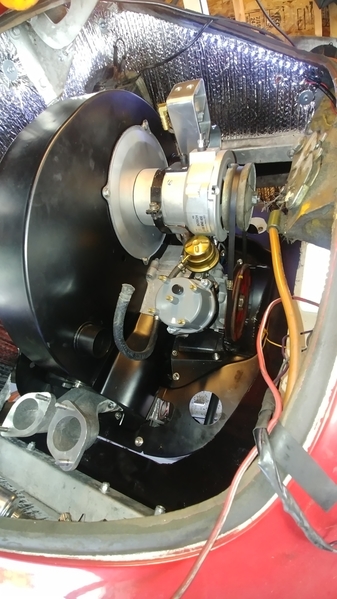
I just put a new motor in my speedster this month and I made some aluminum panels to cover the back and sidewalls in my engine compartment. Before the compartment was painted the same color as the car (white). I have some polished aluminum but mostly black powder coated tins. I will be detailing the compartment with little touches of Red. Nothing to fancy.

Attachments

Images (1)
  • Engine

This is the same Stainless steel that you see in some of the Burger King's on their table tops and paneling. It is 1.5" engine turned circles on 22. ga metal. 

Make a "CAD" with poster board first, then trace that on galvanized sheet metal from Home Depot HVAC section, do another trial fit and trim even better and to make sure you can get the whole piece of sheet metal in. (the cardboard is easy to bend and fit in but sheet metal isn't).  Finally, cut and fit the stainless.

This could be done with sheet aluminum, brass, copper etc.  Heck, we have even seen diamond tuck leather upholstery used !  I think shiner is better !  Also an LED flexible lighting tube fastened up under the lip all around the engine lid hole where you can't see it really highlights the entire engine compartment.

My next project is a Spyder. It will have the same firewall veneer of stainless. I had to get the fire wall panel first and fit it with the stainless before it goes in the body with the frame though. I just like the way it looks and it doesn't scuff up like aluminum does over time from cleaning and wiping. Do what ever you wish but do it right or it won't ever look right to you............Bruce

Attachments

Images (4)
  • engi. comp. firewall #1
  • eng.comp.firewall #2
  • IMG_0359
  • IMG_1289

Sort of.... I put a 1 ft long section at the top of each side panel and a block type led on the deck panel that is in the rear of the engine bay. Yes, I switched it and it is a very low draw on the battery when the motor is not running. It is pretty good in the dark garage. I'll try to send you a photo if I can capture the look with my phone. 

As info, it turns over at this point, but does not start. I know I need to set the advance and adjust the carbs.   The beat goes on, sort of.... Must do some travel tomorrow and Thursday for work. So, Friday may be the day it starts.... fingers crossed. 

Thank you gentlemen, great looking motors and cabin area ideas! I'm leaning towards the original paint schemes but the shiny tins keep sparkling at me. I do know it will take time and planning. I don't want to slap a heat shield together, call it a day so I can go out for a ride. 

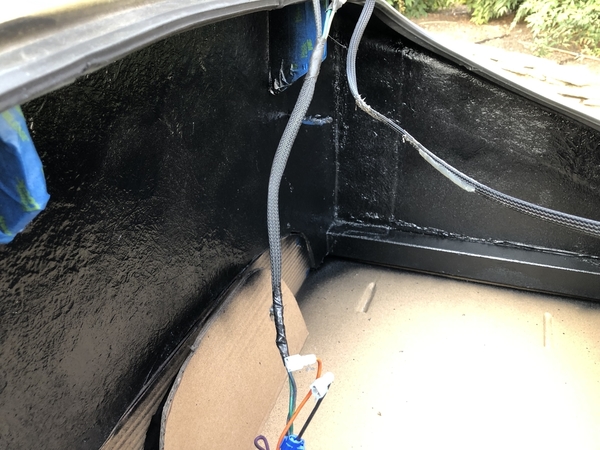
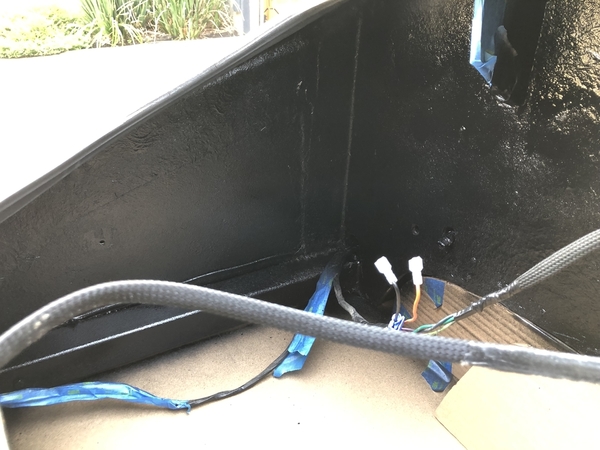
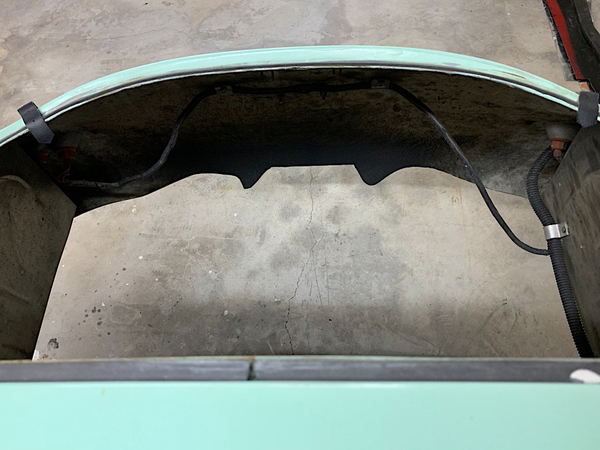
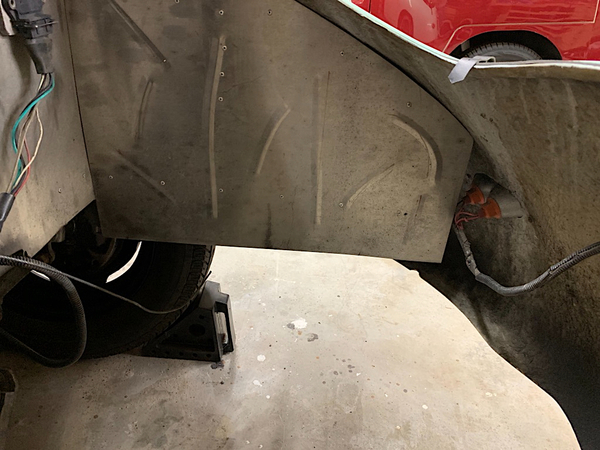
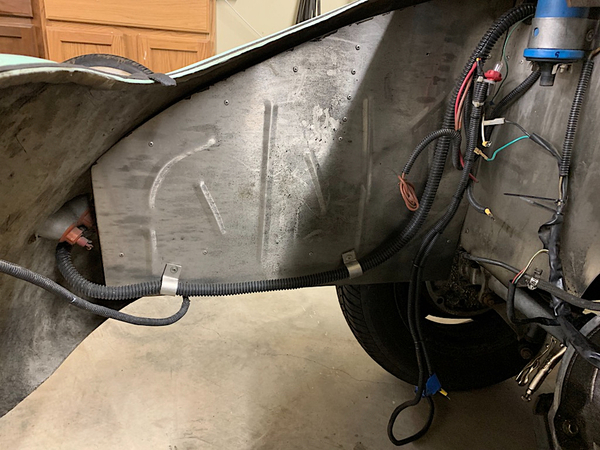
Viewing the photos raised questions. How are you mounting the lower tin? Will 90 degree angled metal brackets screwed on to the side metal sheets be enough? What about the very rear? Use the rubber seal pressed against the inner fiberglass body? I took a few photos so you can see what I'm looking at. 

MotorBay_01MotorBay_02MotorBay_03

Attachments

Images (3)
  • MotorBay_01
  • MotorBay_02
  • MotorBay_03

Very important questions VDUBUSLIFE......Heat is your enemy and the more you seal up the engine compartment, the cooler your engine will run.  All air should enter thru the deck grill ! Vintage Motorcars may sell you a fiberglass piece to seal around the engine, horizontally, to the std engine tin. Many have overlooked that area in your photos back by the tail light assemblies. It is very important to seal up that area.    I used some more fiberglass sheeting for this and epoxied the pieces together in the car so they fit right. Then fastened it with a couple machine screws.  See photos below.

Bruce

Attachments

Images (5)
  • DSC_0010
  • DSC_0004
  • DSC_0001
  • DSC_0008
  • DSC_0009

Remember that (enough) fresh air has to find a way in there too. There has to be enough airflow to feed the fan, carbs and remove radiated heat from the engine itself out of the engine compartment. A higher revving bigger type 1 engine uses way more air than a stocker. I've heard of engines dying in (other) fiberglass cars in as little as 3-4,000 miles because the engine was starving for air.

Last edited by ALB

Times Two what Al Said.  I did some testing using a water manometer and found that there is about a 1.5" negative pressure (vacuum) in the engine compartment at about 70mph on level road. This is with the engine compartment totally sealed off and no "Hole" in the firewall. I had 0 heating issues in spite of the minimal restriction created by the "Rain Guard" under the deck lid grill. Holding the engine lid open 3/8" eliminated the 1.5" negative pressure.............Bruce

vdubuslife posted:

Thank you gentlemen, great looking motors and cabin area ideas! I'm leaning towards the original paint schemes but the shiny tins keep sparkling at me. I do know it will take time and planning. I don't want to slap a heat shield together, call it a day so I can go out for a ride. 

Viewing the photos raised questions. How are you mounting the lower tin? Will 90 degree angled metal brackets screwed on to the side metal sheets be enough? What about the very rear? Use the rubber seal pressed against the inner fiberglass body? I took a few photos so you can see what I'm looking at. MotorBay_03

I don't see the rear half of the frame that is usually in the engine bay area. Where is yours? If you look at Bruce's engine area there is a frae that goes around the engine bay.

DSC_0010


Attachments

Images (1)
  • DSC_0010
Robert M posted:
vdubuslife posted:

Thank you gentlemen, great looking motors and cabin area ideas! I'm leaning towards the original paint schemes but the shiny tins keep sparkling at me. I do know it will take time and planning. I don't want to slap a heat shield together, call it a day so I can go out for a ride. 

Viewing the photos raised questions. How are you mounting the lower tin? Will 90 degree angled metal brackets screwed on to the side metal sheets be enough? What about the very rear? Use the rubber seal pressed against the inner fiberglass body? I took a few photos so you can see what I'm looking at. MotorBay_03

I don't see the rear half of the frame that is usually in the engine bay area. Where is yours? If you look at Bruce's engine area there is a frame that goes around the engine bay.

DSC_0010


There is definitely no rear cross member piece like Bruce's frame. I'm not sure what the builder was following for documentation. I'll check tonight where the nearest cross member piece towards the rear is located. 

Is there supposed to be a cross member piece like Bruce's on all Speedster builds? It would certainly make it easier to add the rear heat shield/tins. 

Post Content
×
×
×
×
Link copied to your clipboard.
×
×