That would be a great option, but at about $400 with shipping and duties landed (hopefully) to my door.
Does anyone in here have a profile on the specs for these rings?
 Speedster Owners - Automotive Enthusiast Community

That would be a great option, but at about $400 with shipping and duties landed (hopefully) to my door.
Does anyone in here have a profile on the specs for these rings?
Since you have a weak area at the gauge holes, rather than use the brackets that secure the gauges( may very well crack the dash face under pressure) you can use a few dabs of silicone on the back of the dash at the gauge housing it will hold them in place but easily removed if needed at a later time.
The speedometer in my TD is held in with a hose clamp. I just pushed it up the housing until it was touching the back side of the dash, then tightened.
Okay, so where the fiberglass cracked is at the lowest part of the hole and the underside of the dash. This was where I originally cut out the previous section and attached the new piece. The section where it cracked actually just had resin there, no glass.
So this weekend is dremel all the garbage out of the gap and then glass the back of the dash with small strips and make the repair.
I also asked Willem to prime the buggered up sections on the car with red oxide primer as the grey was standing out enough. I plan on rat rodding this car until I've made all my changes and that may take a few months.
flatfourfan posted:
I also asked Willem to prime the buggered up sections on the car with red oxide primer as the grey was standing out enough. I plan on rat rodding this car until I've made all my changes and that may take a few months.
Like this?![]() - (I couldn't help myself, guys, I love this car soooo much!)
- (I couldn't help myself, guys, I love this car soooo much!)


Gary:
Just caught up with your thread. The car looks great, I'd kill for your skills. But, the best part is the outcome on your eyes! Great news, I go under the laser tomorrow for my corrective surgery. Fingers crossed.
ALB....It'll probably end up looking way worse than that as I'm at the stage where no sh#ts will be given.....but the general idea is there. I have to do touch ups on the headlights, front indicators, back indicators horn grills and and and....I also have to start on the hard top as well as the handbrake relocation and and and......oi vey. But the idea is to keep it 100% riding.
BOB......Dude, I have to come clean. I really don't have skills, it's trial and error and error....and some more error. Good luck bro. I end up going back in 6 months and my new Dr will be able to do a proper review and comparison and see what type of degradation has gone down.......will be thinking of you man.
Yeah, good luck, Bob.
Chris’ Mom-in-Law just had that done, and so did my Florida brother in law, both with excellent results. My wife has had several laser surgeries on both eyes - She suffered from acute Glaucoma but her doctor has not only saved her vision but gotten her close to “normal” in eye pressure. Good doctors are amazing!
flatfourfan posted:ALB....It'll probably end up looking way worse than that as I'm at the stage where no sh#ts will be given.....but the general idea is there. I have to do touch ups on the headlights, front indicators, back indicators horn grills and and and....I also have to start on the hard top as well as the handbrake relocation and and and......oi vey. But the idea is to keep it 100% riding.
That's ok, Gary. The important thing will be that it's on the road! I really love that pic, and knowing it's a replica (and all the rust is paint) post it every chance I get!
Had a bit of time yesterday to fix the break. As soon as I chipped away and the carnage, I could see what the problem was....what I thought was glass on the inside, turned out to be just resin. You can also see the dollop of resin that jammed up the back.
So first step was to grind everything out and rough it up for some glassing.

Once all the crap was out, you can see the sides that all glassed up and the lower section, that was thin as anything.

Clean break actually and an easy fix.

Really horrifying picture of the repaired area. I built up the back with 4 layers of glass, so that should give me a little over 4mm. I may just rough tit up a bit more next week and then give it 1 more layer. I'll see next week though.

I actually have some evenings planned this week with Bernie which will involve fitting the duzz fasteners as well as the push botton starter and the head light switch. I may be trying something different on the gauge holders this week, but more on that later. Stay Tuned.
Update time....
We worked on my car a bit today,doing a big job that I was too afraid to do.....feathering in the headlight drop. By I, I mean Roger. He asked me if I trust him, and I handed him the grinder and I said go to town.
There as some notes though.
- The KCC nose is different from the originals cars. The fenders on our speedsters sit lower than the original, but about 10mm from about the mirror all the way through to the top of the headlight. You won't pick it up with the naked eye though. You'd need a template.
- The work required is pretty easy. The hardest part will be building up the back of the headlight on the inner fender. I was lucky because I had the shell upside down. We worked it out and about 10mm of build-up at the back of the fender should be enough.
- There is some finishing off to do with some filler as well as some high build primer, but I'm happy. As I said, I'm going to drive this thing rat-rod for a few months until I finish off some other things.
Here's the jig that gave us an idea of what needed to come off. Roger was very proud of this as this is actually version 2.0 as the first one was lost. This is the very best in CAD.

Here's how deep we had to go. Here you can see the layers of what we have. The 30mm fillet that was taken from the bottom of the light and then placed on the top of the light as well as the build up of glass fiber at the back of the headlight. We worked out, that a 10mm build-up on the inside would be good enough as you maybe go though 5mm.

Here you can see the step. The outer part of the fender has been sanded and feathered in and the inside has not.


The rippled area around the bucket still needs to be rough cut and then smoothed off with filler. More on that later. Below you can see what feathering needs to take place and the shape of it, to get it to look right. Like I said, there is some minor work to do here, but I'll rock it as it is for a few months.
Roger, (Firebird) is happy, so I'm happy.


A few last pics. Here you can see that it's feathered in JUST right.


I also got some holes drilled for the dash for the wiper and headlight switch. I have to grind the back down a bit with a pencil grinder, but I'll hopefully do that in a few weeks time before I go out to Roger.
I still need a push button starter as well as my 3 idiot lights, but it's happening slowly but surely. I'll get my battery this week as well as my radiator, fans and some pipework and then it's off to Rogers dad who's going to be helping with my wiring............super chap. That will be done on the 17th of March, so I have a bit of time to get some stuff sorted.

Those with a sharp eye may have noticed that I said Rogers dad is going to be doing my wiring.......yup.
After weighing up my options and my abilities and then deciding that I'm just too fussy, I decided to use a mate of Willem to do the wiring, but his price was pretty nuts, but I saved and had the money ready. Then I spoke to Roger. .....![]()
Turns out that his dad wired his whole car and it looks ace. So after some discussions and a method of payment, he agreed to help me out. So We were supposed to go yesterday to get it done, but I couldn't secure a set of riding lights for the speedster to be towed. So a plan is ready for the 17th to go out to Rogers place and to do that.
Loads of work to do before then and also loads of pictures WILL be taken.
Stay tuned.
Damn! And I thought I was OCD!
That was an amazing amount of work done in a short amount of time. Great to see it progressing nicely. Rich, the '55 Speedster Guy, will be thrilled to see the photos and background - he's a stickler for those kinds of details, too!
This kind of thing is hella scary to start on, and kind of fun and easy once you get into it. Fiberglass is very forgiving of those with patience, lights and a high tolerance for itchy stuff.
Needs some advice from you chaps.
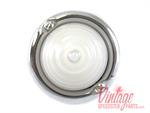
I'm looking at ordering some stuff from the USA and I've been looking at an alternative to sierra's/ stoddards beehives...click meeeee!!!
Basically click meeeee!!!!. Has anyone in here seen these and are they the correct dimensions to the beehives lights?
I basically need 5 units and I'm buggered if I'm paying 70 USD per light.
Any input?
The Stoddard ones appear to be glass while the opaque ones are most likely plastic. I used LUCAS 594 lamps for my front turn signals - they fit the horn grill perfectly. They are not the same size (they are smaller) as the rear beehives tail lights.
These look to be the same as the VS $50 ones but only $38 each.
http://vintagespeedsterparts.c...eturnsignalassy.aspx
So, last time I updated, no wiring had been done as well as well.....not much of anything.
The car goes in tomorrow morning to have the water-pipes redone from front to back in a way that I'd prefer and also bolted to the body properly, without using clamps.
However, my radiator mount sucked hot dogsh*t and I've wanted to re-do it for ages. The test radiator turned out to be from an older VW mk1 and it was way longer than the unit that I was actually going to fit.

The old one was basically a U steel bracket of about 5mm thick and stupid overkill. So I pulled out some old flat bar stock that I had lying around from my bumper brackets and decided to go to town.


Yes I weld ARC........lol. My old trusty "Big Orange" has never let me down, I think it's from the 60's.
Old 50mm ID pipe was cut into sections and allowed for the mounts of the radiator to sit on OEM engine rubber mounts. That way there is still play in the mounting system.


Now. I needed to get the radiator in the nose far enough forward in order to clear the cowling, battery and also allow enough space for the fan and motor (stock VW unit) to clear it all. Using the stock VW cowl cost me all of $20 and the fan and motor was another $50. And it all just bolts into place.

Ignore the wiring, nothing has been finalised and nothing has been cut to length in the front, but it all works. ![]() I have all of the basic functions and the next task is to the VW ECU connected and fitted and also trimmed that one back as most of the functions on the stock harness, I won't use again.
I have all of the basic functions and the next task is to the VW ECU connected and fitted and also trimmed that one back as most of the functions on the stock harness, I won't use again.
The radiator mounts from under the car as well as the fan housing and fan. Coming in from the top is impossible, but it's all still serviceable. Very bad photo but it's about 2 inches lower than the body of the car.


If all goes well tomorrow, the water lines will be on and connected and then I have the following to get done.
1) Hook up ECU and engine wiring harness.
2) Hook up fuel lines and get the fittings for the lines as well as pick up my fuel tank from being modded.
Start it.
I need the car running and roadworthy by the first weekend in August as it's cars in the park (local show) and I really want to take it.


It’s always good to have an incentive to get major portions done.
“Cars in the Park” is as good an incentive as anything I’ve seen.
Get some coolant in there! Fix the leaks! GET IT RUNNING (again) !!!
So I've had 2 weeks off work, but I decided that this is time for my daughters, who are on school break right now and all my projects take a back seat. Included in this was pulling out my bike so that we can start hitting trails again.

So then with my girls dead after the ride, I took the time to tinker. I cut new pan to body washers and finished mounting the body properly and then also trimmed the radiator mount and got it painted and in the car. I also started cleaning up the last of the wiring in the front, so that I could get the front panel in place and attached.
Which brings me to this.


This comes out of a 2000 and something Mitsubishi Colt LDV and will be mounted under the dash and will replace the center mount tunnel beetle lever that's there at the moment.
I went through a stash of about 30 different levers from at least 10 different manufactures and ended up choosing the one that was the most basic and had the least amount of moving parts. Plus it HAD to work with a cable, so that it can mate up to my existing beetle set-up.
The handle will go as will the trigger lever and button and a normal T arm will be fitted that will look more in place with the era. The mount will also be cut down, pretty much all the way so that it can sit up high against the underside of the dash This will involve me cutting the mounting bracket and lopping off about 2 inches and then just re welding it back in place.
Will cut a hole in the front of the tunnel that that the cable can go through and then will make an inspection panel where the existing handbrake is, so that I can mount the cable to a Y-joint so that it can then bolt up to the stock beetle set-up. I'll also have an adjustable joint made up with the new cable, so that it can be adjusted.
Tomorrow I should get my fuel tank back from the shop after the new mods. (new return bung welded in, new main line feed bung, new filler cap and throat as well as breather and also just a general clean-up.
OK that T handle might work great and I'm rooting for you but where's the leverage?
Correct me if I'm mistaken but this looks like a direct-pull type of a handle, and that, to me, suggests that on the Mitsubishi donor car, some kind of see-saw-like, bell crank or other force multiplier exists, and that its absence in your build will displease you.
On the car you have, the tunnel-mounted handle gives you like 3 or 4x leverage. I suggest, before you go too far on this handle, try to pull your hand brakes tight with just a T handle lashed to the cables—no lever at all. See how that feels.
Again, please let me have it if I'm way off base.
Gary doesn't need a "force multiplier".
Have you seen the muscles on those South Africans? ![]()
edsnova posted:OK that T handle might work great and I'm rooting for you but where's the leverage?
Correct me if I'm mistaken but this looks like a direct-pull type of a handle, and that, to me, suggests that on the Mitsubishi donor car, some kind of see-saw-like, bell crank or other force multiplier exists, and that its absence in your build will displease you.
On the car you have, the tunnel-mounted handle gives you like 3 or 4x leverage. I suggest, before you go too far on this handle, try to pull your hand brakes tight with just a T handle lashed to the cables—no lever at all. See how that feels.
Again, please let me have it if I'm way off base.
Not off base actually and I appreciate the question.
When I bought the handle of the Shitsubishi I looked for the force multiplier in the system (as the handle is very spartan) and found it right by the pedals (there are actually 2 in the system), 1st one is a small unequal bell crank that looks similar to this (below) and there is a second under the car attached to one of the frame rails. The wrecker wanted a boatload for them and they were easy to replicate if need be. The Mazda BT50 had a system that was simpler than the Shitsu, and didn't use any multipliers on the cables, but it was all built into the handle mechanism and made it hella bulky and complex and expensive.

The original lever system from a Porsche is similar, but uses an S bracket to get the leverage in the system and WAY more links.

If I don't get the leverage on the system that I want, without them, then I'll use the inspection hole in the tunnel to mount a bracket that will hold the bell crank for the system that will then tie into the rear brake lines. I'm hoping that it won't be needed. Thanks for noticing...
I also got my fuel tank back today.


Overall I'm happy about it. The old vent tube and filler neck were cut out and my hot rod cap and mount were braised in place. I also had the outlet made larger so that I can mount a much bigger inline filter to it. Because I flipped the tank around, the fuel return from the EFi was also moved to the old bottom, the new top. :-)
Except they put it on the top of the tank instead of on the back, by the firewall. It'll work for now though, but they have already said that I can just bring it back and they'll move it for free. I'll make the mounts for the tank tomorrow and also hook up the fuel lines to the filter and pump module that I made WAY back.
Stay tuned.

Access to this requires a premium membership.
Supporting members have donated about $4.00 a month ($49.00 US per year) paid annually.
AUTO RENEW: You membership will auto-renew after 12 months. If you prefer not to auto-renew, you can cancel your premium membership at any time and it will remain in effect until the end of the 12 months. To cancel, sign in at SpeedsterOwners.com and navigate to: (Your User Name) > Premium Membership.
PLEASE NOTE: Your credit card will receive a charge from CROWDSTACK PAY, the payment processor, not SpeedsterOwners.com.