
TRP posted:


OH! and ... how many of you have doors that rattle when you hit bumps? Man... going down a back road sounds like I'm driving a covered wagon! I need to fix that. The doors shut well... it's just that they clatter and rattle on bumps. How do I fix that?!

I used dyno-matt on the inside of my doors and also stuffed polyester filling (a lot)  to sound proof it even more - all prior to installing the door panel. Food for thought...

New, (thicker) door weather stripping will certainly help your door rattles.  Put stuff in that has to compress 1/2 the thickness when the door is closed.  I use 2 or 3 different types depending on where it's used on the door and how much of a gap I need to fill (CMC body - I live for door gaps).  

The last resort is a new rubber bumper on the door latch striker (the part on the body) if it's worn.  I have no idea where you can get those (Bug City?) but they are replaceable.

Last edited by Gordon Nichols

I noticed my door rattling a little after I got her and I adjusted the receiver end (the part on the door itself). I loosened everything and moved it out toward the outside edge of the door. This way the door closed a little tighter. Thicker weather stripping would also help keep the body panels from rubbing together which could be a source of the noise.

Whoa. It's been a while.

Things have taken longer than I'd have expected but that's what happens sometimes in this hobby.   The donor trans I had sent the builder was pretty spent. We chatted about what we could do to gather up some used stuff but at this point there really was no reason to go half-assed on it. I went with all new parts for nearly everything inside the transmission. I think we only used a handful of used stuff. 

Customer service thus far with the builder has been top notch. No complaints what so ever. I'm confident I'll have the gearbox I was originally looking for when I started this quest. 

Do any of you fine gents happen to know where I can find the information necessary to install a Gene Berg 5 speed onto/into a 1967 Sedan Pan? I will be pulling the motor and trans in the next week or so to prep for the pending delivery of the finished gear box. 

Thanks,
Ted

Ted, "It's been a long time"  that's par for the course of building and then installing a Berg 5. being a swing axle it's a bit challenging.  here it is, the once over=

  • install a berg trans mount to your chassis before removing your 4 speed, weld the mounts in place then remove the trans
  • as for the axle position on the spring plates you will need to set the toe when your done. no sense to mark them since you have different axle tubes.
  • remove your 4 speed
  • place your five speed in the car. having the berg cradle mount will help aligning the trans. you will notice the new trans nose cone contacts the axle tube.
  • use a marker, white paint, scribe or anything that works for you to mark the contact areas.
  • remove the trans and begin to cut out the area you marked. after doing several of these I am not shy cutting the torsion tube.  This process for a newbie will require several installs of the trans.
  • you should have gotten the berg 5 mount that has an adapter plate to mount to the stock welded in mount on the pan and connects with two rubber mounts with a stud sticking out. TAKE THOSE RUBBER MOUNTS AND THROW THEM IN YOUR NEIGHBORS POOL!!!!!, Order the alum spacers. don't ask why just get them!
  • After several fits you should have clearance the torsion tube enough. Next mount the cover in place, install the trans again and make sure it has clearance.  then remove the trans.
  • Next you can order the berg piece of metal, fit it in place, tack it in place and install the trans again. if there is not enough clearance go back to grinding on the torsion tube.   Instead of the Berg metal cover I found it to be easier to get some thin steel cut it out larger than the hole in the T-Tube and use a body hammer or round end of a ballpinne  hammer and shape to fit the hole.,trim it and tack it in place, apply silicone to keep out the mositure. paint it.
  • now install the trans. Route the breather hose and secure it. 
  • secure the axle tubes, berg mounts and cradle mount.
  • Next install the coupler on the trans. install the shifter.
  • go back to installing the brakes and clutch cable.
  • fill trans with the proper gear oil- BRAD PENN
  • Install engine.
  • start motor and let the trans be out of gear. the trans will rotate moving the gear oil around. shut off engine. adjust shifter and then restart the engine.
  • test each gear and reverse. 
  • If you have a problem rethink the process and what you missed before calling your tranny builder. He won't be able to diagnose it over the phone.
  • Most of all, Keep telling yourself it's all worth it when I am done!
Last edited by Anthony


Anthony posted:
 
...Most of all, Keep telling yourself it's all worth it when I am done!.....


Ted, I can tell you that it was all worth it when Tony was done.

There's absolutely nothing more satisfying than knowing the job was done by someone who knew what they were doing.

BTW, if your current tranny mount has any rubber in it, you'll hear and feel the difference with this mount. There's more noise, but the powertrain is now more directly connected to your butt, so you're more aware of what engine and tranny are doing as you drive. In time, I think you'll see this as a good thing.

And if you're using Weddle gears, those are noisier, too. Comes with the territory. If you like closing your eyes and playing at being Hans Herrmann at the Targa Florio, you really won't mind this, either.


Hey Tony & Terry
Thanks for the info. I appreciate it. Sounds very straight forward. If you were closer I'd drop the car off at your shop and just have it all done by you guys.   Maybe I drive up on a Friday and drop the car off and drive home with the new 5 speed on Monday.  (kidding... sort of.) Can't wait to get this project wrapped up. I was looking back at this thread and I had forgotten how long this has taken. The financial commitment is nothing when you consider how much time you invest in this upgrade. 

About the existing setup:
The car already has a mid mount so I'm guessing those tabs will have to come out first (assuming they won't work for the Berg mount).  Not a huge deal I have a cutting wheel.  I already have Rhino trans mounts and a solid mid-mount. I'm used to the magic fingers from the 4 speed. 

Regarding this step: 
TAKE THOSE RUBBER MOUNTS AND THROW THEM IN YOUR NEIGHBORS POOL!!!!!, Order the alum spacers. don't ask why just get them!  Okay, that's done. Eric (my neighbor) won't suspect a thing.  Where do I get the aluminum spacers? I checked their site and I couldn't locate them.

While the motor is out I'll be swapping to full stainless fuel lines, relocating the oil cooler with the mount @coolryde built for me a while back, some new spring plate bushings/retainers and wiring up a relay 'cut out' for the cooler fan while the motor is cranking.

Thanks for checkin' in...


Last edited by TRP

Oh! I think I found them...

Is this what I'm looking for: 
http://www.geneberg.com/produc...amp;products_id=3246

 Or is it a pair of these?
http://www.geneberg.com/produc...amp;products_id=1071

I think it's the latter of the two. The first example appears to be for the front nose cone mount. I'm not sure that I'll be using the front mount. I think that also goes in the pool next door, right?


Last edited by TRP
Anthony posted:

order the ones for the front mount[first photo]. do not order ones for the cradle mount as in the second photo.      If you have a berg mid mount in place you do not need to cut the ears for the five speed mount. I think that's what your post was describing.  Call me if you want to bring it up for me to do it.


I have a different mid mount in place now, not a Berg. The one I have now was on the car when I bought it. I have no idea who made it.  I looked through my old thread here and found a photo of 'it' from November of 2015.  You can see the mount below on the right partially occluded by the red generator wire. 

You can see how the existing mid mount uses large I shaped tabs compared to the smaller (yet more robust) mounts of the Berg mount I'll be installing. I'll get under there and see what lines up and what doesn't. 

Thanks for the info on the bushings. I will order two of the first style today. 


I don't think I've ever seen a mid-mount like that, Ted. Usually it's the Berg (or copy thereof) or the Mendeola/Coolrydes/Joel Mohr (I don't know who made it first) style with the red polyurethane pads that bump up against (instead of bolt to) the frame horns. Could be home made? Al

PS- Too bad you had to spring for more new trans guts. I undestand that's fairly common, though; so many transaxles have been rebuilt numerous times and are just plain worn out. Up here where cars have more of a shelf life (winter/salt/rust/death) it's not unusual to find a trans that someone took out of a rusty car and put it away. The trans that my friends gave me so I could pirate the case (and side cover) for the 5 speed was out of a 1978 convertible, had never been apart, and the gear stack (and ring & pinion) look so good that it doesn't need to be rebuilt. 

Last edited by ALB
ALB posted:

I don't think I've ever seen a mid-mount like that, Ted. Usually it's the Berg (or copy thereof) or the Mendeola/Coolrydes/Joel Mohr (I don't know who made it first) style with the red polyurethane pads that bump up against (instead of bolt to) the frame horns. Could be home made? Al

I'm guessing it's homemade. It uses a pair of rear transmission rubber mounts to sandwich between the mid mount and the tabs which are welded on frame horns. 

I mean the two mounts when placed (side by side) appear to do the exact same thing.  They take a bunch of pressure off the nose cone by mounting the mid point of the transmission securely to the frame horns.  *shrug*.


Last edited by TRP

Great photos! Thank you.

So... *deep heavy sigh* ... it looks like there is a different problem with the replacement main shaft that we picked up. From what I can gather they are all out of replacements. Berg is going to have the machine shop machine a new one for me. Unfortunately it's going to take 3 to 4 weeks. In Berg time... that's easily 2 more months.  

I'm going to call Tim on Monday and see if we can figure something out. I may (oh the irony...) just go with a Weddle shaft and 1st/2nd gears.  Yes... more money. 

Maybe Berg will refund some money on the main shaft they ruined? 

*grumble*


Last edited by TRP

Yes, completely frustrating.  I'm thankful that the builder is taking the time to measure and check every piece prior to assembly.  I doubt Gene Berg Enterprises will cough up a penny to offset the cost of Weddel parts. I'm most likely going to have to wait (longer) or... eat the cost of a Weddel mainshaft and 1st and 2nd gears.


Got tired of looking at my passenger door being all askew.

IMAG0272

20170402_141604

20170402_141554

The top front was in and low. The lower rear was sticking out a bunch. Other than that - the gaps were good.

The lower hinge was a wee bit proud. I filed the alumnium spacers a bit. And filed the back of the hinge. I'll space the top a tiny bit and see how it works. Does the adjustment differ if you put the spacers on the body side or the door side of the hinge? I guess all that matters is the alignment of the hinge points?


Attachments

Images (3)
  • 20170402_141604
  • 20170402_141554
  • IMAG0272
Last edited by TRP
TRP posted:

Thanks, Mitch. All that makes sense to me. My comment was about what looks like a gusset on the lower drivers side of your trans case. I know Tony reccomends them for high perf motors / 5 speeds.

Thanks for all the info.

Ted

That case gusset is only really needed when drag racing and the car can pick the front wheels off the ground. A pic of someone local who caught it before it split the case- 

transaxle case cracked

The car runs high 11's at the local track and is a full weight, '65 Cal Look bug street car.

Attachments

Images (1)
  • transaxle case cracked

Ted, please document what you do and how you do it, with photos. Some of us are keen to learn.

That said, the thought occurs to me: the main disadvantage with a fiberglass part is that you can't bend it just a little for that final fit. My dad was a body man, and when I watched him work, I noticed he would adjust the hinge mounts first, then the striker, and fettle that a few tries until it was about as good as could be got that way.

Then, for situations like yours, where the front line was about perfect but the back was out on one part and in on the other, he might use a 2x4 or other stick, wedged strategically between two metal parts, to re-shape or twist the whole door just a hair until it was close enough to perfect. 

Keep in mind, too, that in normal cars you'd be lining off the quarter panel, back to front, since the front fender was easily shim-able (and bendable) to get the front gap perfect. 

School us!

Okay gang - this was so much simpler than I'd have guessed.  I'll walk through the high points.

Here is where we started:  Note the bottom corner of the door. It sticks out a wee bit more than the top. The top was super snug and it would rattle / hit the body so much that it actually cracked the thin top corner of the door. (boo!)

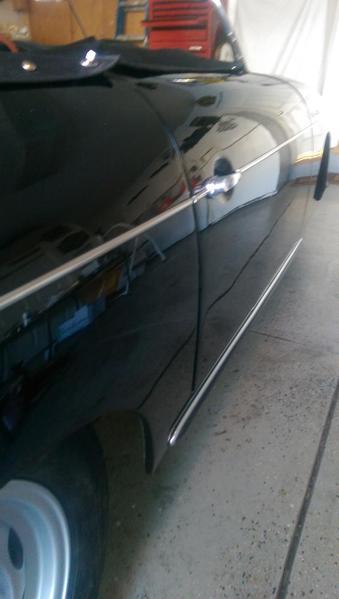
Here is where I ended up after about an hour and 20 minutes of work:

20170409_170201

So the first thing I did was mark the location of the old hinges so that the door would be easy to align later. Blue tape - SOC's official sponsor. In hindsight this was not necessary as these holes are not adjustable. 

20170409_144111

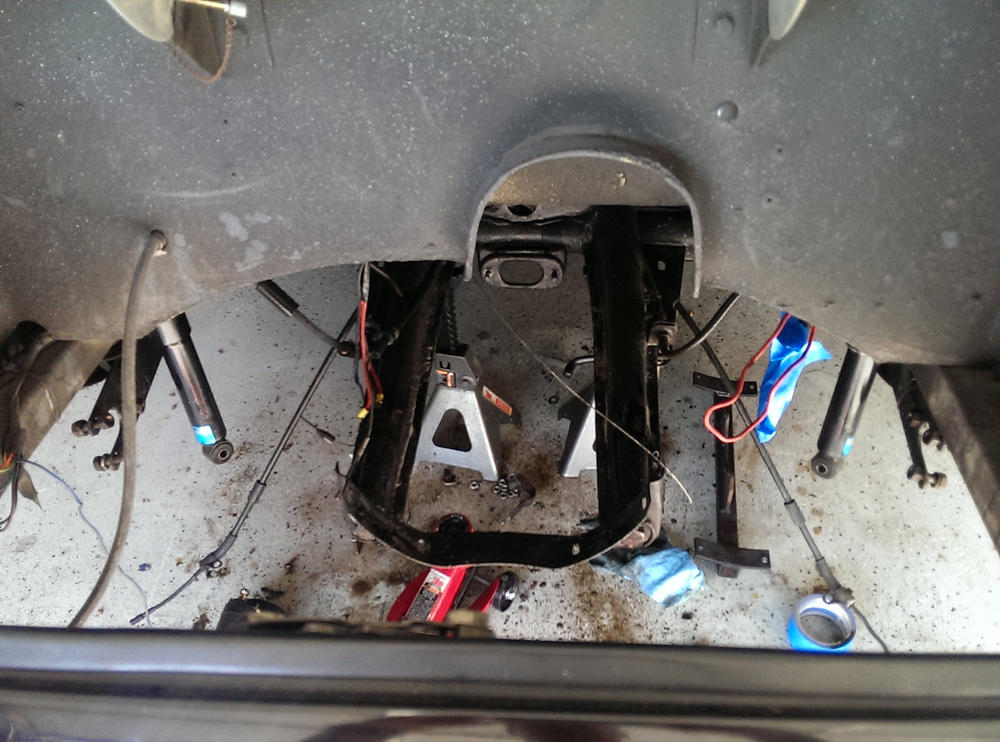
Next thing I did was check the little aluminum spacers (silver inserts above).  The bottom of the door stuck out more than the top. So I first looked at the bottom hinge spacers. Sure enough a few of them were a bit 'proud' of the door jamb. I removed each of them and sanded/filed them until they were flush with the body/door jamb.  They were only 1/32'nd proud... so I knew that wouldn't be enough to fix what I was seeing.  So I moved to the TOP hinge and did the same thing. Those spacers looked good. Needed more space on top.

20170409_144509

Alan mentioned that I might need to shim the door hinge a bit. If the bottom rear sticks out... you need to shim the top front. So I took some aluminum flashing that I had lying around the shop. I traced the profile of the BODY side of the hinge. Use the drill press to punch out some holes to match the hinge holes.

20170409_144120

Trial fit. Looks good! Paint it up and start reassembly. 

20170409_170233

Okay - first off... that's a piece of lint on the hinge, not a crack...

As I said earlier - the body to hinge bolts are fixed - they don't adjust up/down/in/out. All adjustments for up/down etc are done on the door side bolts.

The photo above is after I assembled the hinges on the door first and then tried to fit the door/hinges to the body. I had to undo that and fit the hinges to the body first and THEN attach the door. That was frustrating. The body bolts were too long to get a socket in there to tighten things down with the hinges on the door. It was tricky to do this by myself. Two people would help here.  It would have helped me from dropping the door. (more on that later...)

20170409_170309

In the two photos above you'll see the top hinge and the spacer and the bottom hinge and how snug it fits to the body without spacers.  I eyed up the hinges on the door and body as close as I could... close enough. ( I used the dirt on the door so I could easily see where the hinges used to fit.)   I SLOWLY started to close the door to see how it fit. I didn't want to chip and paint or crack anything. A few times of loosening the DOOR bolts and adjusting the spacing... tightening... and slow closes later.  Looks... close. Too close.


20170409_152226

The lower gap was WAY to tight. Back to the door hinges to adjust.

20170409_152207

Front looks good... little tight on the bottom. Too much more and I'll really screw up the belt trim alignment.  The doors should have been aligned better before the belt trim was applied. My 25+ year old body has a few cracks in the gel coat.

20170409_170144

A few more adjustments. I just loosened the bolts a tiny bit and pulled up on the bottom of the door with some force. Once I felt it move... I'd close the door... test again. I got it where I think I liked it. More gel coat cracks. (I should have spent that 5 speed  money on a paint job. )

20170409_170123

Eyeballing down the body... looks close enough.

20170409_152156

Looks good... cut. print. check the gate. 

20170409_152220

Looks good... except for the dirt and scratches in the door from where it slipped and fell over. If you look close you can see a bunch of vertical scratches in the 'crown' of the door. I'll color sand that out and buff it up.  Now that this is all complete I can get in there and clean up the door jambs and hinge area.

-----

The shot below  is for @Teby S. Once sheet of dynamat delux on the interior of the door. Super quiet and added some mass to the otherwise hollow sounding doors.

20170409_170322

Attachments

Images (14)
  • 20170409_170322
  • 20170409_170309
  • 20170409_170201
  • 20170409_170233
  • 20170409_170246
  • 20170409_170144
  • 20170409_170123
  • 20170409_152226
  • 20170409_152156
  • 20170409_152207
  • 20170409_152220
  • 20170409_144509
  • 20170409_144120
  • 20170409_144111
Last edited by TRP

HA! Oh come on guys. You are too kind. Most of this stuff is just scary to think about and we psych ourselves out before we even try it. 

That door alignment was so simple I bet even  @Teby S could almost do it himself.  Granted we all know he wouldn't have let his door slip out of his hand and flop over onto the floor/table/etc - and scratch then hell out of it.  

Check back when I have to assemble the axles and install that 5 speed!  We'll see how well the skills play out then.

Skills that impress me? Those who can paint and weld. Those people are artists! And then there is Brian - he built his entire car! (he's nuts...)


Last edited by TRP


Ted, I'm impressed with your skills, but I'm even more impressed that you were able to do this without making three trips to Home Depot.

As it happens, I've got exactly the same alignment problem. The bottom, rear corner of my driver's door is out by about the same amount your passenger door was while the top lines up pretty well. I've lived with this since the car was new, but your post gives me hope that mere mortals can align the doors on these things.

If I'm reading your post right, the fix was the shim, but you had to completely realign the door because you took the door off the hinge. And you had to do that because you couldn't fit 'a socket' in to remove the hinge from the body with the door still attached to the hinge.

Do I have all of that right?

What puzzles me is that my doors' bolts have torx heads, so it looks like you could get some sort of right-angled handle in there with a torx bit to remove the doors from the body. In theory, you could then drop in a shim and avoid all the hassle of completely realigning the door. It should just bolt back on where it was, top to bottom and side to side.

In fact, I'm thinking if I know that only the top hinge has to be shimmed out a bit, I could fix this by just unbolting the top hinge from the body, sliding in a shim, and rebolting, without undoing anything on the lower hinge at all.

But that sounds too easy.

What am I missing?

DoorHinge01

Attachments

Images (1)
  • DoorHinge01
TRP posted:

That door alignment was so simple I bet even  @Teby S could almost do it himself.  Granted we all know he wouldn't have let his door slip out of his hand and flop over onto the floor/table/etc - and scratch the hell out of it.  


I don't know, Ted; Teby is pretty new around here...

And as for the door, I feel your pain. These things happen.

Mitch - you have the same bolts I have. The body side bolts are about 2" long. You can put a Torx bit on a small ratchet to get everything loose but you quickly run out of room in the door jamb. If I could have just backed off that top hinge I would have. I can post a photo of what I ran into if it will help.

About the door scratches. I wet sanded and buffed it. Not too bad. Just one scratch left.

20170414_08101520170414_081004

Attachments

Images (2)
  • 20170414_081015
  • 20170414_081004

Mitch - I think I get what youre asking. You want to back off the top bolts just enough to be able to slide a shim in. Humm... It should be theoretically possible. Your shim would need to account for the existing bolts. So where mine is solid with 3 holes in it which essentially trap the shim.  Your shim would have 3 slots in it... Like the letter 'E'.  In hindsight... If you can pull that off you would save a bit of fiddling with the alignment. Remember that you want the hinge to sit flat so you can't just shim the front or back. 

All that said - If i were to do it over? I would shim the door side of the hinge (between the door and the hinge).  Why? Right now your hinge points are plumb and true. The door swings freely with zero effort, right? When you put a shim between the body and the hinge the two hinge points are no longer plumb. Placing the shim on the door side would not change the hinge line. My passenger door doesn't swing as freely as it did prior. Its nothing bad but its noticeable. Maybe its all in my head? Maybe Im over thinking it?

Ted

Last edited by TRP


Ted, I didn't realize how long the bolts were and now get the clearance problem you had.

I was also thinking that just some washers, slotted as shown in this photo, might work (they might have to be trimmed on the edges, too).

How thick was the shim stock you used?

BodyWasher

Here's a photo of my door edge. The top actually aligns pretty well, but gets gradually worse towards the bottom. It's amazing to me that they would have shipped the car this way. If I were closer, I'd have just taken it back to VS for adjustment. As it was, though, I wanted to get the mechanical issues sorted first before worrying about stuff like this.

DoorAlignment


PS: And now, reading your latest post, I was wondering about the two hinges going out of plumb, too. Do you think just loosening the top hinge (at the door to hinge side), without loosening the bottom hinge at all, would mantain alignment?

In other words, would loosening the door side at the top, sliding in the shim, and retightening maintain alignment?

I figure this would lessen the chances of dropping the door, too.


Attachments

Images (2)
  • BodyWasher
  • DoorAlignment
Last edited by Sacto Mitch

I used 1mm stock. 

The door to hinge union is pretty interesting. On my car there is a tapped metal plate  that floats around. This is what gives you the adjustment. Loosen the bolts too much and youll hear a... 'thud' as that plate falls to the bottom of the door. 

If i were in your shoes (size.. 10.5...11?) I would prop the door up on the extreme end so as not to stress the bottom hinge. Once you have that set... Dive in. Even if the door moves its pretty simple to adjust.

In the photo above is that door completely closed? You may want to move that striker in a few MM. But one thing at a time.

Once you get finished its pretty satisfying. 

You've got this maaaaan!

Last edited by TRP

They had to make a whole new batch. Gary went through 4  before he found one we liked. Goldie locks and the 4 mainshafts. One (my original) was ground too small after they modified it. The second one?  Same. Third had pits we didn't like. Fourth was juuuust right. Now that it's all done it should ship sometime this coming week.  

Need to have some tabs welded on to the frame horns and then figure out my next move with the axles. WCC seems like a long shot.

I'll believe it's over once it is in the car.

Last edited by TRP

Don't feel bad, Ted.

Somewhere between Carlisle, PA and the Tappan Zee Bridge, on a remote section of I-78 in New Jersey, probably once sitting on the shoulder of a bumpy downhill section, sat a ramp for Pearl's car hauler trailer.

My son and I both double-checked everything on the trailer when we left the hotel in Carlisle, but when we got back to my house, after the 7 hour trip, one of the ramps (a big, ugly, heavy thing) was missing.  I got the car off of the trailer (we always have spare ramps) and ended up wasting half of the next day welding a new, replacement ramp together.

There, you see?  Speedster replicas are just like car hauler trailers.  Things fall off both, sometimes.

Last edited by Gordon Nichols
Jim Kelly posted:

A warped flywheel can cause driven clutch disc springs to fail.  It's always a good idea to surface the flywheel on a clutch job.  Long-term slippage can also heat the springs, making them brittle and easier to break.  If your flywheel is bad, you'll know before long, launching or not (just kidding about the launch).  In my case, cockpit problems were the culprit, but I was a mere callow youth at the time.   

The heat checked flywheel can cause the clutch to chatter which will break the springs in the disc. If everything is right you shouldn't have any trouble with a sprung disc. Any one that knows a lot about clutches will tell you there is absolutely no reason to run a solid, unsprung disc on the street. They are harsh, tend to chatter and transmit lots of driveline noise. The same thing goes for a solid disc with no marcel in it. These are for road racing or drag racing only. If you look at the outer edge of the disc, between the two linings you will see a slightly waved plate separating the two halves of the disc. This is the marcel or wave plate that cushions the disc and makes the clutch much smoother.

Phil IM356D posted:

Sorry to see the tranny build take this turn.  I will likely do another build some day and I'm definitely interested in a 5 speed. Egos are a delicate thing.  If the tranny Guru is that sensitive I would not want to do business with him.  As a Doc I get advice from nurses, technologists and colleagues all the time.  A wise man considers all advice and then decides.  To dismiss a suggestion out of pure arrogance is foolish.  There is always more than one way to skin a cat  (I hate cats).   I'm sure the tranny Guru is swamped with work.  I believe him.  Good thing since he won't be getting any referrals from this site.   

Hey, I love cats!  And dogs too for that matter, unless it's a doggy car.

My experience has been otherwise, Frank; I've always found an unsprung disc worked fine on the street, without any of the issues mentioned as long as the flywheel surface is true/not overheated, the release bearing was working properly, the bowden tube had the correct amount of bend and the cable guide tube was well greased and secure. It's lighter than a sprung disc, too. 

TRP posted:

As I was cleaning up my tools I figured it out. 7/16 box end 'stubby' wrench! I am in the midst of relocating the oil cooler and fan. I had to remove the remote oil filter.  When I reinstalled it I wedged a wrench in the fender well to hold one nut on the bracket while I used a ratchet on the other side. In my hurry to leave this morning I forgot to unwedge it. I guess it worked its way loose and went bouncing down the road. Because of my OCD - I went to look for it. No luck. Pretty stupid of me so that's what I get. These are the things that make me crazy. I will go look for it AGAIN! 

Serves me right for not using metric!!

HEY ALL:

Funny thing...........As I was driving on East Dunne up in Morgan hill  I hear this: 

"ting  ting ting ting ting....... THUNK!!!     


Ummmmm.......... TED??     

I found your 7/16 stubby wrench........IMG_6207IMG_6208IMG_6209

Damn thing stuck there all the way back to Fresno!!

What are the odds?

What's your address,  I'll send it back to you...........I have no use for it because I use METRIC...

tebs


Attachments

Images (3)
  • IMG_6207
  • IMG_6208
  • IMG_6209
Teby S posted:
TRP posted:

As I was cleaning up my tools I figured it out. 7/16 box end 'stubby' wrench! I am in the midst of relocating the oil cooler and fan. I had to remove the remote oil filter.  When I reinstalled it I wedged a wrench in the fender well to hold one nut on the bracket while I used a ratchet on the other side. In my hurry to leave this morning I forgot to unwedge it. I guess it worked its way loose and went bouncing down the road. Because of my OCD - I went to look for it. No luck. Pretty stupid of me so that's what I get. These are the things that make me crazy. I will go look for it AGAIN! 

Serves me right for not using metric!!

HEY ALL:

Funny thing...........As I was driving on East Dunne up in Morgan hill  I hear this: 

"ting  ting ting ting ting....... THUNK!!!     


Ummmmm.......... TED??     

I found your 7/16 stubby wrench........IMG_6207IMG_6208IMG_6209

Damn thing stuck there all the way back to Fresno!!

What are the odds?

What's your address,  I'll send it back to you...........I have no use for it because I use METRIC...

tebs


Sorta new guy or not...........that was FUNNY!!!

My wife just texted me: 

Wife: "What did you order? The FedEx guy just showed up with a box marked "HEAVY" and I had to sign for it."

Me: Nothing?... oh! WAIT!... Have 'em put that in the garage.

Wife:"What is it?..."

Me: "It's complicated... I paid for it a long time ago... I've been paying for it... for a while... I'll explain later..."

Wife: "Is it car parts?..."

I'll spare you all the rest...  but it looks like the 5 speed arrived!

Resized_20170424_165406

Thats a photo of the box when it left LA 3 days ago. Ill see how it looks when I get home.

Attachments

Images (1)
  • Resized_20170424_165406
Last edited by TRP

It's an aluminium case.  

Excited? Ummm... I'm not as excited as I thought i would be. I think that's because I'm still a ways out from it being installed and driveable. 

I'm glad to have spent the time and money to have Gary build it.  I have complete piece of mind with the direction the build took and the builder.  It will be fun once its installed.


Oh, come on! You and I both know that after all the turns this project has taken you're just about peeing yourself with excitement...

After all the sh*t that's happened, it's built and on your garage floor. Get 'er done, Ted. You're gonna love it! And you owe me a phone call after the first drive...  Al

I agree on the tools thing and I need to learn to weld if I plan to stay in this hobby. That said, I really want these tabs welded properly.  Not something I want to have fail.  

Speaking if welding those tabs on. Right now the brace is bolted to the trans. The brace doesn't sit level. Left to right there is about 1/4" difference in the gap between the mid mount and the frame horns. Front to back the mid mount angles down a bit. 

20171118_162611

In the photo above you can just make out the angle of the mid mount 'forward' bracket 'tabs'. They are just in front of the existing rhino mount.

Should I adjust the transmission so that those are paralell with the ground before I have those tabs welded on?

Attachments

Images (1)
  • 20171118_162611

@Michael - good to know!  Who did you find to do the work? I was going to head to a muffler shop and see if one of they could throw a bead on those brackets. Once they are secured and all painted then the fun stuff starts!  

I'm going to pull the motor this winter and install stainless fuel lines, relocate the cooler, and install that mocal sammich adapter.  I may also take the time to raise the rear end 1.25" on one side and 1/2" on the other.  For some reason my car is lower on the driver side than the passenger. 

The '29 doesn't need a whole lot. Thankfully.

@TRP, I found an auto repair place that also does welding because they would be able to hoist the car up. Originally I was looking for a someone who could do it on Saturday because I didn't want to take time off work. But, with rain in the forecast for Saturday, I went on Friday. That increased the cost.

A muffler shop could probably do it.  Originally, I was hoping someone could do it from a creeper in my garage but then I decided it would be better to hoist it up.

The prospect of having the engine and transmission out has me wondering about installing an Espar heater above the transmission. They are only about 14" x 6" x 6". There was some conversation about this on the site several years ago but I don't know if anyone actually did it.

Michael McKelvey posted:

I had the brackets welded to my frame horns on Saturday. Afterward, when I was putting Rustbullet on them,  it looked like one was a little closer to the flange on the frame horn than the other.

Driving to get this done, with the top down, was the first time I drove the car when the temperature was in the low 30s.

Did you install a mid mount like the 1 I showed the pic of (GB 643)? If it's the same 1 could you be so kind as to weigh it for me? Ted's is the 2nd generation 5 speed version with the front mount integrated. Al

Last edited by ALB
tomrsr posted:

does this thread set some record for the longest ever?i love it

I think that with all the thread drift that goes on in every Forum topic, Theron could simplify this website by just eliminating all the different  forum 'Topics' and just have one thread with the header 'Go'.

Eventually the discussion will come around (drift) to whatever tech question you have, or whatever memory has been stirred, or event you went to, or how to properly run a start-up business, or whatever is wrong with the car you're selling.  

Last edited by MusbJim

Mike:  What you are thinking of doing is exactly how VW added the BA6 heater to the VW Bus.  The air comes out of the fan shroud, goes through the heater boxes and then "heated" air goes into a blower (same as what the Beck guys use as a supplemental defroster blower) and then right through the heater.  The output, on the other side of the heater, goes into the heat ducting to the cabin and/or defroster outlets.  That way, whether you use the heater boxes for a little heat, or the gas heater for a lotta heat, all of the down-stream duct system - the outlets by your feet, the outlets for the defrosters, the heat controls, etc - all work the same as before.  If you're not getting enough heat from the engine for your needs, flip on the gas heater switch and, Presto!  GOBS of heat for the cabin or the windshield.  This automatically and by default becomes a flow-through system, too.

Some people choose to use the gas heater as a re-circulation system, whereby the air is pulled from the cabin, heated and returned to the cabin.  VW did this with the sedan.  Everyone with one has to crack a window to keep the windows from fogging up.  Whenever I put my Rogue on re-circulate, in very short order all of the windows fog up so I chose, on my Speedster, to do a "flow-through" system, pulling fresh air from outside, heating it in the heater and dumping it into the cabin.  There are enough air leaks in a Speedster that it truly is a "flow-through" and the windows never even think of fogging up.  

The BN2 or "2" series of Espar or Webasto (2000 K/cals or 8,000 BTU's) like the Airtronic B2 heater, is a perfect size for a Speedster and can literally drive you out.  These are modern, computer-controlled heaters with a variable heat output - turn the knob up and get more heat.  Starting to drive you out?  Just turn the knob down a bit and the heat level decreases.

Here's where I insert my cautioning statement:  Since these modern heater versions are VERY popular with the tractor-trailer sleeper cab set all over the World (where there is not as much money as in the USA), there are a TON of Chinese knock-offs out there, all the way down to $350 bucks for a NEW one.  The same level of quality appears in these Chinese knock-offs as seen in any Chinese Speedster parts - Bad to really F'ing bad, so beware and only buy a genuine Eberspaecher, Webasto or Espar heater.  Yes, it'll be more money, but you'll get a heater you can trust.

Hope this helps.   Gordon

I've got an Espar heater Henry installed with the build in '05. It pulls air from under the dash, and blows it down at my feet.

I'd strongly recommend not doing it like that.

What happens is that all the heat gets trapped under the dash, and sucked into the heater. There are sensors upon sensors which use any and all data to shut the unit down if it perceives there's any reason whatsoever to do so. Warm/hot return air (supplied to the heater) is enough to shut the burner down. Just about the time it get's crankin', down she goes.

I'd suspect it'd be the same thing if you did it the old-school way with the heater boxes. An old heater would be fine, but a new solid-state controlled Espar won't like it.

Sorry.

The gaz heater was a neat gadget but you'll need a metal manifold of sorts to direct the heat as Stan mentioned otherwise it will shut down.   Seat heaters and engine heat can work fairly well or I recently found a radiant heat source was being used in some cars as well but I am not sure how that would work in our cars. 

A subie produces nice heat with a Vintage air set up you get both worlds ... just saying.  

Yes, there are several "safety controls" on gas/diesel heaters - that's a good thing.  Typically, they have an overheat sensor on the output side that has a set range (mine is around 300º).  If you go above that upper limit it will either stop fuel flow or stop the heater completely, depending on model.  My overheat sensor shorts to ground and blows a 2-amp fuse, stopping everything til I change the fuse.  Do that once and you'll make sure you know why it blew! 

In Stan's case, if you were to use a duct (clothes dryer vent hose is fine, if it fits) to move the input to somewhere else (like input from the frunk or farther away from the outlet vents) I think it would be fine, or maybe duct the output to farther away.  I'm pulling in from the the area right behind the driver's horn grill and outputting under the dash with a couple of aim-able outlets (2-1/2" 45º PVC fittings) that are roughly aimed at one's knees.  It might be interesting to know where @Jack Crosby has his heater inlet and outlet in his car.  His heater is in the nose, similar to mine, but his is a recirculating system more like Stan's, so it has to deal with long ducts on both sides, too.

On my heater and measuring with an IR thermometer, with 38º at the inlet and after a good warm-up, I'm getting about 180º at the outlet - probably cooler than your heater, Stan, but I'm running it on "low" since I didn't want to deal with things being too hot.  I may bump it up a bit before the season is over.....I'm still playing with it.

Mike--my Espar heater is not inside the trunk but is tucked up under the nose of the car.  Safe from road debris there and fairly easy to access although I haven't even looked at it in 3 years. A great, reliable and effective heater.  I would have gone Gordon's route if I had his skills---which I don't.

The warm air comes into the cabin by an adjustable vent to the left of the clutch pedal and a bit higher.  The duct for air leaving the cabin is on the passenger side to the right of the passenger's knee.

The rheostat that controls the heat level is above and to the right of the driver's left knee. This control can turn 360 degrees from the lowest to the highest setting.  The most I have ever turned it was about 10 degrees , any more is just too hot.  I went with the rheostat rather than the thermostat.  Felt it was more reliable and I wanted to manually adjust it as needed.

The Espar makes the car a 12 month vehicle so I can drive year round in any temp.  Some years I used to freeze in the mountains on the way to Carlisle, and on the trip to Morro Bay, CA  for the Western gathering, we were in 20 degree temps and snow at Flagstaff, AZ  Brrrr!  Alice bailed out of the Speedster and got into Dusty and Sharon's Escalade and I didn't blame her a bit!


I'm sorry, Stan.....

I wrote my last post, then went outside to do yard work and realized that you've probably forgotten more about this stuff than I'll ever know, just from your daily work. You already know how to make it better without me!

Didn't mean to sound snooty.......    There's been a little "Trial" and a lot of "Error" in my getting this thing going.  I'm just happy I had a local Eberspaecher/Espar technician who was willing to give me some time and a lot of tips.  He was amazed that I got it running, too!  

Also just found the user/service for the Espar Airtronic D2/D4 online, here:

https://www.thesamba.com/vw/ar...2%20D3%20D4%20B4.pdf

And page 25 outlines values for the flame sensor and overtemp sensor, if you''re curious to see if it is in spec or overly sensitive.  BOY!  Those things can put out a lot of heat!  Upper limit (max fuel input) is 392F !!

No problem, @Gordon Nichols.

My problem is one of where the heater is mounted, and how. The problem is that it's beautifully tucked up under the dash, with a really neat access panel for the glow-plug and unfortunately very close on the inlet air side to the pocket Henry puts in his bodies for the trunk hinge (so there's nothing to seal off).

Simply put, there's not much room to duct the supply air to the outside (which is what is needed), or anywhere else for that matter. I could pull the heater and start over, but what I've got is soooo nice, that I hate to start dorking with it. It heats adequately, just not the "run you out" heat that the unit is capable of. 

It's on the list, but pretty far down there...


My home shop got so bad at times I had to stop working, clean up the shop to find the 10 & 13mm sockets.

....... Need the extra weight to keep the wheels from spinning when trying to pull those nuts off. .......... If this is the case you can use a crow bar with the hook end around a wheel stud and the flat spade and on the garage floor. The hook secure the drum / rotor from turning.

Last edited by Alan Merklin
Stan Galat posted:
TRP posted:

 I bet Al, Stan, Anthony, and Gordon all gasped when they saw how messy the floor is.

You're kidding, right? I've got stuff everywhere when I pull the engine. Your floor looks like you could eat off it.

I did! I sat down and ate a sandwich before attempting to stab that trans in. Im still in shock that it went in so smoothly. Im convinced i did it wrong. 

Alexis is having guests over tonight or I would keep at it.

More to tomorrow.

What Stan and Gordon said- you still look fairly organized! And I think I understand why you're trying it that way (you don't want to undo the kafer bar supports- am I right?), but it might be hard to keep the spade ends in place as you put in the be C clips, and how are you going to know when you've got the right amount of tension on the plastic petals (and the right # of gaskets under the side covers)? As Chris said, I've always done it with the axles and tubes on first. I'll be waiting patiently to hear how it goes...

For too many times I forgot to leave the wheels on and then later needed to remove the hub nuts.  Finally, I bought a piece of steel stock at Home Depot, 1/4” thick, 2” wide and 4 feet long.  Something under $20 bucks.  Drilled a hole in one end to fit a wheel stud, then figured out where to put another hole to fit the next adjacent wheel stud.  Assemble to the hub/drum with a couple of nuts so that the long end acts as a lever to oppose the loosening of the nut and position that end on the shop floor.  36mm socket on the nut, 5 foot piece of pipe on the socket bat handle and just ease it right off.  Flip it around to re-tighten the nut.  WAY better than trying to rely on the e-brake to hold the hub.

If you want to be really cool, drill another hole on the opposite end of the steel bar to fit  a clutch bolt on the flywheel, then another hole for the next adjacent clutch plate bolt.  Instant flywheel/crankshaft tool for removing/installing the flywheel gland nut.  Easily good for 400 - 500+ ft. Lbs. and safe for the mechanic.

Hang it up somewhere in the shop by the hole at one end.  Paint it your favorite team colors or Black, Red and Gold for the German/Porsche flag.


Last edited by Gordon Nichols
sherco_chris posted:

What made you decide to put the tranny without the axles?  I've always put them together on the floor, then into place as one piece, ( I've only done a few, one several times!). You'll have to let us know if that is easier.  

It's easier to manuver in and out for cutting and fitting the 5 speed. Now that it's in, I will pull it out and install the axels and whatnot.

Now, had I known I only needed to take it in and out just the one time, I may have installed them frist!

I dread those c clips...

Last edited by TRP

Years gone by, I could put a tool down and go back later (sometimes weeks or months later) and just remember where it was and pick it out.  No more.  Now it seems like I forget where the heck things are within minutes.  Gets pretty frustrating, sometimes, so I find myself doing the same thing - use something and put it back so I'll know where it is.  

I also have a small, handled tool tray that I put near where I'm working and just put tools I need and am using in there.  At least I then only have a couple of places to look!  After everything is done I can move the tray to the bench, clean everything off and replace it all back in the chests.  

Life is good.   

You just lengthen the back of the car...

tranny_comparison

The 3" comment was sort of hyperbole. The 5 speed isn't longer but it's bigger up front. The additional bulk is taken up from the midmount forward and is concentrated up in the nosecone.  Which is why you have to make room up by torsion tube.

The above example is an IRS box, but the swing axle is fundamentally identical from the side plates forward. The 5 speed is on the right with the silver parts being part of the Berg kit.

The shape of the 5 speed nosecone necessitates a new front mount, mid-mount, and bracket which you buy from Berg. You also need a new shifter. 

Attachments

Images (1)
  • tranny_comparison
Last edited by TRP
James posted:
TRP posted:

The case is only about 3" longer. I am running heavy duty side plates and stiffeners.  It just looks big because it's silver. Black is slimming.

Just out of curiosity, how do you accommodate the extra 3”?  Does the coupler change? Does the engine move to the rear?   Are the mounts moved?

Like I said, just curious about how it all bolts back up.  

Although the gear cluster is longer (both main and pinion shafts extended so 5th sits on the end) and the new nose cone housing is a little bit more bulbous, overall length is the same as the hockey stick (shift selector) is shorter. The rear trans mounts bolt to the trans and yoke the same, but the front mount is reconfigured and the torsion tube is notched a just little to clear the nose cone. It all fits quite nicely just like it did before, with the engine still in exactly the same place.

Edit- And I see you've already answered James' question, Ted, with a comparison pic and everything. And it sounds like your torsion tube clearancing was way more civilized than mine...

Last edited by ALB

just a bit of berg 5 speed insight.  Gene made a few versions of the five speed. The design before the present one used a stock nose cone and you were able to mount the trans with a stock mount.. the current version has a new intermediate housing and nose cone which does not accommodate a stock mount therefore the berg 5 mount is required. Also if you purchase a new berg 5 version  mount, ask for the front mount to come with the alum spacers rather than the cheap rubber studded ones

happy new year!

Gordon Nichols posted:

Now that we're back to the 5-speed and if any of you folks are considering making the leap to a 5-speed and want a used one from a front-corner-crashed 912, @Matt Berry has a front-shift 901 available from Carl's stash.  You can PM him on here for more info.

If your car is irs this is a great way to go. Where's Stan- will this fit in a newer IM?

Last edited by ALB
Rusty S posted:

I like how the transaxle mount is adjustable.

It's not really adjustable.  What you're seeing is a "Stiffy" Kafer Bar from @coolryde.  It went in a few years back. The bars can be set up for different amounts of pre-load and all of that.  I didn't bother.   I just made sure they were tight and that each bar was equal length.  

I'll get in there this week and tighten everything down.  Next up will be the stainless fuel lines, a fuel pressure gauge, and a few other do-dads. I keep contemplating sending the long block to Ken Jansen and to have him swap out the heads for a pair of the Panchito's.  That's more of a distraction at this point. Not sure I need them.  

@TRP wrote- I keep contemplating sending the long block to Ken Jansen and to have him swap out the heads for a pair of the Panchito's.  That's more of a distraction at this point. Not sure I need them

Refresh my memory, Ted- engine specs? I do remember it's a 2 liter of some sort- cam/rockers? how high is redline? what heads are on it now? IIrc, 44IDF's and 1 1/2" sidewinder? compression ratio?

Unless the heads on it now are seriously holding it back, I don't know if you'd notice enough difference to be "worth it"?

And that's all a kafer/truss bar does, is hold everything in place. Tran/engine should be level, with maybe the smallest bit of pre-load on each of the rear bars. Al

PS- remember, I want to hear what you think Immediately after your first drive!

Out with the old. In with the new!

AC Industries wide 5 front discs and Rear stock spring plates - GONE!

CSP front discs and Sway-A-Way Adjustable rear spring plates - installed!

Shaved off about 10lbs off the front.

Waiting on the new shocks. Also installed drop spindles so i can raise the front beam back up to stock ride height. Hopefully regain some ride comfort.

20180220_16410820180220_164220

Considering installing a residual valve for the rear discs. One project at a time.


Attachments

Images (2)
  • 20180220_164108
  • 20180220_164220

I didn't like the press fit studs offered by AirKewld. I would love a set of Kevin's brakes but the way the hub attaches to the disc requires those 5 raised nuts on the hub face. Might look  great for a custom car but they would prohibit me from running drum skins. (sad trombone)

The other upside is that the CSP's are MOT compliant. (grabbing at straws here)

@Troy Sloan - Do you need a complete set of AC Industries Wide 5 front discs? (calipers, brackets, discs, pads, new front lines etc.)

Interesting, the pressed in studs and thick flange sold me on Airkewld. My old CSP brakes are now on Lenny's Spyder as he converted to wide5. Looks so much more the part now with the Vintage 190 wheels.

Airkewld brakes do have their problems, and the front install wasn't easy. It required some machine work on the seal area and the grease cap. Everything else went in fine. I will add that the CSP solid rotor brakes are DEFINITELY 3/8" to 1/2" narrower than Airkewld. My new car has a 2" narrowed beam to keep the tires under the fenders.

I don't think it's possible to have stock track width with a ball-joint drum spindle and a wide5 conversion. Lowered or king pin no problem I believe.

Okay! Long overdue update:

  • Ridetech shocks are all installed
  • CSP Brakes are installed
  • 5 Speed installed (we covered that)
  • Stainless steel fuel lines and pressure gauge installed on the motor
  • Installed new clutch disc (the old one was fine, but the motor was out... so...)
  • New oil filler installed (brushed aluminum) 
  • Polished aluminum alternator has been scuffed down to look more brushed aluminum 
  • Removed the 'Santana Style' degree pully and replaced with 'OEM style' black degreed pulley.
  • Removed silver alternator pulley and replaced with black oem style pulley  
  • 2" drop spindles installed
  • New outer tie rod ends
  • Adjusted select a drop to the highest setting
  • Rear spring plates & bushings replaced
  • New stainless rear lines with banjo fittings

What's left:

  • Adjust valves
  • Clean up motor tins
  • Relocate Setrab
  • Install motor
  • Double check all of the nuts and bolts
TRP posted:

...I would love a set of Kevin's brakes but the way the hub attaches to the disc requires those 5 raised nuts on the hub face. Might look  great for a custom car but they would prohibit me from running drum skins. (sad trombone)


You mean you passed up the Coolstop brakes so you could keep the drum skins?

ALB posted:
TRP posted:

...I would love a set of Kevin's brakes but the way the hub attaches to the disc requires those 5 raised nuts on the hub face. Might look  great for a custom car but they would prohibit me from running drum skins. (sad trombone)


You mean you passed up the Coolstop brakes so you could keep the drum skins?

Yup. As odd as it sounds, I really don't like the look of the Coolstop brakes with the 5x205 adapter. On more of a custom car, they are amazing. But for a vintage car trying to retain its original look and feel, they are very busy. Ultimately they detract from the classic look of the wheels without hubcaps.  In retrospect? I'm not sold that the AC Industries kit vs. the CSP kit was worth the price difference.  


Add Reply

Post Content
×
×
×
×
Link copied to your clipboard.
×
×