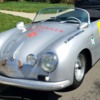
I'm bored so the Speedster is on jack stands.

I want to install driving lights but my car, being the Outlaw persuasion, has no bumpers or bumper mounts. It do have a anti roll bar so that I can also drive it rather than just enjoy the body lines.  I will need bumper mounts to support the lights.The valance at the front of our cars is the thinnest part. I seem to remember the CMC cars were thicker.

Most of us are aware that the available mounts are not compatible with the usual sway bar and the usual modification looks too flimsy for my liking. What I really would need is the sway bar I built for the Spyder, but don't want to go to that trouble.

I've scratched a bald spot on my head trying to come up with a reasonable solution.

Got any ideas?

One other thing...with the front wheels clear of terra firma are the axle arms at their absolute lowest possible position?

Last edited by Jim Gilbert - Madison, Mississippi
Original Post

Replies sorted oldest to newest

This is what I did for a front bumper support that will clear the sway bar.  I also let it extend down enough to attach beam supports that bolt to the pan.  

Front bumper support1

1 1/2" x 1 1/2 x 1/4" angle attached to the beam with U-bolts.


Front bumper support2

2" channel and 1/4 x 2 1/2" flat bar welded to the angle at a 5 degree angle to support the bumper brackets.  The two bolts at the end of the flat bar are attaching the bumper mounting brackets.

Front bumport support3

The rod ends on the bottom are the beam supports that run back to mounting holes on the pan.  Also, I added a few extra holes to the flat bar for other things like the horn brackets, etc.  This drawing will give a few more details, but the dims may be different for your car.

Capture

Attachments

Images (4)
  • Front bumper support1
  • Front bumper support2
  • Front bumport support3
  • Capture

Wolfgang, I just don't like look of that mount. It's  cheesy. I know that's what the CMC came with and I installed them on the Speedster I built in 1980. I didn't like them then.

James, I was looking into something like you did. The more I fooled with it the more it began to look like a bridge. The lights aren't heavy but I don't want them flopping around left to right. Need to connect the two mounts together near the front of the body; there's the bridge.

I'll keep scratching.

Thanks

...

James, I was looking into something like you did. The more I fooled with it the more it began to look like a bridge. The lights aren't heavy but I don't want them flopping around left to right. Need to connect the two mounts together near the front of the body; there's the bridge.

I'll keep scratching.

Thanks

Jim, one of the purposes of the extra holes that I mentioned drilling in the brackets was to add an aluminum tie bar across the brackets just behind the front valance.  

Who said you have to use bumper mounts for driving lights?

That's a buncha Whooie!

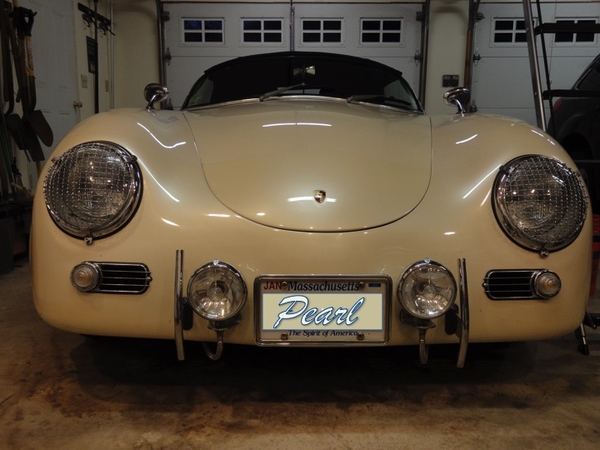
Just make up some brackets from Stainless Steel and bolt them to the body.  I happen to have the bumper mounts for my Nerf bars, but if you don't have the bumper mounts (and I applaud you not having them), try something like this:

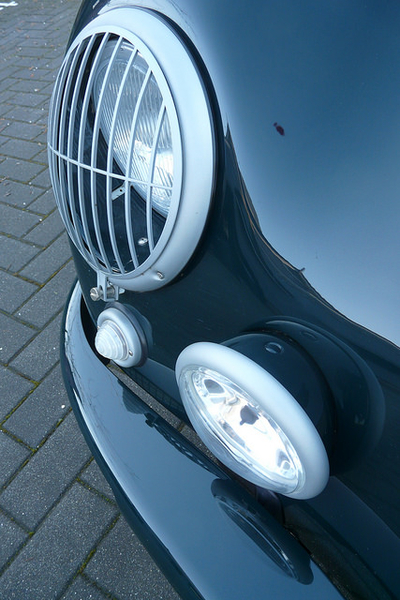
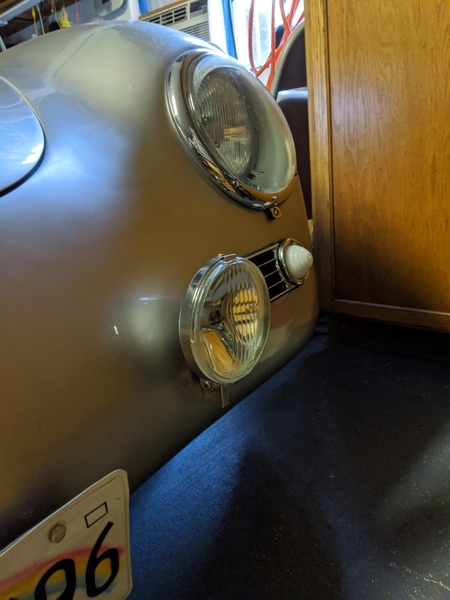
The bolts are stainless 5/16" carriage bolts and the holes in the brackets are large enough to accept the square bases.  Look close and you'll see the mounting gasket, made from a piece of truck inner tube.  The bracket material is 1/4" and I admit is overkill but I wanted zero vibration when the lights are on.  Sure got that!   3/16" thick would be a bit easier to work - Stainless Steel is hard and tough.

DSC01019

Like the stainless woven cover for the wires?  Home Depot Plumbing dept.  Kitchen faucet or toilet water feed happens to be the same threads as a Marshal light base.

DSC01020DSC01021

Yeah, I know.....These are enormous Tungsten bulbs.  They've been replaced with Halogen H3 versions for much brighter light and a 2-lane-wide spot out at about 1/4 mile (which would be good for spotting alligators, right?).

DSC01022

Trust me - These things are RUGGED!  Like something ROLM Electronics would make for the Military.  But they show zero light jiggle when the driving lights are on.

DSC02215

I would suggest using those spiffy, wedge-shaped aiming washers that come in the box with Hella lights (sadly, Marshall hasn't quite caught up yet).  They make dialing them in for a spot down the road super-easy.

DSC02216

Pearl Front

Attachments

Images (7)
  • DSC01019
  • DSC01020
  • DSC01021
  • DSC01022
  • DSC02215
  • DSC02216
  • Pearl Front

Gordon,

I like your installation! I'll definitely use your plumbing parts.

I just feel like I need some structure to support the lights. I'm concerned about paint cracking. We do have the occasional, unavoidable, pot hole. The fiberglass at the valance seems to be only about 1/8" thick.

After looking at everyone's photos and comments, I think I have come up with something workable.

Thanks,

Hi Jim, here's what I did on my old IM outlaw. I bought some aluminum bar stock and cut holes in the bumper area that matched up with the front end supports. I bolted the bar stock to the front end supports, ran wires through small holes next to the support holes and attached the driving lights to the bar stock.

Polished bar stock through the bumper area

IMG_20200811_183322

A view from underneath

IMG_20200811_183355

View of other side

IMG_20200811_183408

Bar stock attached to front end support

IMG_20200811_183426

Attachments

Images (4)
  • IMG_20200811_183322
  • IMG_20200811_183355
  • IMG_20200811_183408
  • IMG_20200811_183426

I have some original Lucas driving lights such as these.  They still work after all these years.  After years of Lucas electrics in British sports cars, I don't remember any real issues. At least not many more than what I read on this site about poor grounds, burnt fuses, etc.  

I do believe the Prince has been maligned all these years by jealous and envious forces...

Who said you have to use bumper mounts for driving lights?

That's a buncha Whooie!

Just make up some brackets from Stainless Steel and bolt them to the body.  I happen to have the bumper mounts for my Nerf bars, but if you don't have the bumper mounts (and I applaud you not having them), try something like this:

The bolts are stainless 5/16" carriage bolts and the holes in the brackets are large enough to accept the square bases.  Look close and you'll see the mounting gasket, made from a piece of truck inner tube.  The bracket material is 1/4" and I admit is overkill but I wanted zero vibration when the lights are on.  Sure got that!   3/16" thick would be a bit easier to work - Stainless Steel is hard and tough.

DSC01019

Like the stainless woven cover for the wires?  Home Depot Plumbing dept.  Kitchen faucet or toilet water feed happens to be the same threads as a Marshal light base.

DSC01020DSC01021

Yeah, I know.....These are enormous Tungsten bulbs.  They've been replaced with Halogen H3 versions for much brighter light and a 2-lane-wide spot out at about 1/4 mile (which would be good for spotting alligators, right?).

DSC01022

Trust me - These things are RUGGED!  Like something ROLM Electronics would make for the Military.  But they show zero light jiggle when the driving lights are on.

DSC02215

I would suggest using those spiffy, wedge-shaped aiming washers that come in the box with Hella lights (sadly, Marshall hasn't quite caught up yet).  They make dialing them in for a spot down the road super-easy.

DSC02216

Pearl Front

LOL, Gordon. I've been working for three years to get all the HomeDepot plumbing hardware off of my Spyder.

@dlearl476

The trick with the Home Depot stuff is to be discerning.  I have very little HD stuff left on my car, but those driving light wire conduits just look like they belong there.

The stainless steel plate I used was a fabulous idea, right up until I started to try cutting and bending the stuff - Especially that thickness.  I have since learned that Stainless Steel is alloyed with other stuff - like overly starched shirts - to make it amazingly friggin stiff.  I tried a propane torch on it and it laughed at me and refused to bend, even clamped in my 1940's vintage 8" jaw, 80 pound bench vise.  I upgraded to a Bernz-O-Matic TS-8000 MAPP gas torch and only got it to bend a teeny bit (with one helluva lot of effort), so I broke out my "Big Mother" oxyacetylene set with a "Fireball 5000" blowtorch tip.  

Igniting that thing is an adventure in itself, as you start with pure Acetylene which emits clouds and clouds of stringy, coagulated smoke that eventually settles and gets all over everything in the shop, but once you get a flame you increase the Oxygen from zero and advance the Acetylene and the Fireball 5000 takes over and emits a flame/fireball that's about 2 feet long with a roar like an F-4 Phantom jet on steroids.  Give it just a little too much Oxygen and it flames out with the bang of a 16 gauge duck hunting shotgun (always exciting in an attached garage/shop with your wife quietly sewing on a quilt on the other side of the wall).  Once you get a decent fireball going, you chuck up half of that flat driving light mount in the vise and within seconds the exposed half was soon blazing a bright orange and ready for bending.

It was obvious that the screwdrivers I had wedged into the vice for bend leverage would not be sufficient to bend anything other than wet cardboard, so I resorted to the only thing left in my tool box that might work - My Big, F-in, 3-pound hand sledgehammer and began whaling the Pi$$ out of it.  After several episodes of heating, hammering and repeating I got it to a 90 bend, only to find that that part of the body is far from straight up and down (oops...), so I had to re-heat and re-hammer in the opposite direction to get it to open up a little to get the lights aimed more-or-less straight ahead, not up into the sky as aircraft landing beacons. 

THAT is why I recommend using those little wedge-shaped mounting washers that Hella shipped with their lights.  They allow you to aim the lights in any direction and angle them up and down super-easily.  You use two and the wedges allow tilting in any direction so you can dial them right in (although Mike Pickette's bumper mount jobbies look pretty aim-able, too).  

Once I got the angles dialed in, I sanded the back sides for a while with various grit sandpaper to remove most of the hammer blow marks (none of which are visible from the front) and the vise jaw marks and semi-polished them as best I could.  They shined right up and look great and nobody notices the imperfections but me.

Anyway, good luck with your mounts.  I have a piece of truck inner tube rubber between the body and the slightly curved vertical back (to kinda-sorta mimic the curve of the body) but do not use a backing plate on the back side of the body.  I never thought it needed one with the three bolts AND the somewhere between 3/16" and 1/4" thickness of the mount material.  I got the stainless steel from a metal salvage yard and they couldn't tell me from whence it came, only that they had a hell of a time cutting the stuff and had to use a carbide wheel.

Gordon you've gone on about these brackets several times before, but never ever do I recall having heard about the three levels of torch heat you applied. The insanity of that. The sweat of it.

I love that story. It so well illustrates the frustration and triumph inherent in owning these cars (for most of us; @MusbJim excepted). That a simple thing that hardly anyone would notice took all those hours, at risk to life and limb!

I want everyone to describe in this level of detail the steps it takes to deal with the needs and wants associated with these vehicles. It's a timely reminder that, IRL, there are material things. Things that won't bend. Things that will break. Things that can't be fixed by choosing from a drop-down menu in your web browser, or even by rebooting your computer. 

The people who post here understand, but I think there are whole generations of people who really don't.

Post Content
×
×
×
×
Link copied to your clipboard.
×
×