needs update.
Wiring...? Wow.
Dude we're neck and neck. Can't wait to see the start-up vids of this puppy.
Impressive, Carey! Good for you, Anand, that is sweet!
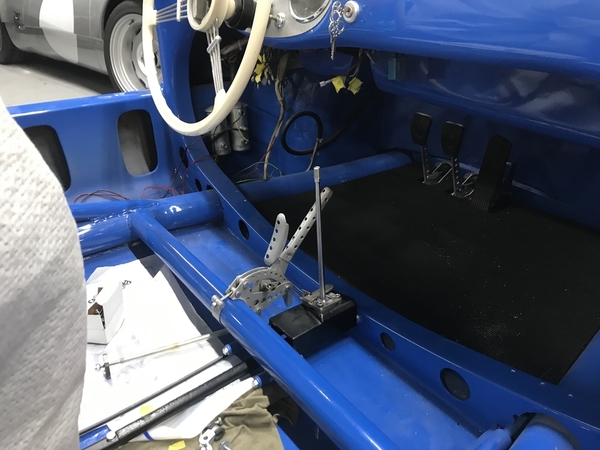
I LOVE that handbrake!
I love that he has the correct frame cross member to mount that handbrake. (I actually considered adding one on my build but talked myself out of it).
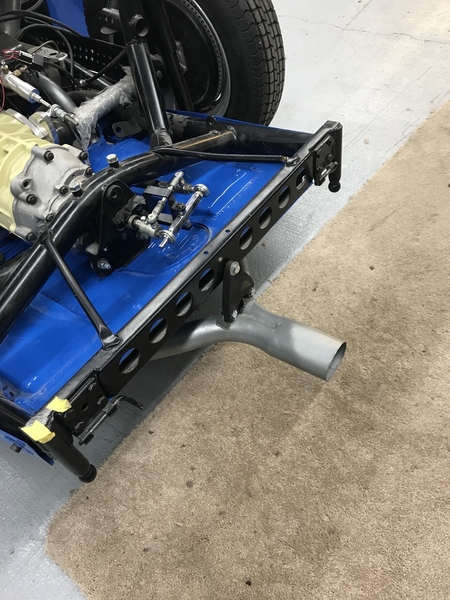
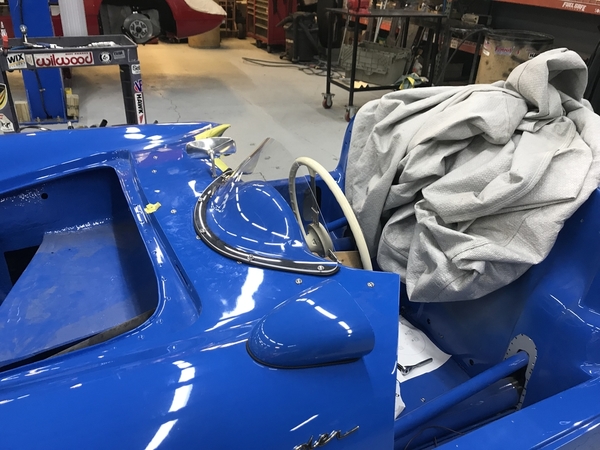
Carey added some new 4 cam style air cleaners from Vintage Speed, installed my single plexi windscreen (no one is a fan except for me!), and re-installed my Sebring-style exhaust.
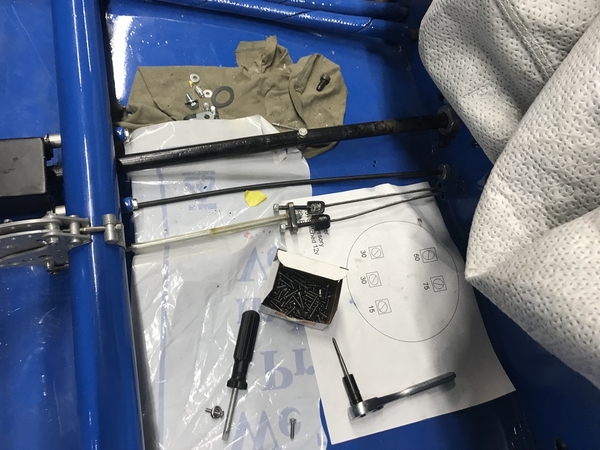
Crank trigger wiring is likely next, followed by re-installation of the front hood and doors!
Attachments
No passenger screen?
Marty Grzynkowicz posted:No passenger screen?
Anand says it has rivnuts across the cowl so he can have both the small windscreen for driver and passenger. He also has the ability to have the full windscreen. If you look at the photo you can see the rivnuts going all the way across and in front of the passenger area.
Attachments
Love the mono screen. Just the thing to pair with the hard half tonneau.
Got me a set of them Knecht knock-off air cleaners too, as seen on several real Spyders and many 356 Carreras. Surprised you didn't spring for the OG four-bolt style!
Nice. I like it all.
@arajani love the single windscreen, along with everything else about your Spyder.
Great job.
@Kevin - Bay Area, @Stan Galat, @edsnova — glad you guys like the progress! Yep — the single plexi can be changed for a full length one as Robert mentioned. The flexibility is nice, but driving with the single plexi and a hard tonneau really makes the car look cool.
These air cleaners are from Vintage Speed — I chose them because they accept a standard EMPI filter inside that can be cleaned. The original KNECHT ones are made for Solexes and don’t really filter the air that well. The 4 bolt Carrera ones that Ed is alluding to change hands for ridiculous sums, so I thought it better to use these.
Hopefully there will be more photos soon! Carey should be back on it Monday.
Anand
Attachments
When you can mix looking good and practicality it's a win win. Of course, this whole car is a win to the tenth, and then some.
BTW, what are you doing for a fuel tank??? That's one of the things on my list.
If ever I'm somewhere and someone wants to get a tour of my car, and I'm feeling like it, I avoid showing them the frunk. Mine looks so cheese wiz.
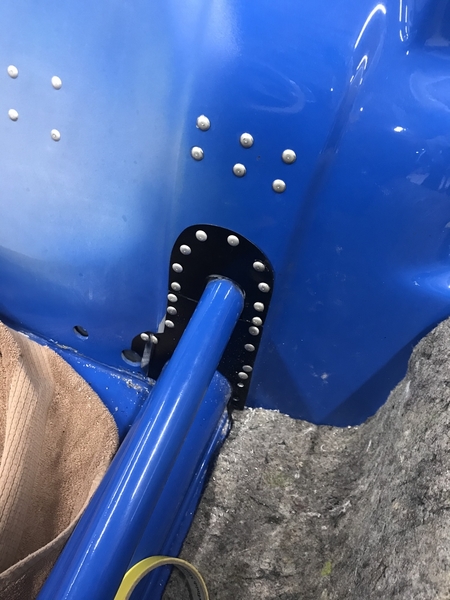
It's gonna be killer, Anand! And I'm lovin' the holes in the emergency brake handle, and bulkhead, and frame rails... Al
Thanks Al! It’s coming together nicely. Honestly, I am most excited to hear the engine start. I don’t think it’s that far off! I’ll definitely post a video of that one!
Now that's what I'm talking about!
That's worth opening the frunk to gawk at.
Very legit tank, Anand. Carlos, I think you saw what I did with my car's fuel tank. If you're interested I can show you how or, for reasonable scratch, make one for ye.
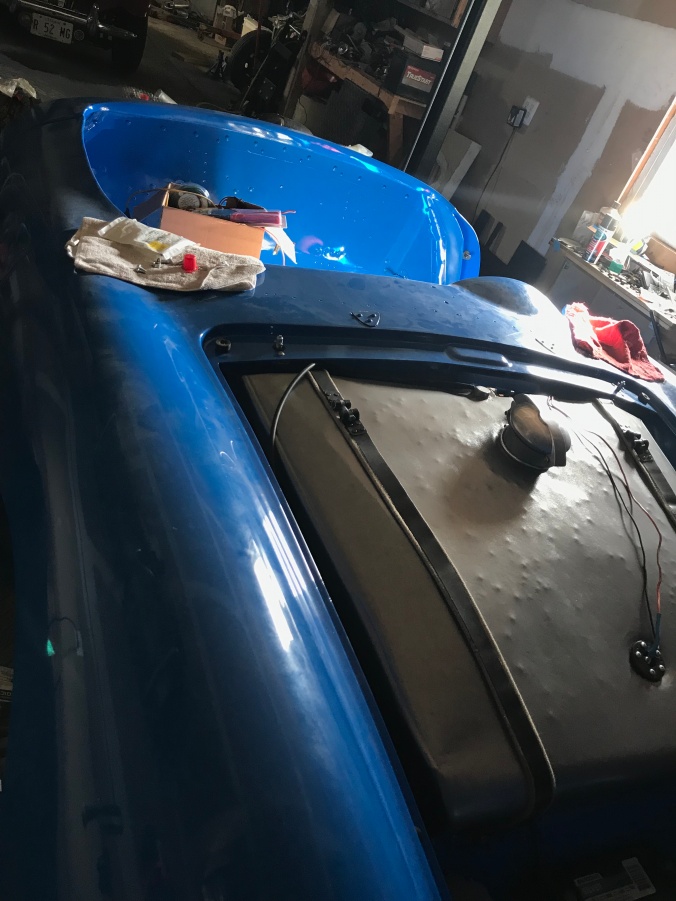
Carey is currently going through the rest of my wiring harness, as it was in total disrepair. Quite a tedious job, but he’s getting it done. After that, he’ll finish the plumbing for my brakes, the fuel system and then he’ll get the fuel tank back in.
It looks simpler than it is, I suppose! Everything takes time.
More to come!
Anand
I started out with the wiring harness from my donor '69 VW sedan and then added a bunch to it for the other stuff I wanted.
A great deal of hair-pulling ensued.
Very similar process to what Carey's elves are most assuredly using on your harness (but I had the advantage of an official VW wiring diagram that was, at least, accurate for the original stuff).
He/They deserve at least a case of really good suds for their efforts. ![]()
Can confirm...wiring takes more time than you planned on.
Ditto that, Ed
@edsnova Thanks for the offer, but my wanting a better tank isn't just about looks. I want to increase capacity, and remove that scrotal bump that you removed.
Well, the plots thickens.
As usual, progress has been ensnared by the discovery of yet another example of poor craftsmanship by the previous builder of my 550.
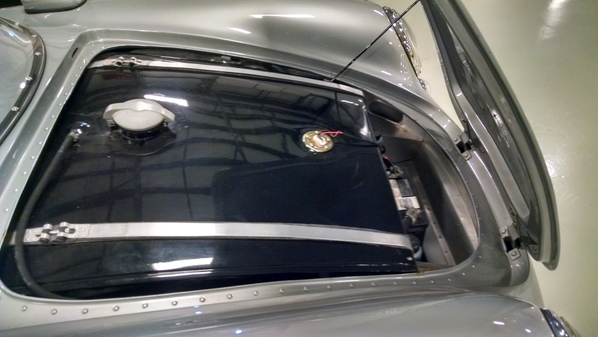
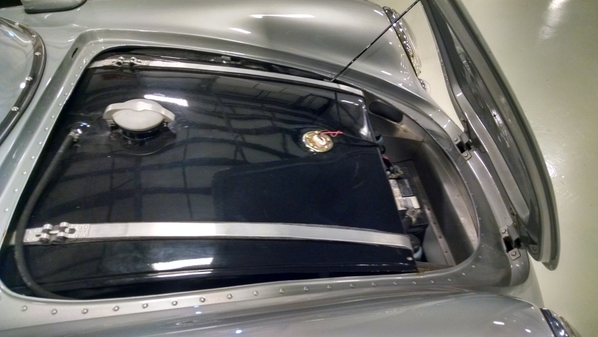
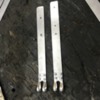
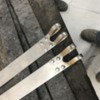
Carey was in the process of re-installing my fuel tank with the illustrious Randy Beck when they realized that the straps that secured it were thin pieces of aluminum that had been welded together. Carey (and Randy) used a few adjectives to describe it, but I can’t post those words here. LOL.
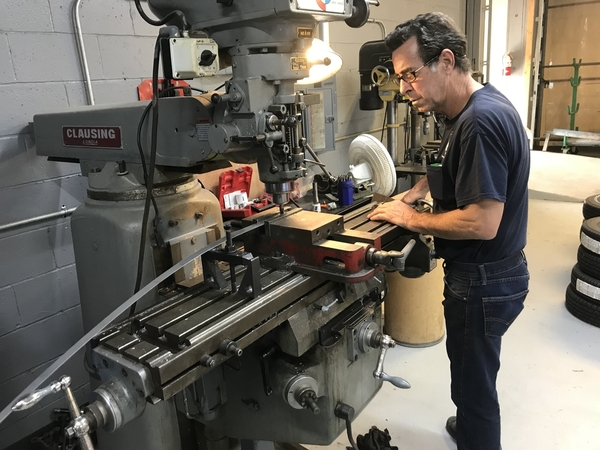
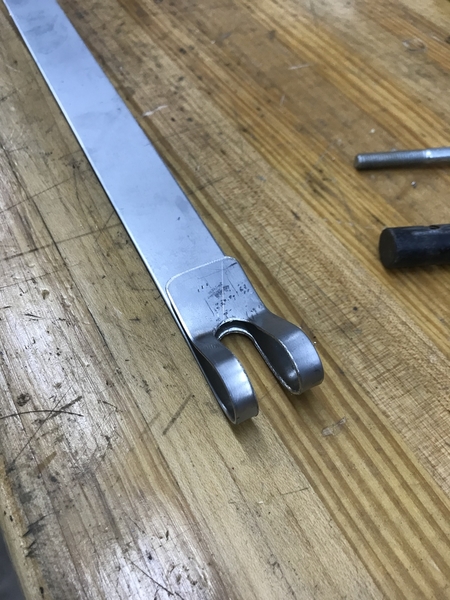
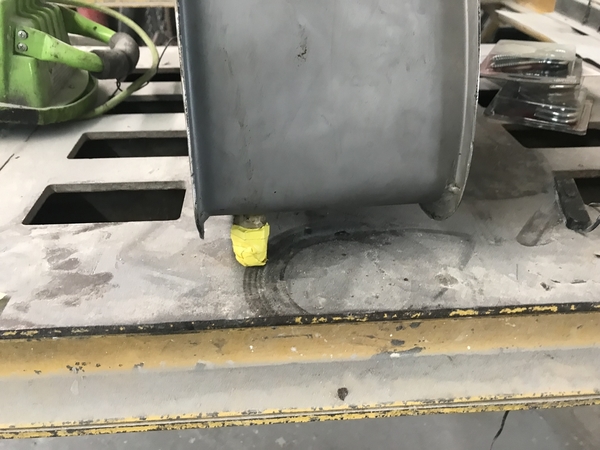
Carey and Randy immediately sheered some stainless, milled grooves in it, and are remaking the straps. If you haven’t already been convinced by the contents of this thread, no one can beat Carey Hines in the world of customer service and fabrication. Period!
Old straps...
High quality welding work below from the SoCal shop that fabbed this tank 🙄
Randy Beck making things happen
New straps!
Attachments
I took a lot of photos of the 1956 Porsche 550 [550-0075] owned by Nick Clemence of European Collectibles in August. I'm sure you all have a number of photos of 550's, but I'd be more than happy to share what I have.
Attachments
Amazing photos, Kevin! Thanks! I’ll pass them on to Carey...
Anand
I bet @edsnova would be interested in your whole set of photos, too.......
Those are sweet. The originals were steel, I think. Stainless is better.
I bought a roll of one-inch steel packing strapping and cut and riveted my own.

 Painted them black at the end.
The padding is supposed to be "natural fiber," per The Spyder Factory. I bought a couple inch-and-a-half cotton belts from Sears. Close enough.
This thing is SO the balz.
Every time I see this it makes me all tingly.
Naaaah......... It's probably that your Meds are off.
see a neurologist(if U have the nerve):}
IaM-Ray posted:Lane Anderson posted:Every time I see this it makes me all tingly.
I know, Ray. I know. ![]()
Must be Canadian humor, because all I see is what looks like a female elf asking a girl on a date. Kinda weird, ya know?
Sorry It reminded me of this humorous part of this movie Lane, it is a clip that he says how he gets all tingly and his tongue swells up. ![]()
I was kind of expecting the Church Lady from SNL.
That's supposed to be a HE?
Is his name Pat?
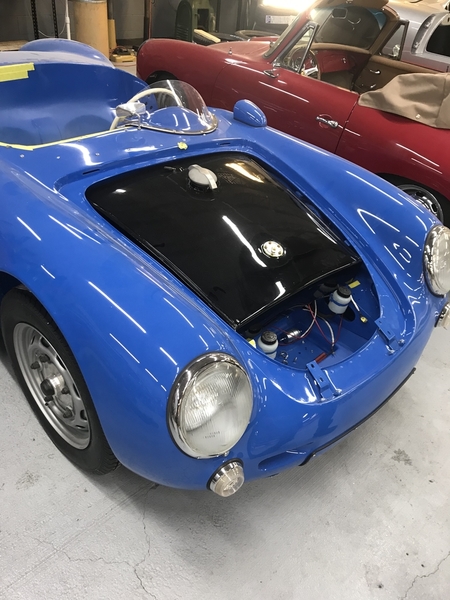
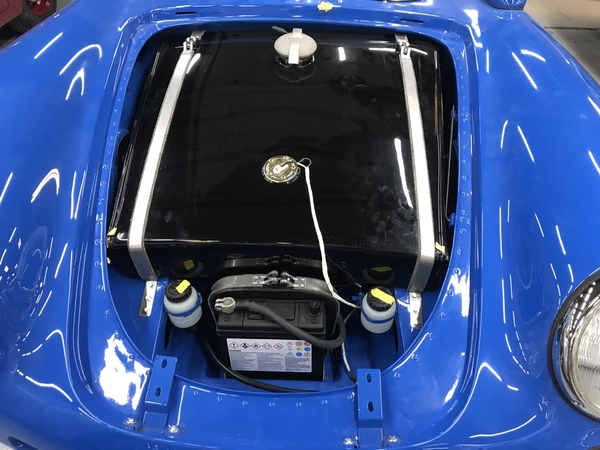
Carey welded in some supports to keep the tank from sagging. He attached them to the front beam and added some forward bars to attach to the straps and also support the front of the tank. It turned out nicely!
Oh — and I got new brakes lines! ![]()
Now I need a battery, a battery strap, and the front hood.
Getting there! I have no idea what’s next on the list.
Attachments
Holy Smoke!
How big is that tank?
@Gordon Nichols...it is 90L — just a touch bigger than the racing tanks used in the 356 GT cars!
2.5x what then rest of us fakey-do Clown Car aficionados get.
You'll be able to drive to SF and back without refueling!
@edsnova — True that I can drive for a while — the problem is, there’s no place to store anythingn on a long trip! Typical race car.
The more Carey and I go through this car, the most I understand why Chuck Beck did the things he did to his replica. The VW tank is readily available, smaller and allowed for some storage. The 3” longer chassis allowed for a dual circuit master cylinder (you can’t fit one in a regularly sized 550) and for a bit more cabin space. The cowl from a Speedster allowed for a safer glass windshield option.
Anyway — Carey tells me he’s going to do the following next:
1) Battery
2) Crank trigger wiring
3) Installation of the breather
4) Oil lines
Hoping to hear this thing fire up in the next 1-2 weeks!
Anand
Heh. You guys are doing a great job. Everything has a trade-off, eh?
Mike
I made mine that way...
arajani posted:@edsnova — True that I can drive for a while — the problem is, there’s no place to store anythingn on a long trip! Typical race car.
The more Carey and I go through this car, the most I understand why Chuck Beck did the things he did to his replica. The VW tank is readily available, smaller and allowed for some storage. The 3” longer chassis allowed for a dual circuit master cylinder (you can’t fit one in a regularly sized 550) and for a bit more cabin space. The cowl from a Speedster allowed for a safer glass windshield option.
...
Anand
Also, isn't Chuck like 6'2" or something? I thought he was pretty tall, and stretched the car, in part, so he could drive it.
Kevin is at least 6’2”, but Chuck is not a big guy at all. In fact, if he’s 5’6” I’d be surprised, and he can’t be over 140 pounds. I’m very happy that he takes us larger folks into consideration when he’s designing cars.
Ah, good to know (I have met Carey and know he's tall).
Had my 6-1 neighbor sit in my car's driver's seat today. With the seat back all the way (or maybe only almost all the way?) he fits fine and his eyes are below the top of the windscreen.
It's a whole thing getting in there tho...
edsnova posted:Ah, good to know (I have met Carey and know he's tall).
Had my 6-1 neighbor sit in my car's driver's seat today. With the seat back all the way (or maybe only almost all the way?) he fits fine and his eyes are below the top of the windscreen.
It's a whole thing getting in there tho...
I bet. I found myself having to put my right knee under the steering wheel on my IM because if I put my foot under there first, my knee hit the steering wheel on the way over. After restarting my entrance a few times, I found that I could just press down the clutch to get enough room to swing my knee to the right side of the seat. I can imagine your car is even tighter...
I usually have to get in my Beck when the top is down, by placing my right foot on the right of the steering wheel and then putting my butt on the top of the seat, then sliding down the seat. That used to be ok but I just got my car back from Indiana and they placed the Suby ignition system(?) behind the drivers seat and that keeps the seat from going back to where it was before. ( redrilled the seat tracks when I first got the car.)
New member here. I just placed my order with Carey for a Spyder and got to take a look at Arajani's car. Was in the shop yesterday and it looks great. I live in Granger IN, just a bit north of Bremen, so I'm pretty close. The wait may kill me though.
Bald54 posted:New member here. I just placed my order with Carey for a Spyder and got to take a look at Arajani's car. Was in the shop yesterday and it looks great. I live in Granger IN, just a bit north of Bremen, so I'm pretty close. The wait may kill me though.
Hopefully they explained to you how highly modified, customized, and personalized Anand's car is and for that matter money-fied. A normal Beck Spyder is a lovely thing in its own right but you can't compare it to Anand's car. Welcome and start a new thread so we can follow your build process.
Welcome to the Madness. @SJackson!
"money-fied" interesting, most interesting.
IaM-Ray posted:"money-fied" interesting, most interesting.
money-fied = costs lots and lots of $$$$$
Yup, I got the full scoop on the car.
You're gonna like what you get from these guys.
@chines1 has been doing some amazing work on my Spyder! I just got these pictures. Feels like Christmas!
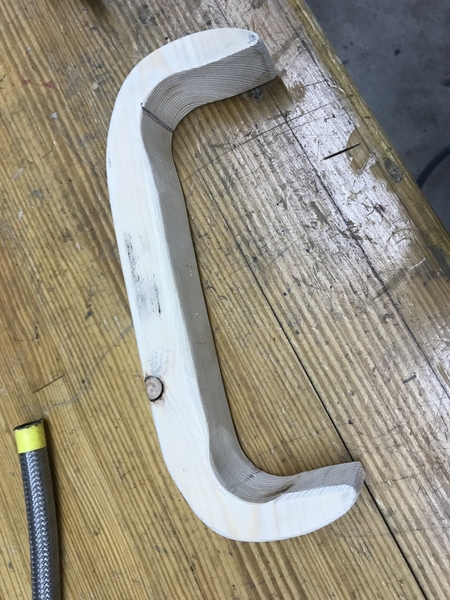
He refused to use the original battery strap, as it had clearly made contact with the previous battery (see photo!).
Instead, he made a spacer out of wood, and installed a new strap (and a new battery). He had a wooden spacer for the oil breather, too.
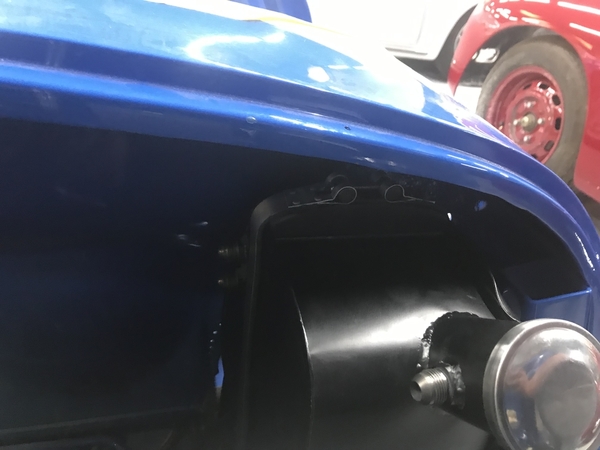
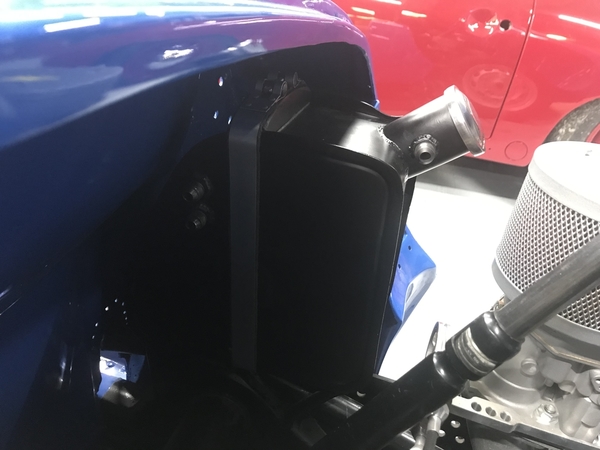
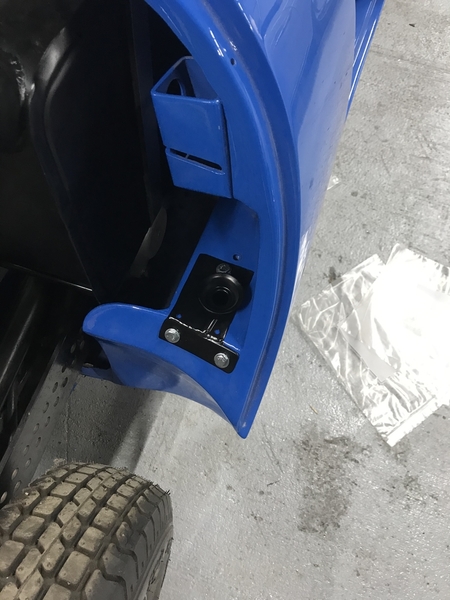
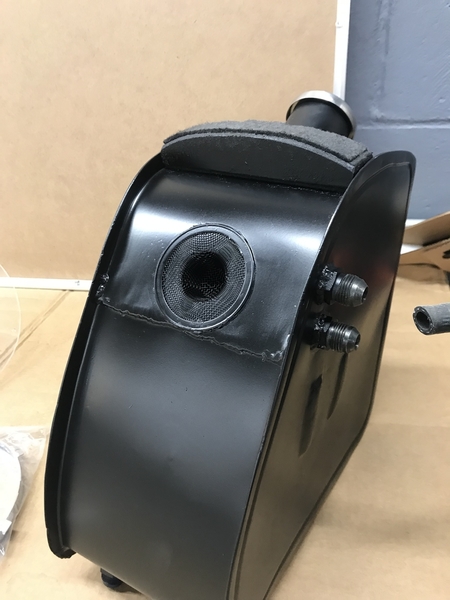
He also added new fittings to my oil tank, which we are now using for a breather.
Next up is the front hood, a Setrab oil cooler up front (where the original cars had one, behind that grille), and the engine wiring.
I'm hoping to hear that motor fire up this week.
Attachments
Outstanding!
Stan Galat posted:Dude.
x2!
Stan has such a way with words. By the way, that red Speedster next to Anand’s car is mine coming back to life. I’m hoping some of Anand’s car’s cool-factor will rub off on it.
Nice. You need that wood block on the battery, as originally equipped.
@Lane Anderson...poor guy. My car has been driving him crazy. He can’t catch a break.
Almost there!
Add note to folder... no more photos for Anand.
Lane Anderson posted:
arajani posted:@Lane Anderson...poor guy. My car has been driving him crazy. He can’t catch a break.
Almost there!
chines1 posted:Add note to folder... no more photos for Anand.
You'll notice his eyes are closed. I think he's been sleeping in the shop he's been so busy.
HE is taking a cat nap ![]()
IaM-Ray posted:HE is taking a cat nap

Or he's caught in the Spyder's web. Bwaa Haaa
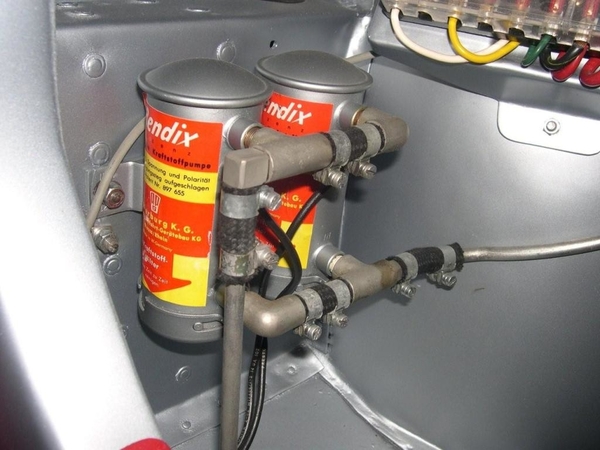
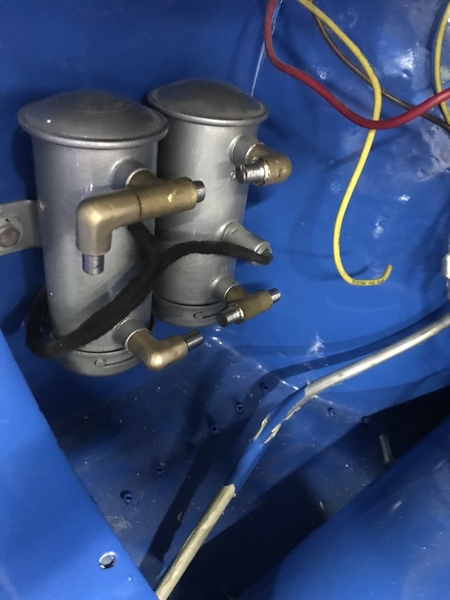
Carey has been working on my Bendix fuel pumps (just faux — we have a Redline to do the real work!).
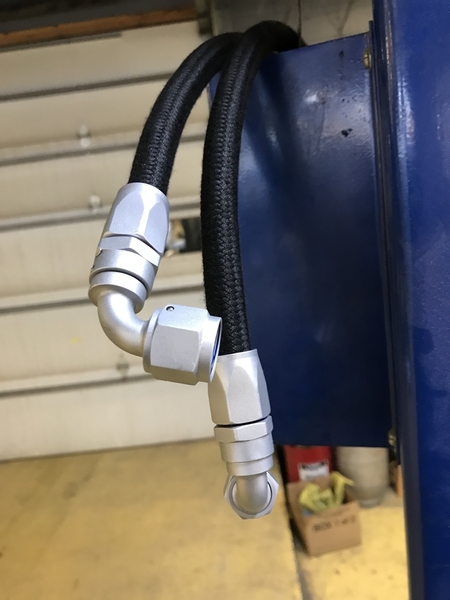
The first photo is from a real 550. Carey found brass fittings, but nothing like what they Germans used in the 50s. What did he do? Sanded, tapped, cut and glass beaded each one and made it perfect. This guy is amazing.
Braided hose, decals and clamps to come!
Attachments
Those look perfectly legit. Salute, fellow members of the Fake Fuel Pump Club!
I clamped a couple split fuel lines between my real fuel line and the Autopulse 500 inlets to complete the illusion.

vs:

Ya love to see it.
I think our friend Carey is having more fun than he lets on. Both Anand and Ed are going to have spectacular cars.
I invited Ron and Maddie to show their Spyder at next April's Cars on Kiawah show, and they plan to be there. I know one of the folks on the board, and connected them. I'd love to see either or both of you do the same. If you're interested, please let me know ASAP and I can put you in touch with folks who can get you in. Don't wait, though, as registration opened a week or so ago and it fills up quickly (limit 250 cars). BTW, I plan to have the new Beck Super Coupe there as well. there will be a large 356 contingent and we are going to be next to them. I know some of them and they're good folks.
Go to https://www.carsonkiawah.com/ for more info.
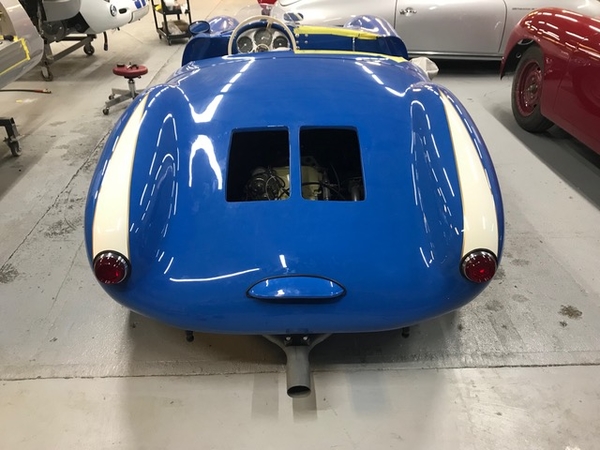
@chines1 ran into more bad workmanship with the plate light.
He took it apart and put all new parts inside it (including a better LED light) and got it mounted. Along the way, we realized the exhaust was crooked!
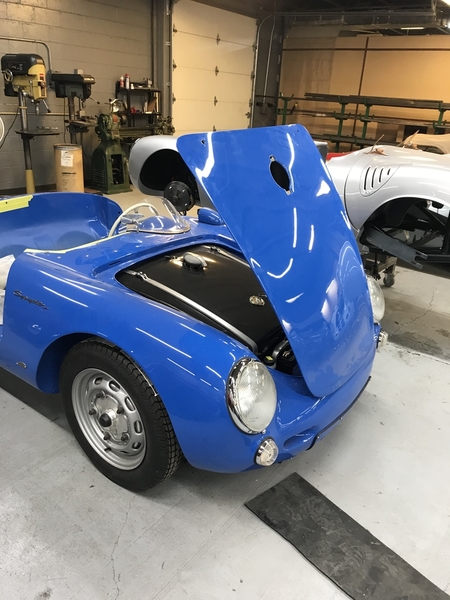
Carey is going to install the spare tire holder next, so he’s left the engine lid off.
He installed a new bracket to hold the engine lid up.
These receiving brackets were in bad shape, so Carey glass beaded them and painted them.
Getting there!
Attachments
Lane, I'm flattered that you mention my build in the same post with this one. And I'd love to show the car on a golf green in the spring. Only trouble is, every time I tell some show it'll be there, something happens (or fails to happen) and the car ain't ready.
Also, it's 10 hours from my house to the island. A bit of a stretch a month ahead of Carlisle. Sorry.
Anand: so great to see more progress. The "seat" Carey makes for you spare tire will certainly be more authentic looking than the one I hammered out of an old frying pan!
Ed Wrote: "Only trouble is, every time I tell some show it'll be there, something happens (or fails to happen) and the car ain't ready. "
I went through that with Pearl and my son, Chris (and so much for that "build it in 40 hours" Horse-Hockey).
I promised he could use it for his High School Junior Prom (didn't make it), then his Senior Prom (didn't make it), Then HS Graduation (didn't make it), then College graduation (didn't make it). Finally had it done so he could use it when they got married, which he did, only to have it shear a rocker arm shaft and die right after the posed photos were over. It looked mint for the photo session, though.... ![]()
And how many broken VW rocker arm shafts have you ever seen?
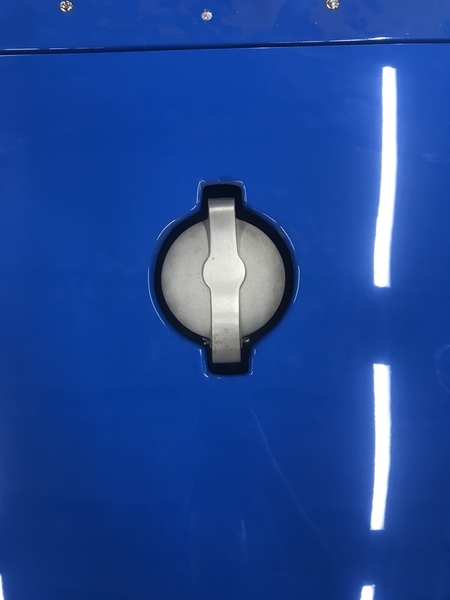
Super cool flip cap! (like everything else)
Those AN fittings: holy freaking cow they're gorgeous.
What Stan said X2.
That is a neat install.
Yeah that looks absolutely legit!
Everything on this car so far looks legit!
What is the screen for? Is that open to let breather fumes out?
That is the one thing that Henry said he would not do on my IM6 build - fabricate a centre fill gas arrangement. It is a lot more work than people think, especially on a Speedster. Lots of measuring, etc. as Carey certainly knows.
Looks great.
chines1 posted:@DannyP Yes, Pat said my -8AN breather wasn't big enough and he wanted at least -12AN so I said "eff" it and blew a 1" hole in the back of the breather can... just put the screen there to prevent anything from getting in.
If bigger hose is used then airspeed on the way up to the breather container can get slow enough that the oil starts falling out of suspension before it even reaches the can. Gordon found this when he went from 3/8 to 5/8" breather hoses on his car, which has almost 3 times the volume of 3/8" hose. The hose itself becomes a useful part of the crankase volume.
Soo...
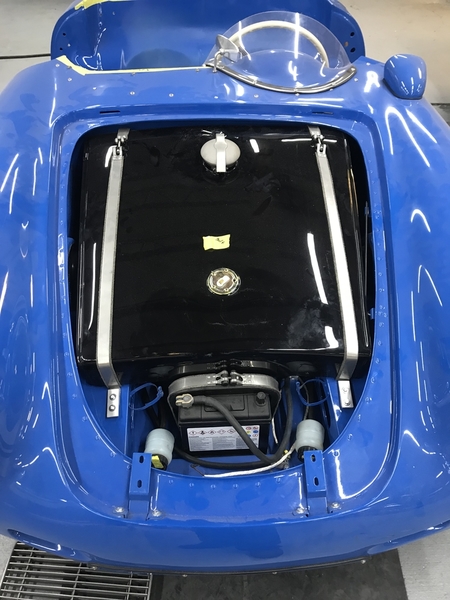
I've continued to drive Carey crazy. I had him repaint the tank -- the paint on it was terrible, and it needed some rehab anyway. Carey made it look perfect, as always!
Carey got it strapped back in, and then aligned it. FYI: The hood has been cleaned -- the rest of the car hasn't LOL
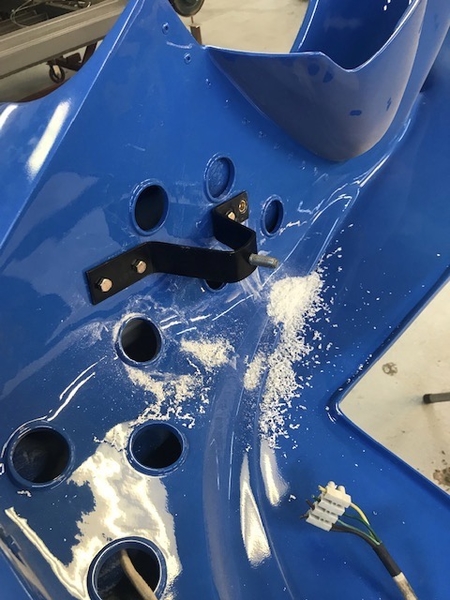
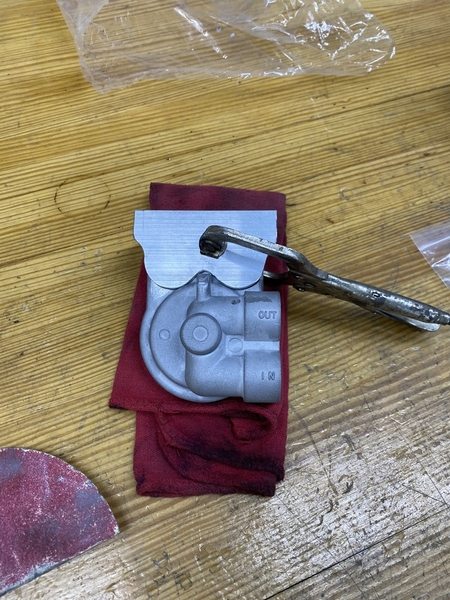
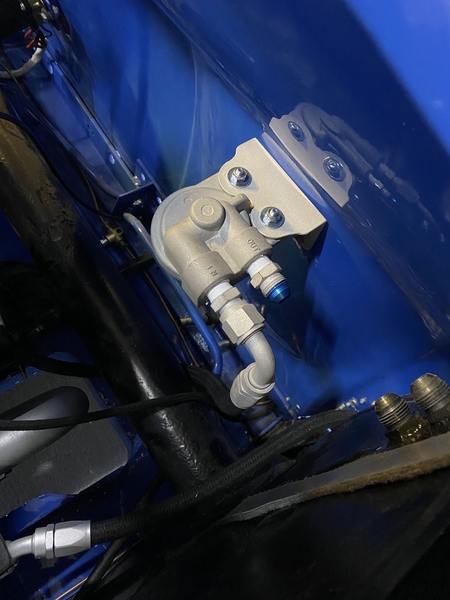
I then put Carey up to the task of making a mount for my fuel filter, just like the original car had (picture taken from Rainer Cooney):
Carey made a custom bracket. Absolutely awesome fabrication skills. The guy is amazing.
He went ahead and mounted the bracket for my voltage regulator, too.
The next step is to get some wiring sorted under the dash (quite an undertaking)! We're slowly getting there!
Anand
Attachments
Amazing amount of 'original' detail there.
![]()
Bob: IM S6 posted:Amazing amount of 'original' detail there.
Yes...beautiful riveting too. Those details are amazing. Congrats.
Every so often (although seemingly more often with cars on this site), you see a car that is a “Wow” car.
You are drawn over to it and make a slow lap around it, finding more things that make you say “Wow” as you drink in the workmanship and details.
Then, you draw your friends over (Hey! Look at This!”) and you make another lap around and find a few things you didn’t notice the last time, pointing them out to each other, each one making you say “Wow”.
Some (but very few) of the Hot Rods I see are like that, and the cars from the Ralph Lauren collection when it was last shown, and the cars up at the Spyder Factory, too.
I think both Anand’s and Ed’s Spyders in progress are turning out to be “Wow” cars. That is definitely not easy to do. It takes a lot of $$$ and even more in labor, applied with mucho TLC. Both of those cars are the epitome of “Building it like somebody cared”.
My hat is off to everyone involved with these builds. “Wow.”
Attachments
Well said, Gordon. Well said.
Ed builds cars in the same manner in which he digs for the facts in the articles he writes.
No detail is too small.
Both cars are fantastic, built in different ways.
I look at these cars and I can share in their build excitement. They look awesome.
You guys are a real inspiration. Beautiful vision and execution!
You guys have been referencing Rainer Cooney and the Spyder Factory from time to time, so I thought I would dig down into the Vault and show a video from just before the start of the Spyder Factory, back in late 2013. Rainer was just about to leave Meister Restorations (he still has a hand in it to this day, although less as time goes on and the Spyder Factory really took off) and head down the road (literally) to the gorgeous, 3-story, post and beam shop of the Spyder Factory, but he gave the local 356 club a tech session day at the old shop.
Here you go:
Nice! Great match on the filler cap.
Hoping we get to see this car at the West Coast Gathering this year. *hint, hint*
Kevin - Bay Area posted:Hoping we get to see this car at the West Coast Gathering this year. *hint, hint*
It will be there. Even if I have to bring it.
Looks amazing!
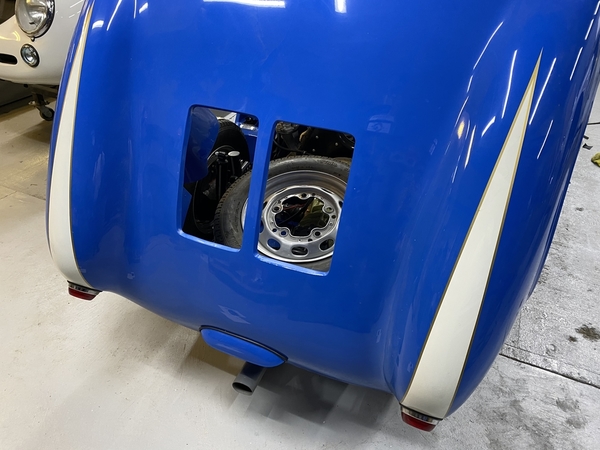
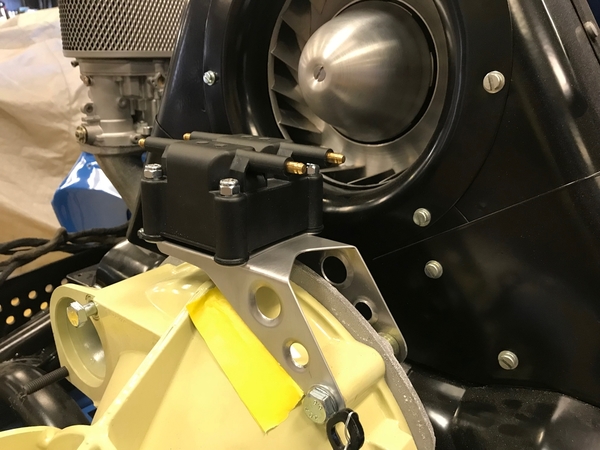
Carey sent me a few pictures of where my spare tire holder will end up. We had it moved up pretty far before, but this didn’t allow us space for my dry coil pack and mount (see last picture below!).
At least we know the tire fits with the rear engine lid on (we are learning the hard way about making any assumptions with this car — it has been unpredictable from day 1!)
Attachments
Assumptions is my favorite breakfast cereal, some in the morning always makes for an interesting day!
That coil bracket is sexy. That's some Project Binky level stuff, right there. Carey is killing' it!!!
@arajani wrote: "we are learning the hard way about making any assumptions with this car — it has been unpredictable from day 1!"
You sure that's a Beck? Sounds a whole lot like a CMC!
Interestingly, @Gordon Nichols, it isn’t a Beck at all (and that is the basis of most of our pain). It is a CMI body, which means all of the proportions are different.
As for the spare tire holder, the Beck frame has an integrated place for a spare. It is probably the 10th such item that we have “assumed” would work based on our prior experience with my last car (a Beck!).
LOL! Welcome to custom fabrication. Nothing fits, cut and try and CAD(carboard-aided-design) are the words to work by! Are you paying Carey enough, Anand?
I know you're not stingy. That's why my comment struck me as funny!
arajani posted:@DannyP -- I have a lot of faults, but being stingy is not one of them. With my last build, I actually asked Carey if I could pay him more...
I do think that some projects unintentionally go way beyond the original intent and budget especially when doing custom work and at that point you enter into the fog where it becomes hard to know what is needed to ask or pay seeing that neither of you want to take advantage of the other.
I personally have had that happen, and we were friends, so we met where we both would have no regrets and keep our relationship.
@IaM-Ray: Carey and I have that sort of friendship, too. In fact, there have been many opportunities for him to spend my money recklessly to get something done quickly, and in spite of my urging, he has not.
At one point, I actually owned 6 air cooled cars/trucks at the same time, and have slowly sold them all for a variety of reasons. The only car I care to keep is this 550, and that is largely because I admire Carey so much and think so highly of the work that he does. It will be a great reminder of our friendship to walk in to my garage and see it sitting there ![]()
Anand
It does get harder to drive all the cars and take care of all the cars, when you have more of them. I mean, even if your just taking them to your mechanic it takes time.
As to your friendship with Carey, sometimes when you get into a hobby and find a craftsman that you like, you develop a work/ friendship that can grow into a lot of fun. Glad you guys are enjoying the ride personally as well as car-oling or should I say Carbuilding ![]()
arajani posted:Carey sent me a few pictures of where my spare tire holder will end up. We had it moved up pretty far before, but this didn’t allow us space for my dry coil pack and mount (see last picture below!).
At least we know the tire fits with the rear engine lid on (we are learning the hard way about making any assumptions with this car — it has been unpredictable from day 1!)
That's dead-sexy Anand. I was gonna say about the spare tire. They need to be way back there to fit in the U space made by the clam's inner panel, and leave room for the coil(s). Carey & Co nailed it, as usual.
BTW the "seat" for the spare tire can be either bolted through a drilled edge of one of your trans ribs or (better, I think), fixed to a bracket spread over the tops of the side covers and bolted through one or two of those fasteners on each side. I think either is preferable to running a Beck-style shock tower cross tube (like mine has) and setting it on that (like I did). Your chassis has the correct triangulated rear frame member, which should impart all the stiffness the shock tower brace does—and more.
@Gordon Nichols I wish it was a Beck, it would have been done LONG ago... LOL It started life as a CMI and I've changed just about everything about the car (that was possible).
One really cool thing that has come out of this car is I now know exactly WHY Chuck made the changes he did to the car in the 80s. There is just SO MUCH that doesn't make sense from a production/service/common sense standpoint it's comical.
The biggest challenge has been trying to improve on some really bad shortcuts, some of which were quite frankly dangerous, to say the least. The fuel tank was a great example. We simply wanted to support it better so that it didn't come through the hood on a hard stop (or god forbid a frontal impact), BUT it was done so half assed originally because it NEEDED to float around to fit under the seal lip of the front hood, and in order for the hood to close... 40+ hours later, it's right...
Some things I just couldn't do anything about... I HATE single circuit master cylinders, but its already up against the front beam and crammed into a tight space left to right, and the pedals are as far back as possible... so there is just no way to do do anything about it. This is one of the major changes Chuck made to wheelbase, in order to fit a dual circuit cylinder without changing front end geometry... so in this case it's just one of the shortcomings we have to live with.
OK, back to work for me. I have 3 cars being delivered as Christmas presents over the next 10 days...
And here I thought I had it tough...
Didn’t realize I was getting my car before Christmas...SWEET!!
Which Christmas?
Didn’t realize I was getting my car before Christmas...SWEET!!chines1 posted:Which Christmas?
BWAAHAAAHAAAAHAAAA
Good one - both of you! ![]()
![]()
Great stuff SantaCarey
Christmas delivery,,fantastic....Me, if i wake up Christmas morning, thats all I need:}
Carey’s master mechanic, Mike Fincher (who is quite a character) sorted my wiring last night.
Everything works. There was one brown “power” wire under the tank, so everything came apart up front. AGAIN! (Carey has a hit out on whomever wired this car originally-it’s that bad).
Oh-and my original Pre-A turn signal switch is faulty. A relay blew up in Mike’s face when he was under the dash. LOL. Oops. Time for a new switch! Oh the joys...
I’m just going to use a Type 2 6 wire bus switch and then we will wire my crank trigger and get my oil system finished. I want to hear this thing start!!
Attachments
"...Mike Fincher (who is quite a character)..."
Oh we're all familiar with Mike, Anand. He's "quite a character" at Carlisle and online as well. 
That is really laying down for the job... right fit
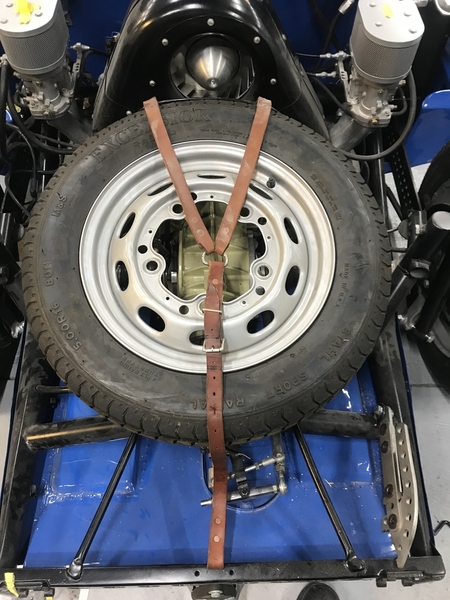
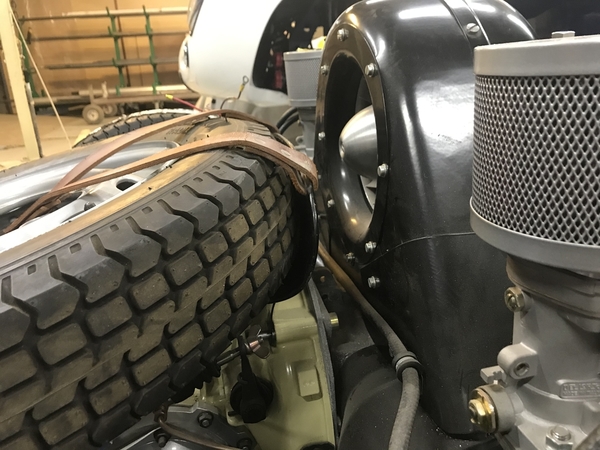
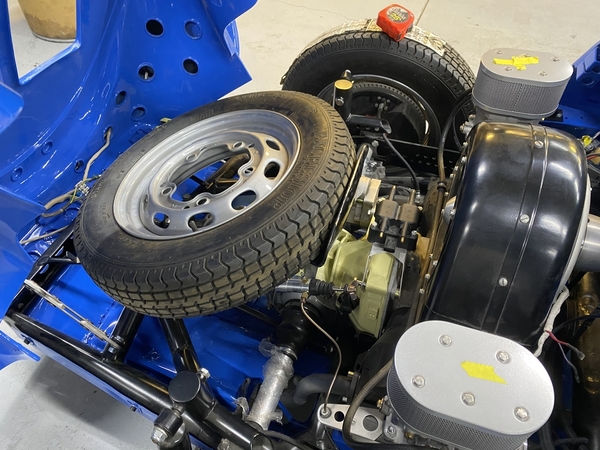
Carey got the spare tire mount fabricated — it looks great. The mounting hardware is a bit tricky, since I don’t have an original 519 split case transmission. The normal tire mount bolts to the bolts that hold a split case transmission together, which is the tough part.
Attachments
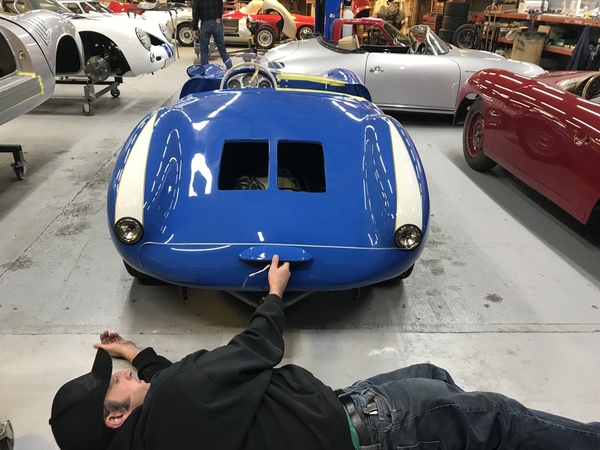
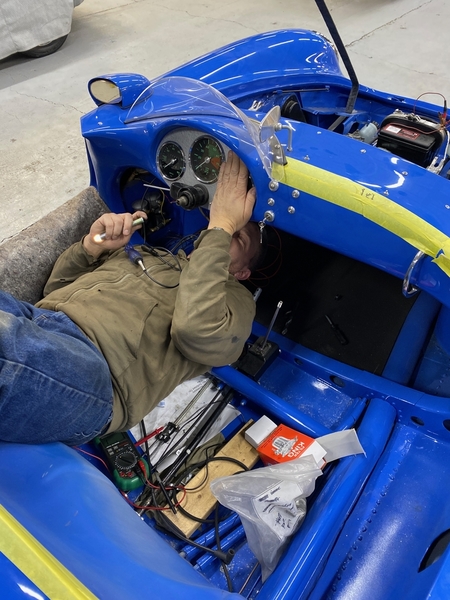
Today's Tech Tip: When inverted under a Speedster - Spyder dash for electrical follies, get yourself a sleeping bag or a quilted moving pad folded into thirds to lay on, both are super comfortable.
Paddy O'Furniture pads work as well........
@Alan Merklin we use old seat cushion bottoms. For the concrete we have large cuts of plush house carpet the guys drag around the shop. Does wonders for the knees and feet...
Using a sleeping bag when working under a Speedy dash is really more a safety thing than a comfort item.
People have been known to twist just the wrong way and get trapped there, having to spend the night in the garage.
It's probably a good idea to have a few days of emergency water and a cell phone with you, too.
Anyone besides me actually fall asleep under a car ? I went out back to my shop about 7PM was working with the car for a few hours up on a mid rise scissor lift, I woke up at 1AM still holding a ratchet :~)
Alan Merklin posted:Anyone besides me actually fall asleep under a car ? I went out back to my shop about 7PM was working with the car for a few hours up on a mid rise scissor lift, I woke up at 1AM still holding a ratchet :~)
And this was when you were a young fellow, right?
Spare tire seat looks awesome!
Alan Merklin posted:Today's Tech Tip: When inverted under a Speedster - Spyder dash for electrical follies, get yourself a sleeping bag or a quilted moving pad folded into thirds to lay on, both are super comfortable.
https://en.wikipedia.org/wiki/Ethylene-vinyl_acetate
Have you even tried one of these EVA foam pads? You can cut it and lay on it and even fall on your knees and you won't get hurt. They use it to build bridge decks.
Alan Merklin posted:Anyone besides me actually fall asleep under a car ? I went out back to my shop about 7PM was working with the car for a few hours up on a mid rise scissor lift, I woke up at 1AM still holding a ratchet :~)
I fell asleep one time working under the front end. I think I was working on the fuel pump. Woke up about 5 seconds later when the wrench I was holding smacked me in the face!
I have had Charlie(my dog) wiggle under there and rest his head on my chest. Michelle and I laugh about that one still. He was "helping"!
The guy under the dash looks like me! At 69 I can still do it! Not much room under there to work.
Jim Gilbert - Madison, Mississippi posted:The guy under the dash looks like me! At 69 I can still do it! Not much room under there to work.
@@Jim Gilbert 69 is the new 50 now a days 👍
calmotion posted:Jim Gilbert - Madison, Mississippi posted:The guy under the dash looks like me! At 69 I can still do it! Not much room under there to work.
@@Jim Gilbert 69 is the new 50 now a days 👍
The idea is to have an escape plan.... help, pull me out ![]()
I fell asleep underwater while scuba diving. Warm tropical water, a hard party night before and a boring dive. Pretty scary. I aborted the dive when I woke up.........Bruce
aircooled posted:I fell asleep underwater while scuba diving. Warm tropical water, a hard party night before and a boring dive. Pretty scary. I aborted the dive when I woke up.........Bruce
Holy crap !
aircooled posted:I fell asleep underwater while scuba diving. Warm tropical water, a hard party night before and a boring dive. Pretty scary. I aborted the dive when I woke up.........Bruce
Rapture of the deep, maybe, along with rapture of the night before?
IaM-Ray posted:calmotion posted:Jim Gilbert - Madison, Mississippi posted:The guy under the dash looks like me! At 69 I can still do it! Not much room under there to work.
@@Jim Gilbert 69 is the new 50 now a days 👍
The idea is to have an escape plan.... help, pull me out

@IaM-Ray push the button around the neck to send distress signal LOL
Help, I've loosened the bolt and I can't get up...
If I woke up underwater mid-dive I’d have aborted FAR more than the dive itself!
aircooled posted:I fell asleep underwater while scuba diving. Warm tropical water, a hard party night before and a boring dive. Pretty scary. I aborted the dive when I woke up.........Bruce
Wow that is a deep scary movie in the making
The environment was really soothing and pleasurable for sleeping. I was totally warm and weightless as well. Luckily my head bobbed a couple times and I woke up to discover what had happened. I got back on the boat before something catastrophic happened..............Bruce
Any updates on your project?
@John Schneeman — Hi John! We changed out the master cylinder that went bad, and am waiting for the tire saddle to get painted. Should have that done in the next 1-2 days.
After that, we will wire the crank trigger and the car will be ready for a test fire. Everything else is done...except the interior!
I’ll post an update next week, or sooner if possible.
Anand
Thanks, looking forward to your update!
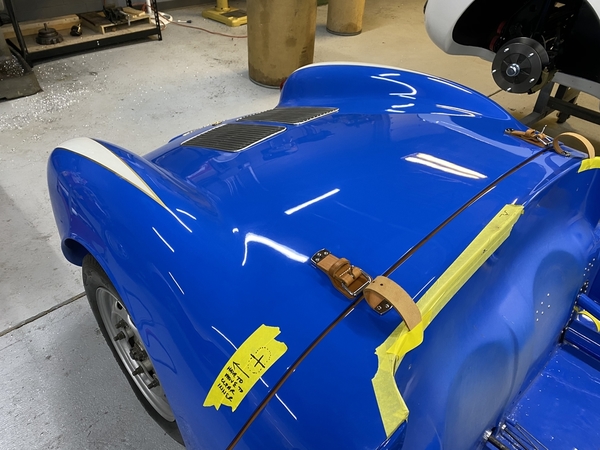
Carey got my master cylinder changed and put the whole front of the car back together. My turn signal switch was busted, so we put a pre-A style one in (the early 550s had switches with black housings, the later ones had tan housings that matched the tan steering columns).
Carey is going to rivet in a new leather strip for the rear cowl and also put my tire holder in. I think he’s also ready to start plumbing in my front mounted setrab oil cooler, too.
Attachments
Looks great! Hey, who is having the white car built? It looks just like mine!
Carey, call Greg, I heard he "may" be making his own nosecones and shifters.
I've used them already, they are nicer than PBS...
HEY!
Carey's got my old, white Donor Beetle in the back of his shop!
Absolutely stunning.
Dibs on the Carey clone!!!
Maybe I should pop out to Indiana and be a guest builder on Lane's coupe? I can't promise much except major league ball-busting between Carey, Mike, and me......
Hey, I already worked on your first car.
DannyP posted:Maybe I should pop out to Indiana and be a guest builder on Lane's coupe? I can't promise much except major league ball-busting between Carey, Mike, and me......
Hey, I already worked on your first car.
Danny , since WE are retired we should do a field trip to Carey's maybe wrench a day on Lane's Coupe and the Janis Joplin car soo ~
In all seriousness that would be extremely cool. 👍👍
It just keeps getting better.
Nice touch hanging the filter on the firewall.
Carey and I have been collecting photos of original 550s in an attempt to learn about the details of the interiors.
I was able to see the European Collectibles’ 550 in person last March (2019), and got some up close photos. We also ended up talking to Andrew Hosking, owner of the type550.com site, who has provided many photos and guidance for this build.
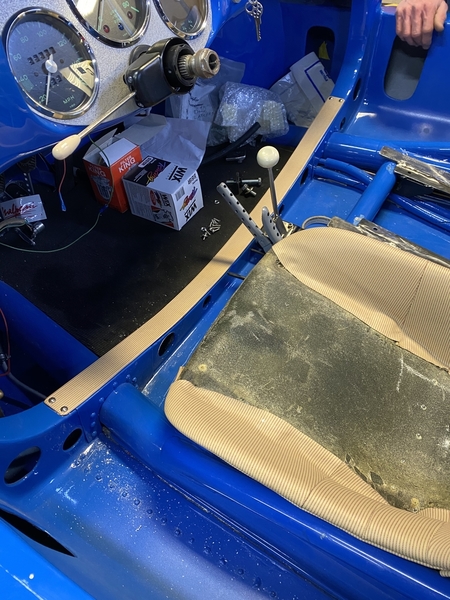
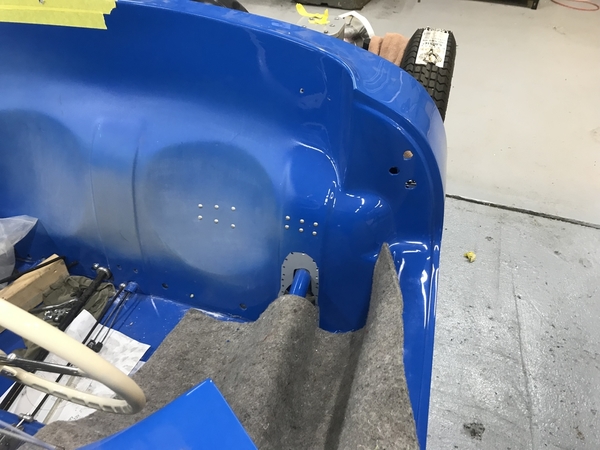
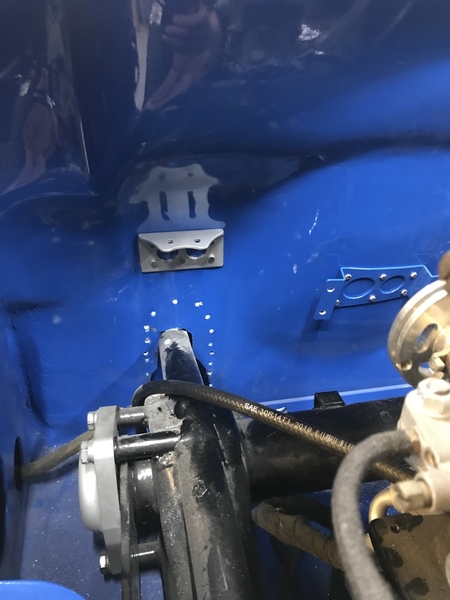
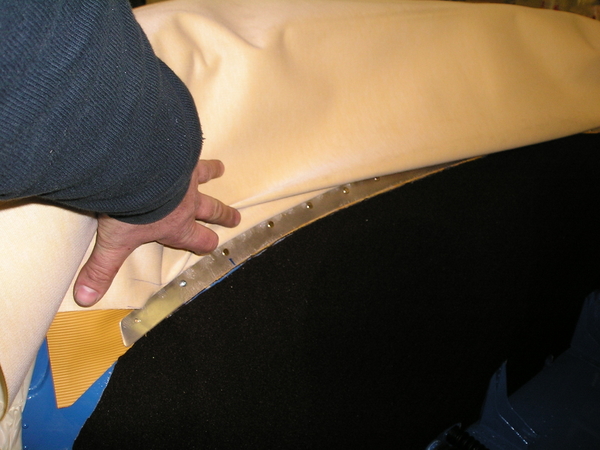
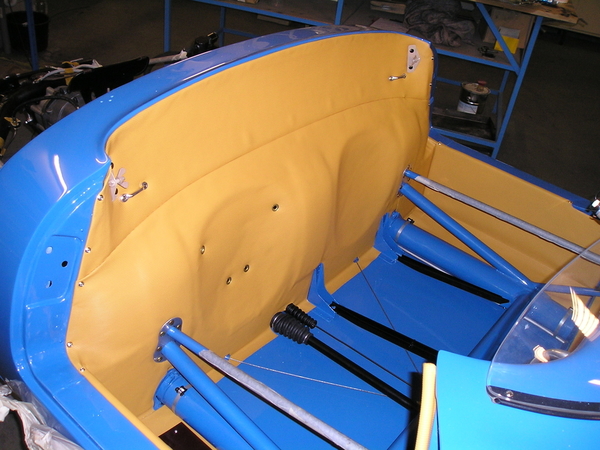
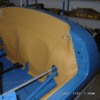
Carey suspected that the vinyl probably wouldn’t stay in place too well along the door thresholds or at the top of the firewall without some aluminum ferrules. I reached out to Andrew, and he confirmed Carey’s suspicions.
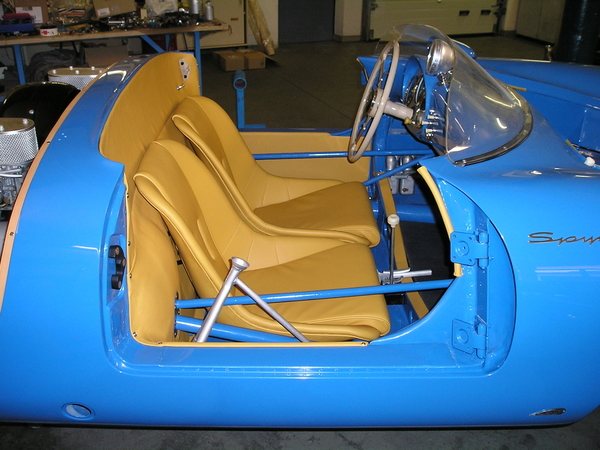
Cool photos to see — these are of another French blue car that was done by a restoration shop in Europe. Cool little details. I love this stuff. Carey: not so much. LMFAO
Attachments
The material is a bit stiff, I found.
"Cool photos to see — these are of another French blue car that was done by a restoration shop in Europe. Cool little details. I love this stuff. Carey: not so much. LMFAO"
The builder is trying to finish the project while most guys are continually trying to make it more perfect....
I guess that is why Dolly Parton's husband sent her yearly for Plastic surgery tuneups
Hey @arajani are those photos of 550-0051 under reconstruction? They look familiar but the ones I was going by (Hoskings' site, probably) disappeared from the web a year or two ago.
@edsnova — Not sure! You might be right. I thought these pictures were from Torsten’s Shop (Simonsen 356 Panels).
Anyway, here’s the latest. Brad (seen here) is the upholstery guru — this guy is amazing. He’s been planning the rear firewall and getting everything together.
The seats are a mess thanks to my OCD. I had Carey change the cushion shapes a bit and have created yet another mess. I am surprised he hasn’t burned my car in a bonfire yet, to be honest.
Attachments
I'm 99 percent sure that's 0051.
Your car's looking spot-on.
Getting the barberpole material to lay down on that lower contour is going to be real work. I think he'll have to start in the middle and slowly work his way out with the glue, stretching it all the way while keeping the lines straight as possible. Just an absolute slog.
On mine I made a separate foam piece with the right(ish) shape and tried to wrap the material around it. The foam did not have the stiffness or smoothness (nor did I have the requisite skill) needed to make it all lay down properly though, so you can see.
Yeah, though, the seats were fine....
Now all you need is a matching belt and of course the Jay Leno blue denim wardrobe ![]()
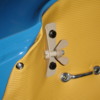
Very nice with the legit turn-key latches. And—of course—once again going just one better with the correct (not phillips) upholstery screws!
Dude.
Ed: Anand’s also got one of those super-light “Al Blanchette Special” racing ignition keys, too!
It’s becoming a long winter. I may have to create my own lightened racing key for something more to do.
One advantage of the $10 ignition switch that was standard equipment on my VS is that the designers have already minimized the mass of the key. No further lightening is required - or even prudent.
And the pot metal in the switch body is also the lightest alloy obtainable.
The key shape is correct for mailboxes and piggy banks of the period.
And in a master stroke, they extended this 'less is more' design philosophy to the switch contacts, too.









































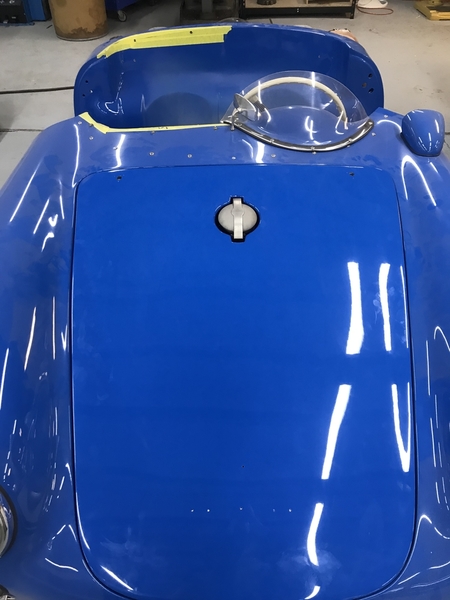
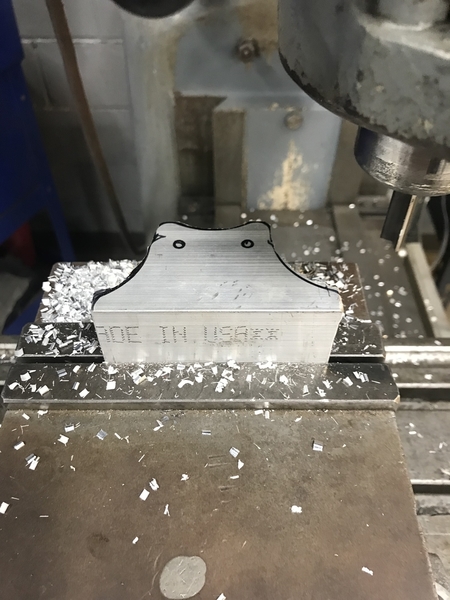
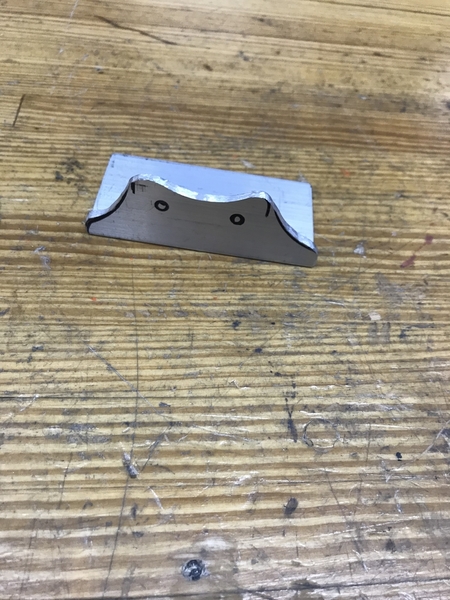

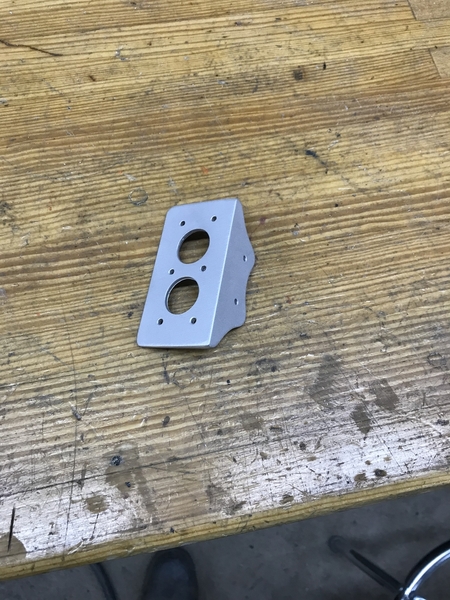

































 mais oui.


