Another thing, VW IRS axles are tough. The Empi axle, who knows what kind of steel they are made from.
Pulled the motor today. One of the lower nuts was missing and one of the upper bolts. Also found out that I don’t have the thermostat mechanism for the fan shroud vanes and the linkage that operates them. I will have to remove the shroud and see if the vanes are in there. Also found that the header and muffler were full of rust, so I’ll add that to the list to replace.
I had my best helpers with me. I can just imagine what the conversation will be when they go back to school after Christmas: “friend - I programmed my new cell phone over the break. My daughter - That sounds boring. I helped my Dad pull a motor out of his Porsche. My Dad is the coolest.” (Maybe that’s close to what they will say anyway....)
Attachments
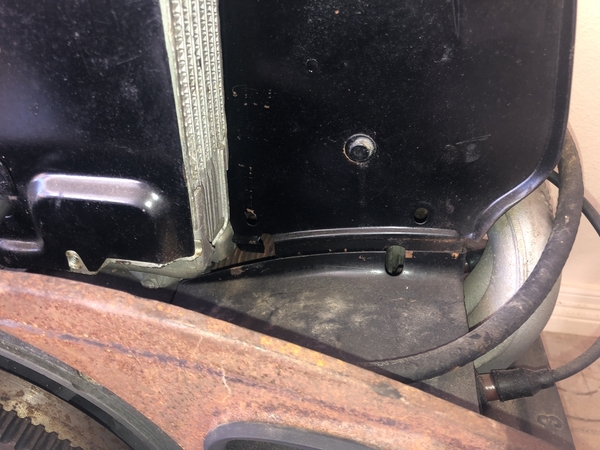
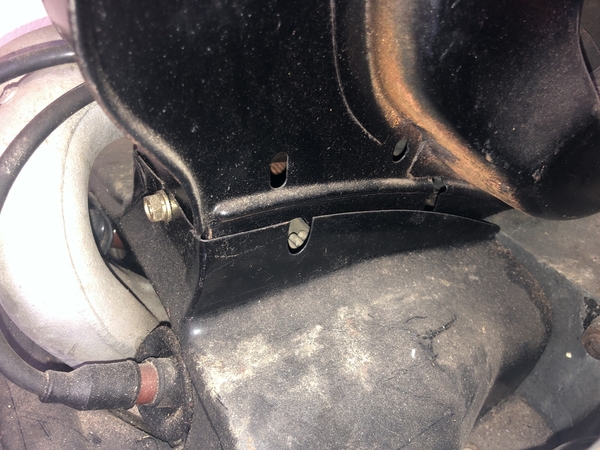
Good deal! You can tell if you have the vanes installed in the fan housing just by looking at the front two bottom sides of it; if you see cheesehead bolts (the flathead ones that hold all the tins in place) sticking out you know you've got them; if you only see holes you don't.
@Impala posted:Good deal! You can tell if you have the vanes installed in the fan housing just by looking at the front two bottom sides of it; if you see cheesehead bolts (the flathead ones that hold all the tins in place) sticking out you know you've got them; if you only see holes you don't.
Thanks Impala, I’ll check that out today.
I think you will also be able to see posts sticking out from the vanes that the linkage attaches to.
Years ago the rage was to remove and throw them away!

Finding a set of air vanes with the associated linkage bar, thermostat and thermostat actuator rod is the hard part. Once you get them delivered we can walk you through the installation and adjustment to make them work smoothly. The newer spring-style thermostat doesn’t look like the older, bellows style, but from what I’ve heard they work just as well. Don’t forget to check local salvage yards to see if you could find a whole fan shroud with the vanes intact. You have the older, “36 hp” style fan shroud. There is a newer version with a bigger fan, but it is flat across the top, rather than rounded like yours. For that, you can fit a bigger oil cooler and bigger fan and it’ll cool better - A must for engines 1,915cc and larger.
The German hardware to install them was slotted 6mm screws. Unless you wish to grow up as a sainted Purist, I would suggest going to a local hardware store and get a box of 6mm X 1.0 pitch X 12mm long (1/2”) Phillips Pan-Head screws and flat washers to fit. Those screws come in handy for a lot of stuff on these engines and a box of them is cheap - washers, too. Don’t forget some metric lock washers, just in case, too.
Don't waste your time with old crap. Get a brand new set from Clark.
http://www.awesomepowdercoat.c...hermostat_flaps.html
I put a set in my engine when I replaced my crappy Chinese shroud with a Cooled1 replica thing shroud. Couldn't be happier. Solved the overheating issues I had on long freeway and 5%< grade runs.
Per Gordon's post, Clark has the older bellows-style thermostats, but they're pricey because they're getting rare. On my Spyder, I couldn't use one because the exhaust is in the way, so I fabbed up a Triumph choke cable to operate the flaps manually
And +1 on ditching the OEM straight blade cheesehead screws I used SS pan head allens, spring washers, and locktite on mine.
Attachments
The flaps in the ebay link are for a single port engine. Probably, what is needed in this case is flaps for a dual port engine.
@TreyG posted:
When you get it apart, take a good look at an exploded cooling parts diagram. I think the "what is this crap? I don't need this" mentality that led to leaving off the thermostat flappers also led to leaving off the internal baffles which channel the airflow to where it needs to go.
When I got mine all apart, it was also missing these.
Clark sells great reproductions of all the necessary bits to get your cooling system back to the way the VW engineers designed it to work.
ETA: From your your pic it looks like you're also missing the ducting for your oil cooler, which means you're dumping hot air into your engine compartment or blowing it right in one if your carbs (if you have dual carbs). Numbers 2&3 in the parts pic.
Attachments
Thanks guys, this is good info! I found Clark’s website the other day and was thinking that getting a full set from him is probably the best route. Then I have all that stuff correct. Good tip on the fasteners Gordon and dlearl476.
@TreyG posted:Thanks guys, this is good info! I found Clark’s website the other day and was thinking that getting a full set from him is probably the best route. Then I have all that stuff correct. Good tip on the fasteners Gordon and dlearl476.
Clark is a great guy. Very responsive to emails, too. If it strikes your fancy, his threads on The Samba are pretty informative. Other than Jake Raby, he's probably done more research into AirCooled VW cooling than anyone else. His username in The Samba is Volksaholic.
@Michael McKelvey posted:The flaps in the ebay link are for a single port engine. Probably, what is needed in this case is flaps for a dual port engine.
Thanks for pointing that out; I didn't look closely.
@TreyG posted:Thanks guys, this is good info! I found Clark’s website the other day and was thinking that getting a full set from him is probably the best route. Then I have all that stuff correct. Good tip on the fasteners Gordon and dlearl476.
By all means; probably the best way to go.
Happy New Year!
I tried to drain my transaxle today to remove it. I don’t have 17mm hex wrench. I tried using a bolt with a couple nuts jammed on it, but that failed. (25 years ago I welded a bolt to a piece of rebar for a homemade wrench, I guess I should have kept it!)
Y’all know any tricks to getting it out other than the correct tool? I am going to look around town tomorrow to see if I can get a wrench or socket locally, but don’t have high hopes for finding it local.
might have to do ebay
@TreyG posted:Happy New Year!
I tried to drain my transaxle today to remove it. I don’t have 17mm hex wrench. I tried using a bolt with a couple nuts jammed on it, but that failed. (25 years ago I welded a bolt to a piece of rebar for a homemade wrench, I guess I should have kept it!)Y’all know any tricks to getting it out other than the correct tool? I am going to look around town tomorrow to see if I can get a wrench or socket locally, but don’t have high hopes for finding it local.
I had no luck with a double-nutted 17mm bolt either when I couldn't find my socket. (I turned up in the door pocket after an extensive search. DOH!)
IIRC, it was <$10 at Lowes.
FWIW, this is the wrong time if year to be messing with gear lube. ![]()
My suggestion? Put the new stuff in a pan of hot water for a while, and either go for a long drive or put a heat lamp on your trans for a few hours before you drain it.
I looked at Lowe’s today, no luck. However I google searched and it looks like my local Autozone has one in stock. I’m going to run there in the morning and see if it is indeed in stock!
You could try a hex coupling nut and a socket. I believe a 1/2" coupling nut is 5/8" hex which will fit 17mm.
Here's entire used shroud with flaps and the tin for the dog house cooler for $100 in CO.
Thanks Wolfgang. I’ll check it out.
Autozone had the 17mm hex, $9. And a lot of other tools. I usually shop at O’Reillys, so now I know Autozone is another place to check.
With the right tool that plug came right on out!
@sherco_chris posted:You could try a hex coupling nut and a socket. I believe a 1/2" coupling nut is 5/8" hex which will fit 17mm.
That would not be a good fit at all, and might screw up the hex plug.
Always use the right tool.
@TreyG posted:I looked at Lowe’s today, no luck. However I google searched and it looks like my local Autozone has one in stock. I’m going to run there in the morning and see if it is indeed in stock!
Sorry you struck out at Lowes. Were you looking for an Allen Wrench or a socket? They recently reorganized the tool section in my Lowes and all the separate sockets went from hanging on peg board hooks to being in drawers. It took me a minute to find the Allen sockets, but they did have them in almost every common size, including 17mm.
Our Lowe’s is a wreck. They are reorganizing the whole place. When they finish I’ll refamiliarize myself with their layout and see what they have!
@TreyG posted:Our Lowe’s is a wreck. They are reorganizing the whole place. When they finish I’ll refamiliarize myself with their layout and see what they have!
What a drag. I'm guessing the socket you needed was stuck in a bin somewhere awaiting the drawers to be installed. Sorry for the wasted trip.
FWIW, like many of us I suppose, I've been a Craftsman guy all my life. Other than a few SnapOn bits I've found at pawnshops and a few Proto, KD, or other specialty tools, I've always had Craftsman.
Since the demise of Sears, I've really been pleased with the quality and availability of Lowe's Kolbalt line.
something like that i go to my True Value,, good sized store and they have everything I have looked for, those old farts working in there know everything about anything..
True Value is my go-to for taps and dies.
"those old farts working in there know everything about anything."
Watch it - Most of us are getting to be "old farts"!
Me and the girls got the transaxle pulled today and some other miscellaneous stuff done. We are trying to get the pan disassembled to a point that we can power wash it real good, fabricate seat brackets as necessary, and then touch up paint to start reassembling as we get new parts. We are going to focus on brakes first.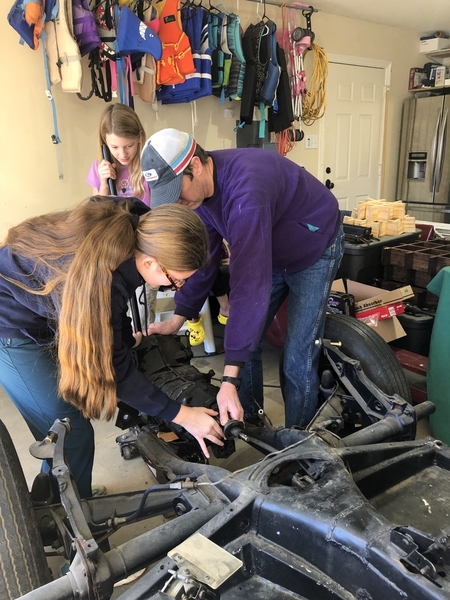
Question 1: While removing the old, rock-hard rear IRS snubbers, the little mounting point was rusted through and came off with the passenger side snubber, see pics of good one and broken one. Any thoughts on how to repair this to mount a new snubber? I think I could fabricate one out 2 different diameter pipes to recreate that “mushroom”, or maybe there is a style mounted to a plate that I could screw to those two holes in the IRS arm?
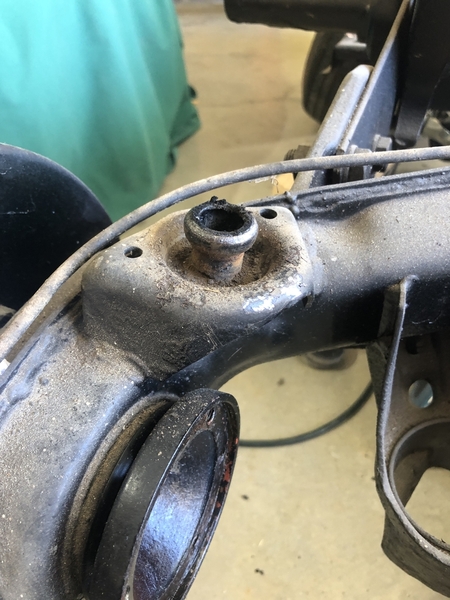
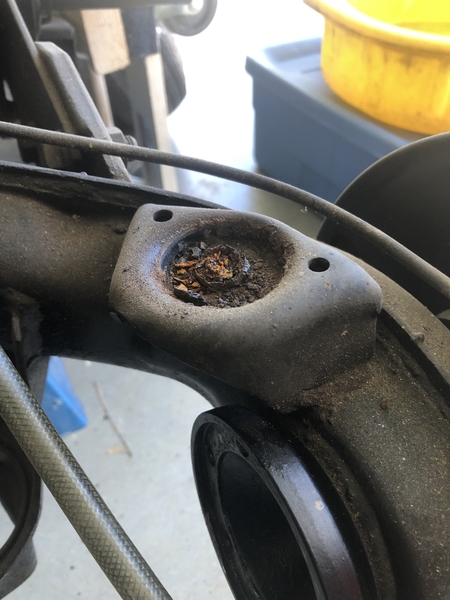
Question 2: Anyone know what part number the seal is for the clutch and accelerator tubes where they exit the pan (see pic)? I found one on jBugs.com that looked correct, but it says its goes only goes through 1971 (https://www.jbugs.com/product/113-293D.html)
Attachments
Good job; this is a link for the clutch tube one; looks like they’re separate on later models:
https://www.wolfsburgwest.com/...ist.cfm?ID=311721363
The one for the accelerator cable:
There are different seals depending on the year of the pan. If yours don’t look like Impala’s versions, then compare what’cha got to these which are ‘68 - ‘79.
111301289B Is the seal at the front end of the transaxle.
https://socalautoparts.com/pro...-3-nose-cone-to-pan/
and this is what you need for the cable exit next to it
In my first order of stuff, I got the 2 that impala had links for. I was thinking that these were from the 2 flexible Bowden tubes to the steel tubes coming out of the pan?
The second one that Gordon has a link to looks like it might work where the steel tubes exit the pan. I’ll add that to my list and try it out.
What about the snubber? Any ideas there?
According to Wolfsburg West it looks like for cars after 1971 the single boot doesn’t work but rather each one; the clutch and accelerator tubes each has their own individual seal. That’s my understanding. I will check on the snubber issue. There might be a solution other than finding a replacement arm.
I seem to recall a thread about a similar snubber issue a while ago. It is worth a search.
Mine were mostly rusted away but hadn't broken off. I filled them with epoxy.
Looks like you need a couple of these:
https://socalautoparts.com/pro...p-stop-rear-stock-2/
I think that should fit the mushroom on the “good” side if I picked the right one.
For the other side, the one that the mushroom rusted off of, you have several options and remember that the only force that snubber will ever see is compression from the top.
OK, so given that the compression force will never pull the snubber away from the seat, I would clean up the seat really well; wire brush tip on a drill, whatever it takes, just clean the heck out of it. Maybe even use some rust preventative on it. Then, go to NAPA and get a tube of 3M weatherstrip adhesive and use it to goop up the seat and just stick the snubber right onto the seat (watch out for adhesive coming out the bottom). Let it set up for a couple of days and I bet you’ll have to use dynamite to remove it.
Maybe @Alan Merklin has some ideas, too.
BTW, I never installed the rear snubbers on my IRS car and even though it’s lowered (a lot), the suspension never compresses enough for anything to hit.
@Impala posted:According to Wolfsburg West it looks like for cars after 1971 the single boot doesn’t work but rather each one; the clutch and accelerator tubes each has their own individual seal. That’s my understanding. I will check on the snubber issue. There might be a solution other than finding a replacement arm.
Thanks Impala. I haven’t tried the ones I have, I should try those on first and see how they work out.
Gordon, you have good points about the compression, as well as that the suspension probably doesn’t ever get close to hitting it. I’ll try cleaning it up and epoxing the snubber on there.
Maybe something like this would work:
@Michael McKelvey posted:Maybe something like this would work:
That could work! Thanks Michael!
That looks like it could be made to work.
FWIW, I've used these bump-stops I bought from Auto-Zone (click the blue font-- it's a link) for sliding freezer door stops. They'd work.
$14.99 for a pair, and right up the street from everywhere.
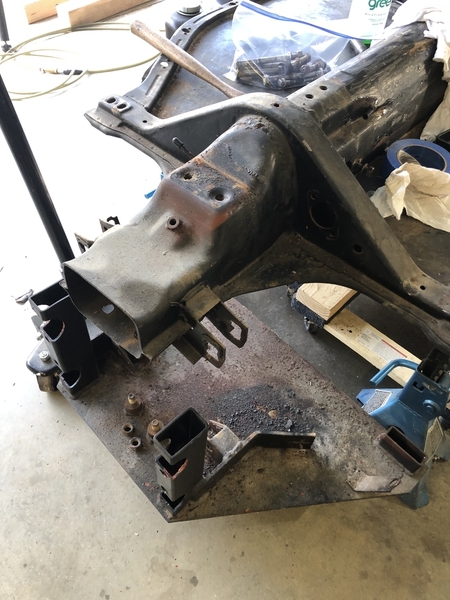
I finished disassembly of the pan today so ready for power washing. I took apart that super beetle front beam adaptor so I could clean and repaint all that too.
I also did a little investigation of the rear snubbers and I think that style y’all suggested with the bolt in the bottom is the going to be the way to go. I will cut off/grind smooth the original mount that isn’t rusted off and clean up the other side to. Drill the appropriate hole in them and bolt the new snubber on. Should be easy!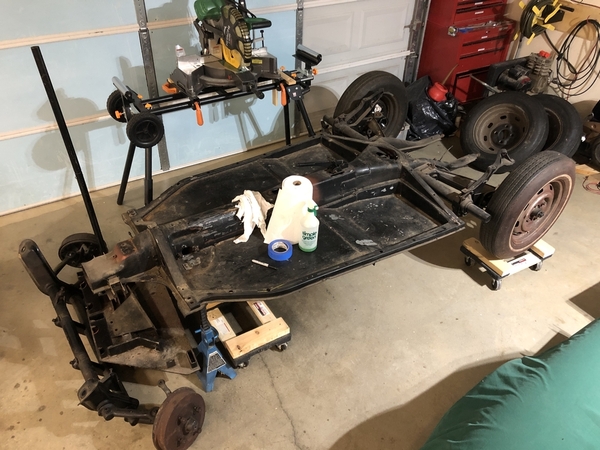
Attachments
That is looking solid; I believe it’s going to come out real nice!
I removed the emergency brake handle and the cables tonight. The cables and the flexible tube that goes from the pan to the drum look pretty bad so I will replace them.
My rear brake backing plates are in good shape but need a good cleaning and repainting. My Haynes manual doesn’t give a description of how to remove them, it just says something like “remove diagonal arm and take to your local VW dealer to have all the special bearings pressed out .....”
See the attached photo, it appears to me that I can remove the 4 bolts I have circled in red and the backing plate should come off. Can y’all confirm this or tell me the proper way to remove the backing plate?
Attachments
Yes; start by removing those and that metal cover with the seal in it comes out. There’s an order so you might like to look at your service manual and take photos as you take it apart.
Get a Bentley manual for your year VW pan. I prefer the 66-69 Beetle manual, it covers both link-pin and ball joint front ends, and swing axle and IRS rear. I think it's usually available for $30 or so. GREAT pictures, procedures, and diagrams.
Thanks Danny, I'll look for a Bentley too. I found that I still have one of those John Muir How to Keep your Volkswagen Alive books from when I restored my Beetle in high school, but it doesn't have a lot of pictures or illustrations, so not as helpful.
Found a good used Bentley on Amazon for $30 bucks. Its on the way!
X2 ^^ on the Bentley's manual
Can anyone see Lane Anderson's reply? I have an email alert that he posted a comment and picture, but I don't see it here....
I deleted it, Trey. It was a warning about the swing-axle seals you'd have to replace after removal and replacement pf the backing plate. After posting I decided to go back and look at the picture which showed that your car has IRS, rendering my reply not applicable. In a swing-axle car it is not always easy to get those seals to work properly and you risk fouling your brakes with transaxle grease - potentially with disastrous effect as I found out.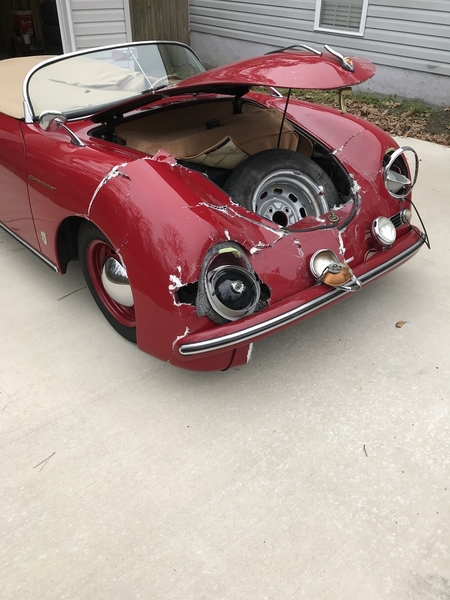
Attachments
That explains it! Thanks Lane. And I recently read through your thread about your accident as I was researching seat belts. That was a helpful thread, despite the calamity that caused it.
Sounds like IRS axle stub seals will be much easier to deal with.
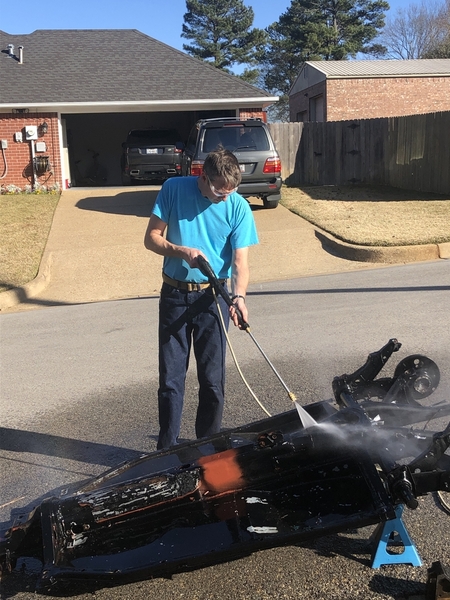
Got the pan and the front beam and adaptor power washed today. My Bentley manual should be here in the next week. When it gets here I am going to remove those rear backing plates and get them cleaned up.
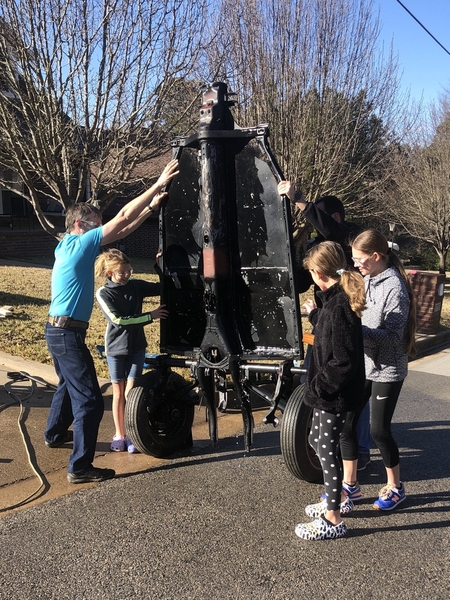
Next will be to flip the pan over and take a good look at how the previous owner replace/reinforced the pan. Also, I will be positioning the seats and making sure I have reinforcement for the seat mounts and the seat belts.
Power washing
Flipping the pan over
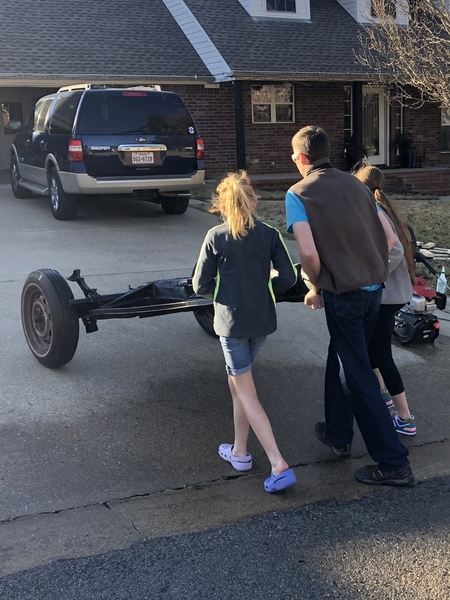
Wheeling the pan back in.
Attachments
I fastened my outer seatbelts horizontally through the subframe and the inner seatbelts through the side of the tunnel where it is spliced and is double thickness.
@Michael McKelvey posted:I fastened my outer seatbelts horizontally through the subframe and the inner seatbelts through the side of the tunnel where it is spliced and is double thickness.
That’s good info. I found a thread where Gordon fastened his through the tunnel, but I was wondering if you could put them through the outer sub frame.
I bolt a 2-1/2" x 5" x1/8" steel plate, one end to the rear seat floor bolt then drill the other end of the plate to accept the seat belt bolt.
___________________________________________
Belt hole Seat floor bolt
O O
_________________________________________
Great job, Trey. Lovely photos with the girls. Like I said, that pan looks strong. Make sue you paint it and seam seal it well to protect it from corrosion. Then, roll your sleeves and on to it!
Thanks guys!
Off topic a little. Since brakes are the first pile of parts I’m working on buying, i have been researching wheels, lug patterns, tire size availability etc before I buy discs and drums. I found an old CMC ad that says front tire size should be 205/55R15 and rear should be 235/60R15, all wrapped on those oh-so-hip 15” gold wheels.
Tire availability seems very limited in 15” these days, and the aftermarket wheels for a VW 4x130 pattern are also fairly limited (you know, in case I want to get rid of the gold rims!).
I was looking at ordering the discs and drums in the dual 5x4.5/5x4.75 pattern. I researched this and those 2 patterns were used by the Big Three, plus Honda, Mitsubishi, Acura and several others. That means ALOT of choices of wheels.
From what I read I see lots of guys have the 16” Porsche rims, and there are lots of tire choices in 16”, no mater what rim I choose.
Thoughts?
Chevy 5 on 4.75 rotors and the rim choices are plentiful
@Alan Merklin posted:Chevy 5 on 4.75 rotors and the rim choices are plentiful
Thanks Alan, I will plan on getting the dual pattern discs and drums.
I'm running VW 4X130(?) hubs all around because I built my car without benefit of this forum's experience.
The Chevy bolt pattern will offer you far more wheel choices than, say, the Porsche 5 X 130 pattern, which is only used by Porsche and the Audi Q-series SUV. Great if you want to run Fuchs or Porsche rims, but that's about it.
I, too, have a flared Speedster so you can run some pretty wide rims. You also have to either get them dished waaaay out there, OR run some spacers to get the wheels to where you want them in the wheel wells.
So to that end, I once ran 16" X 6" front rims with 205/16 tires and at the rear I had 7" X 16" rims with 225/16 tires. I have 1-1/4" Billet adapter/spacers that take me from the 4 X 130 bolt pattern to the 5 X 130 Porsche pattern. All of my rims are original Fuchs 5-spoke. Those big boots on the rear made my IRS car handle like a Banshee and I loved them - They looked really awesome from the rear, too.
Eventually, I outgrew wanting to track the car (and my reflexes aren't what they once were) so I traded the 7" rims for another pair of 6" and now run 205/16" all around. It handles almost as well, but not quite, the tires fill the wheel wells nicely and the adapter/spacers still seem right (although I might have gone to 1-1/2" on the front).
I've never had a problem finding tire choices for my 16" wheels.
@Alan Merklin posted:Chevy 5 on 4.75 rotors and the rim choices are plentiful
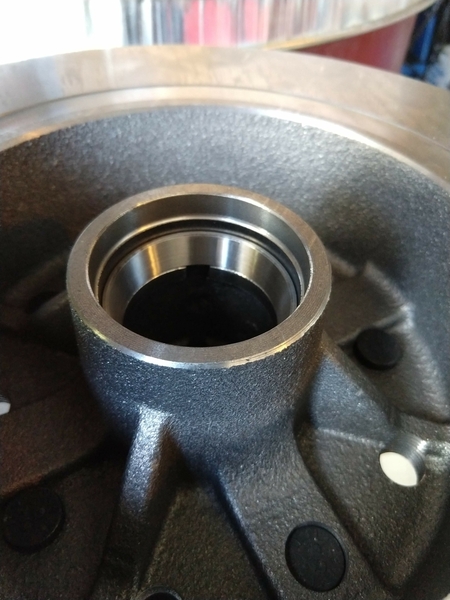
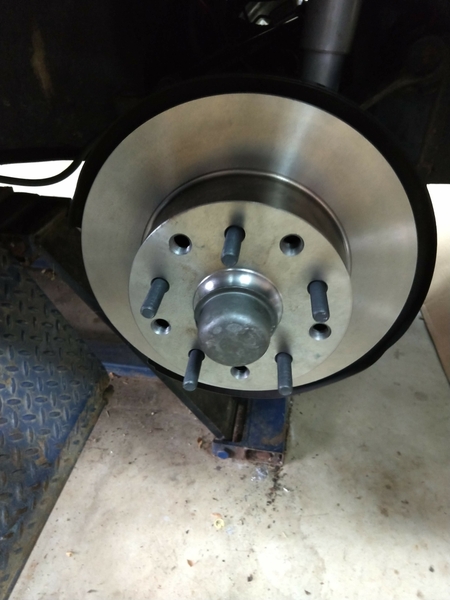
Have a machinist bore out the threads and press in studs. I find that it makes it easier to mount the wheels, especially if you use a lift. There are plenty of custom lug nuts available too.
Gordon, that is very useful information.
Eric, pressing in studs resolves a question I had. The description on SoCals website for the drums suggested you had to buy their stud kit (which they don't have on their website anymore) for the dual pattern drums (AC Industries brand), yet the front disc conversion (also AC Industries brand) with the dual pattern said nothing about the stud kit. I like the idea of having the machinist bore out and press in studs, much easier than wrangling the VW lugs.
Thanks Impala!
For my seat belts, I used a large, thick washer on the outside of the frame and a threaded plate inside the tunnel.
@TreyG posted:Gordon, that is very useful information.
Eric, pressing in studs resolves a question I had. The description on SoCals website for the drums suggested you had to buy their stud kit (which they don't have on their website anymore) for the dual pattern drums (AC Industries brand), yet the front disc conversion (also AC Industries brand) with the dual pattern said nothing about the stud kit. I like the idea of having the machinist bore out and press in studs, much easier than wrangling the VW lugs.
If you get a machinist to bore and press in the studs, bake sure they bore lands in the webs so the studs bear evenly on the entire shoulder.
Attachments
Ok, thanks Eric!
I got my Bentley Manual today, as suggested a few posts ago by Danny P. I have flipped through it some, much better than the Haynes manual.
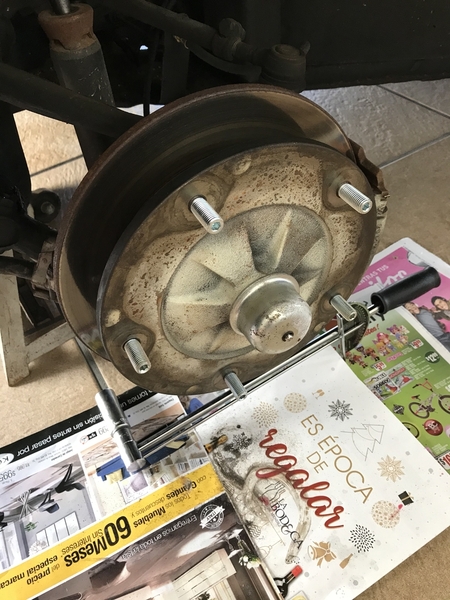
So, back to the topic of backing plate removal, remember we are talking IRS here. Bentley shows how, looks simple. I will have to order the seals to put it back together.
I hate to ask, maybe opening a can of worms, but should I go through the procedure to press out the stub axle and replace that seal in there on the transmission side of the diagonal arm (see pic)?
I want to do this project right, and while it is apart now is the time. BUT, I don’t want to waste effort on something if it isn’t necessary (i tend to do that some, just ask my wife!).
Attachments
Or should I just clean that backing cover in place and not disturb the bearing cover/seals at all?
As you well said now that it’s apart if it were me I would clean and inspect the bearings and repack or replace, along with any seals. God knows their condition and if they were ever serviced.
@Impala posted:As you well said now that it’s apart if it were me I would clean and inspect the bearings and repack or replace, along with any seals. God knows their condition and if they were ever serviced.
Is there a reliable way to check the bearing condition? I read a how to article on the interweb last night and it suggested that in most cases the bearings themselves will be fine, as they were very well engineered. It said to grab the axle and see if it will wiggle and click, indicating bad bearings. Also spinning the wheel should make a smooth, whirring sound when good, or a crunchy, rattling when bad.
You guys have a way to check the bearings besides these suggestions?
@TreyG posted:Is there a reliable way to check the bearing condition? I read a how to article on the interweb last night and it suggested that in most cases the bearings themselves will be fine, as they were very well engineered. It said to grab the axle and see if it will wiggle and click, indicating bad bearings. Also spinning the wheel should make a smooth, whirring sound when good, or a crunchy, rattling when bad.
You guys have a way to check the bearings besides these suggestions?
Other than what you mentioned above, not really. If the axle spins without any movement or noise they're good to go. If you disassemble then look at the bearings for any wear/scoring.
And yeah, the Bentley is the manual to have. I've always found Clymer's assumes you know a fair bit already and is quite often a little short on explanation. The Idiot book is great for de-mystifying things and making you more comfortable with attempting procedures but (I think) assumes you have the appropriate Bentley beside you as well.
Second ALB; if you’re not that comfortable disassembling at least do those checks to make sure the wheels rotate smoothly and without noises, etc. Worst comes to worst you’ll need to service them later when the car is together.
Thanks guys. I found a YouTube video showing the process of removing the axle all the way to replacing the bearings. It doesn't look as difficult as I thought it might be. I will disassemble and check everything and repack bearings, replace seals.
It didn't look like there were any races to replace, like in a wheel bearing. Is that correct?
Yeah, it's a big sealed bearing that presses in. Fafnir, Sachs, AST, GRW are all good.
Over the years, I've replaced rear axle seals and bearings on a few VW sedans, Dune Buggies and one on my Speedster. ALL of them were on the passenger side. I believe it's because that side is closer to the side-of-the-road slush and salt in the winter which takes a bigger toll on everything on that side of the car.
And just like you, Trey, I figured "What the heck" and did the driver's side on my Speedster, too. The second one went much quicker!
Gordon, What the heck always costs me money! But on the positive side, it creates a better finished product.
I'll give them a good inspection and if there is any doubt, new bearings it will be.
Trey,
I'm like you, I tend to over do things at times. It took almost four years, but I built my Speedster with everything new or refurbished down to the last bolt and wire, except for one part. I used a transaxle that came with the unassembled pile of parts that I purchased. The PO told me that he had gotten it in a trade and that it was a rebuilt unit. It had nice black paint and the remnants of a tag and I assumed it was in good condition. It was not. The one part that I took at face value is the only failure that I have had in my car. It has popped out of 3rd gear when I let off the gas ever since day one and now whines like crazy in 1st and 2nd.
I guess the moral of this story is to leave no stone unturned. Now is the best opportunity to make sure that every last part is right. Besides, on a VW platform, almost everything is pretty easy! Looking good!
James
Thanks James! I will keep turning over those stones!
I replaced wheel bearings and seals on my Speedster when I changed the rotors to 5-stud Chevy and eliminated the adapter/spacers the PO installed. The IRS rears were easy as pie. The hardest part is putting the proper torque on the axle nut. I couldn't use my torque multiplier because of the non-stock axle bolts, so I had to make up a long brace to hold the hub steady against the floor and use my 3/4" drive torque wrench. The Idiot book recommends a 30,000 mile re-pack interval, so I've got a few years before I have to re-lube.
I used a set of sealed bearings on my IRS hubs.
At this point, they'll assuredly last a lot longer than me (and look better doing it).
@Gordon Nichols posted:I used a set of sealed bearings on my IRS hubs.
At this point, they'll assuredly last a lot longer than me (and look better doing it).
Gordon, Do sealed bearings mean you don't have to pack them with grease? And therefore you don't have to repack them someday?
Yup.
@Gordon Nichols posted:Yup.
Awesome. I hate packing bearings.....
I did mine quite a few years ago and don't remember it all perfectly, but it was when I was making up sets of hex bar carb linkage upgrade kits with heim bearings. When I stopped at a local bearing place I mentioned having to get new axle bearings and was told that if I brought one in they could match it. I took one to them and they cross-referenced it and said I could replace it with a different roller bearing that was sealed, same OD, ID and thickness. That's what I got. I can't remember the manufacturer from back then.
Replacing the regular, grease packed kind isn't all that difficult on an IRS rear. You have the option of either removing the diagonal arm or leaving it in place - It's easier to remove it and press the bearing out/in using a press. Just remember to peen the tabs out releasing the diagonal arm mounting bolt so you can screw it out to remove the arm, then peen them back when done to lock the bolt in place. To grease the bearing, either smear it in there with your fingers or use a large BBQ meat marinator syringe packed with grease and just shoot it in there. Check your Bentley's manual for the type of grease to use.
I remember the diagonal arms pivot on some sort of rubber bushings, right? Can those bushings be checked and replaced while you are at it?
A quick google search turns up that there is bushings in there. I’ll add that to my parts list. Y’all are a great resource. Thanks!!
@Impala posted:I remember the diagonal arms pivot on some sort of rubber bushings, right? Can those bushings be checked and replaced while you are at it?
@TreyG posted:I’ll take a look at the diagonal arms and the Bentley manual to see. If there’s bushings in there I will replace them!
Yes, the bushings wear and usually need to be replaced in an older car, especially if the car has been driven spiritedly (or if you're building a Speedster and are planning to).
I found cip1 has a set of the rubber bushings for the diagonal arms on sale for $45. I’ll scoop them up before the sale ends.
For the rear axle bearings, Gordon mentioned several brands above. How do y’all feel about AC Industries for the bearings? SoCal has a kit for what appears to be a good price that includes all the bearings, seals, etc.
That’s great! CIP1 is a great place especially with the free shipping offer; good opportunity to get most everything and save on the shipping. AC Industries also carry very good parts and So Cal is another good place to buy.
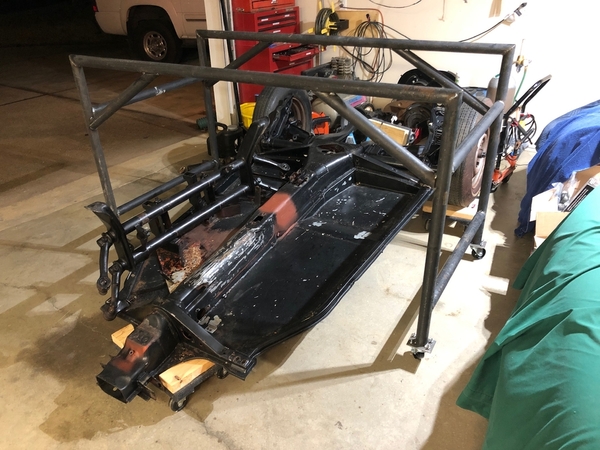
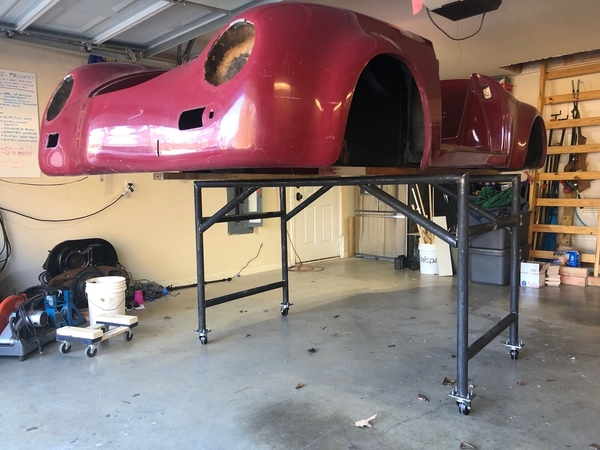
I needed to free up some space to get my wife’s car back in the garage. I did some dumpster diving on one of my construction sites (I’m not too proud!) and came up with some 2” pipe. I made a cart to put the body on till I’m ready for that part. I made it just tall enough to get my pan under, on its dollies, with the engine installed.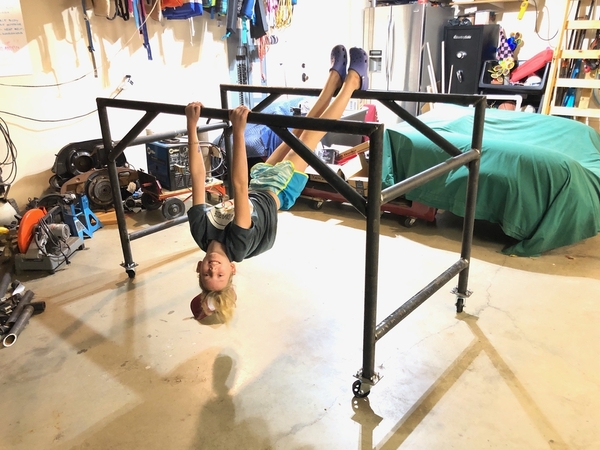


Attachments
That’s killer! It’ll make the task easier!


