@TreyG

I'll be honest with you - Finishing the build on one of these cars is a lot of work, way more than 40 hours, so keep coming back here for moral support.  We all want to follow along anyway - building vicariously through YOU (and the girls).   Yours is well on the way to completion already so it won't be like starting from zero.  My son helped me as he was going through high school and college, when he was around, and we have had a lot of fun with it in the years since - He now owns a Porsche 996:

I bought my CMC body in 1993, but had no place to build it in, so I first had to add a bay to my garage.  That took about a year, doing all of the work myself after foundation install.  It was a 16' X 24' gem of a shop, complete with forced hot air heat.

Where Alan Merklin gets his cars painted in 2 weeks, it took me two years but I also was working at a place that was growing 300% per year, most of us were working 70+ hours/week so I didn't have real time for the car until I retired.  Then I got it road-worthy, started it up the first time and the engine seized.  Spent 2 weeks tearing it down, repairing it and re-assembling it, screwed that up, got the case welded and repaired and finally got it back together.  It's been running fine (more or less) since:

So it was on the road, but it had a rough interior and no dash pad.  I convinced myself that I liked it that way.  

I went to the first Carlisle Speedster gathering in 2004 and we drove home in the rain for over 3 hours with no top, so to keep from having to dry out the entire interior again, that winter I added the top.  Oh, and this was garage (and house) #2:

Then, other goodies got added, like Kafer bracing, anti-sway bars, a wind blocker in the roll bar, new bearings in the transaxle, little things like that.  Later on I added the dash pad (at house/shop #3) and swapped out the Porsche 914 seats for something more comfy ( at house/shop #4).  

We didn't know what the heck we wanted when we retired so we tried different places, only to eventually return to about where we started after 15 years.  

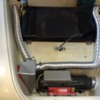
And a year or two after that I added a VW Gas heater in the Frunk, since I never had heater boxes on my engine:

Currently, I'm working on heater mods that will give me better heat modulation and enhanced safety, but that's all I have planned for this winter.  I don't have heat in my current shop, so car things tend to take a back seat unless I can do them inside the house.  These days, I mostly just want to drive it so it's nice that it seems to be really reliable and ready to go anywhere, any time.

Yes, the "Madness" runs deep in this one, but I'm trying to live with it.

Gordon
The "Speedstah Guy" from Massachusetts

Attachments

Images (7)
  • mceclip0
  • mceclip1
  • mceclip2
  • mceclip3
  • mceclip6
  • mceclip7
  • mceclip9

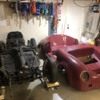
I got a little something done. I removed the doors, trunk and deck lids and steering col to prepare for removing the body. I also put everything I don’t need at the moment on the attic.
I also made my own wheel dollies out of miniature, $7.99 each Harbor Freight furniture dollies to help move it around easier. I had to add a 2x4 on each side to give them a little more strength. They work great and where a lot cheaper than actual tire dollies. image

Attachments

Images (1)
  • Wheel Dolly

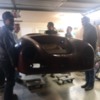
Rounded up some friends tonight and removed the body from the pan. More little Harbor Freight dollies under the body to roll it around easy.
I pulled out my old photo album of my Beetle project from high school, circa 1992. Found a pic of me and some friends removing the body. Showed the guys helping me tonight the history they will be part of! (I could tell they were very impressed 😬)

I’ll be starting investigation of the pan etc on Friday.

Attachments

Images (3)
  • FB8F5908-5304-4CD2-8EBE-A49B0D097439: Nostalgia 1992
  • A72EC08F-4D3A-4352-B975-D0A217185897: Friends helping out
  • 0D078395-1AE0-4131-B887-168DB002BA91: Ready for work

Trey; it looks like you've got this in terms of your prior experience with VWs. My only suggestion is to organize things so that you do things right only once. Your foundation is of utmost importance. Make sure your floor pans are perfect; this can come to bite you years down the road and replacing after the car is put together can be a real pain (ask me how I know). If they are less than stellar I would replace with 18 ga. replacements (the heavy original gauge). If your foundation is good to start with you only need to tweak or add things here and there as opposed to tear everything apart to redo it. Looking forward to your progress.

Great advice Impala. I got the chance yesterday and today to work on the car. My first task was to check the pans and the dimensions over real well, just as you suggested. I went through the manual and checked all the measurements given in the instructions, and it seems to be spot on. The pans must have been rotten when the previous owner started the project and they have been replaced with heavy gauge sheet metal. It appears to have been done well so we moved on to my checklist.

I checked a number of other items too, found a handful of things that need replacing such as the steering box, shift rod bushing and coupling etc.

I found that the clutch Bowden tube had too much sag in it, it was around 2 1/2”. (according to my Haynes manual it should have 1”-1 13/16”) . I checked the length of the clutch cable tube coming out of the pan and it was longer than the 1” (green arrow on photo) recommended by the assembly manual. So I trimmed it back, smoothed up the edges with a file and reassembled. Now it has right at 2”. I am going to replace the Bowden tube because it is separating at one of the connections. Maybe that will correct the problem?

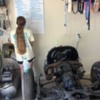
The other picture is my oldest daughter crossing off some items on the list we hung up. It’s a pretty general list, big categories mainly, and we have a long way to go. But it feels good to be started!

Attachments

Images (2)
  • Bowden Tube
  • Crossing off the list
@MusbJim posted:

"Showed the guys helping me tonight the history they will be part of! (I could tell they were very impressed" 😬 - @TreyG

Very cool! Having your buddies around will make this project that much more fun...if you consider you doing all the work and them sitting around drinking your beer joking and supervising your every move FUN!!

I have considered making the beer fridge in the garage coin- operated for that very reason...

@ALB posted:

I have considered making the beer fridge in the garage coin- operated for that very reason...

When I had my home shop in PA it was the neighbors who would drop by but I only had my bench stool and a 5 gallon bucket this was on purpose so that when they had dug into by adult beverage refrig multi times and their ass would go numb they would stand up and there was a twinkle hope that they would keep heading for the door. That was bad enough but the final straw was when "  Beer Belly Dave" pulls into my driveway and unloads a Love seat... " NO... No........ No........... that's NOT coming in my shop" and I helped him shove it back onto his pick up.

@TreyG posted:

Great advice Impala. I got the chance yesterday and today to work on the car. My first task was to check the pans and the dimensions over real well, just as you suggested. I went through the manual and checked all the measurements given in the instructions, and it seems to be spot on. The pans must have been rotten when the previous owner started the project and they have been replaced with heavy gauge sheet metal. It appears to have been done well so we moved on to my checklist.

I checked a number of other items too, found a handful of things that need replacing such as the steering box, shift rod bushing and coupling etc.

I found that the clutch Bowden tube had too much sag in it, it was around 2 1/2”. (according to my Haynes manual it should have 1”-1 13/16”) . I checked the length of the clutch cable tube coming out of the pan and it was longer than the 1” (green arrow on photo) recommended by the assembly manual. So I trimmed it back, smoothed up the edges with a file and reassembled. Now it has right at 2”. I am going to replace the Bowden tube because it is separating at one of the connections. Maybe that will correct the problem?

The other picture is my oldest daughter crossing off some items on the list we hung up. It’s a pretty general list, big categories mainly, and we have a long way to go. But it feels good to be started!

Trey, from the looks of your shroud, it looks like you're missing some oil cooler ducting. (17, 20)

image

Without it, you'll be pumping oil cooler heated air into your engine compartment.

image

And, depending on the manufacturer of your tin, you may need a "Hoover bit," too.  

image

Attachments

Images (3)
  • image
  • image
  • image
Last edited by dlearl476

Thanks dlear1476! I’ll get those pieces to complete the shroud.

i looked around the base of the oil cooler and I can see that it DOES have the Hoover bit. I would never have known to look for this! This would be one of the reasons I joined up with this forum!

Seeing how these shroud pieces work tells me that my fuel line is incorrectly run through that vent. I did some quick googling and found that I am missing the portion hard line in the engine compartment. I’ll add that to my list.

I have been working on a parts list for missing items and for items that need replacing on my pan/suspension etc while the body is off.

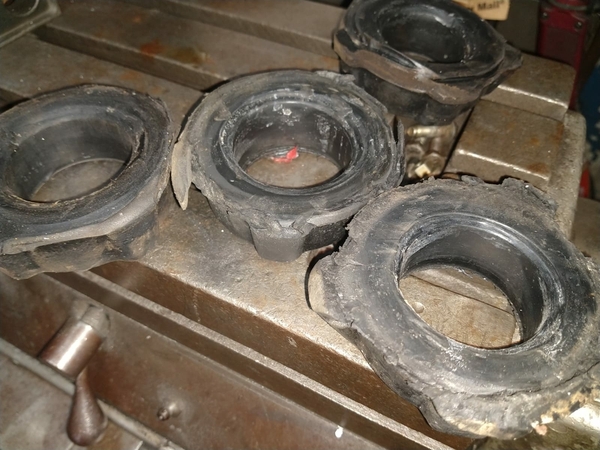
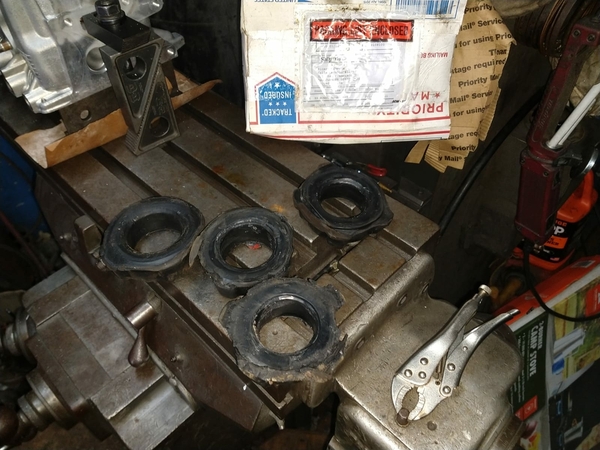
QUESTION: Should i replace the rear torsion bar grommets/bushings? Should I assume they are worn out and replace them now? Seems most people suggest using the stock VW rubber ones, not urethane.

It is infinitely easier to change the rear torsion bar grommets now with the body off.

In fact, it is nearly impossible to swap them with the body on unless you cut one side of the grommet to get it around the torsion bar and then glue them back together with super glue.

Go for the stock rubber grommets on the rear.  The Urethane jobbies will give you a harsher ride and probably crack themselves into oblivion in a few years.

Don't forget to lubricate them with either talcum powder or CV joint grease when you install them.

Last edited by Gordon Nichols
Post Content
×
×
×
×
Link copied to your clipboard.
×
×