I can paint cars fairly well but don't let me use an airless sprayer as that's another story. My first home I bought we gutted the walls and re-rocked it. Rented an airless sprayer to save time and get a primer coat on the walls and ceilings, I started in a closet so I could get the hang of it  ... I pulled the trigger, the paint line fitting popped out of the gun shooting the entire closet in primer and most of me, in two seconds....

@ALB, beautiful job! Those thinners seemed to do the trick.

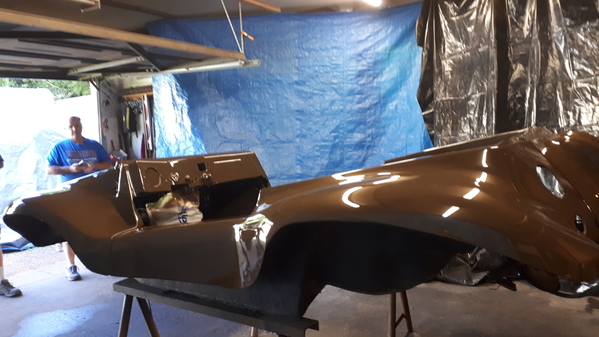
I've sprayed urethanes/polyurethanes a few times over the years; being an industrial paint, they are a little more difficult to work with and get a really nice, automotive quality finish.  It's just not what that type of coating was originally designed to do.  I've always followed mixing volume instructions precisely using the proper temp thinner for conditions (almost always medium for anything around room temp, iIrc) and never failed to produce decent finishes (the guys were always happy and thought it looked great) but after the 2nd or 3rd time thought it could be a wee bit better.  This time around I talked Nelson into letting me buy a liter of slow thinner as well as the medium (the gentleman at the autobody supply store didn't think the slow thinner was necessary) and, working in balmy 78- 80° weather, I mixed the first coat with the recommended amount of medium speed thinner, mixed 20-25% slow thinner into 2nd coat and 3rd coat was close to 50% medium/50% slow thinner (and a splash more thinner than recommended overall as well).  It gave the top coat just that little bit longer to flow and outgas before skinning over and produced (what I consider) the nicest finish yet!  And that's my brother in the background...

20210623_145515

Attachments

Images (1)
  • 20210623_145515

So it turns out that if you spray 2-part clear coat at 23 pounds per square inch pressure from a nice spray gun directly at a 10-ounce sheet of bent 5052 aluminum that is suspended from two holes along its top edge, what will happen is the spray pressure from the gun will swing the work farther away as you work down, and the swinging action of this sheet of material will cause the spray distance to vary significantly enough to cause trouble.

@edsnova posted:

So it turns out that if you spray 2-part clear coat at 23 pounds per square inch pressure from a nice spray gun directly at a 10-ounce sheet of bent 5052 aluminum that is suspended from two holes along its top edge, what will happen is the spray pressure from the gun will swing the work farther away as you work down, and the swinging action of this sheet of material will cause the spray distance to vary significantly enough to cause trouble.

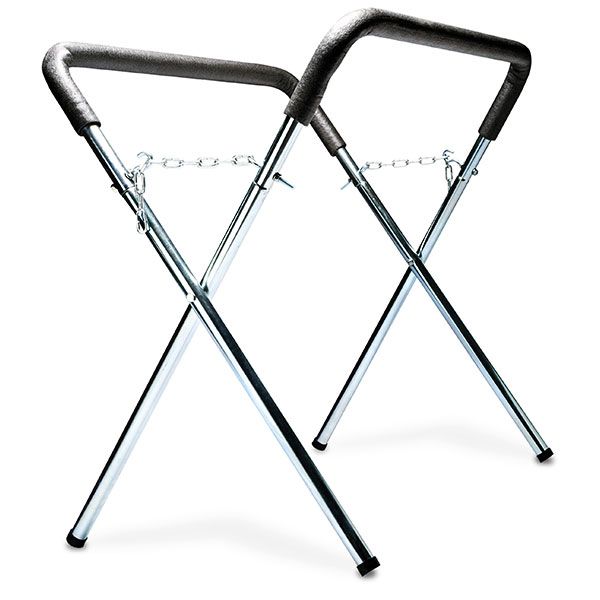
Had the same issue spraying MC gas tanks. Ending up draping them over a door/fender stand instead.
094AC200-C7FB-46C4-ABFA-246341CC1DDB
These things are handy for all sorts of stuff. I have a 2’x4’ piece of 1/2” Arboron that I set on top and it’s heavy enough to make a pretty stable work bench. 

Attachments

Images (1)
  • 094AC200-C7FB-46C4-ABFA-246341CC1DDB
Last edited by dlearl476

@ALB

So what happened with the slower thinner vis a vis reducing orange peel?  

Do you think that it self leveled during the slower cure or is something else afoot?

You get serious orange peel when something isn't right, usually either not enough pressure (the paint won't atomize properly and will look in extreme cases somewhat rough or 'pebbly' and too much pressure can cause this as well), not slowing down enough while spraying to put enough on (more important during the final coats to combat the wavy but glossy orange peel look) , the material isn't thinned enough or a combination there of.   I think that the slower thinner probably helped it level out, but what I also noticed working with this material is that the overspray that lands on places already coated didn't always melt in the way I thought it should.  I don't have access to a booth so everything counts.  I'm probably just being picky, and as I said before, no one else has noticed, but I think it made a difference.  We're going out with Nelson and his car tomorrow so I'll let you know what I think after the weekend, and maybe have a few pics as well... Al   

Last edited by ALB

Spent about three hours messing with it. First I sliced off the runs with a blade. Then I wrapped a wet paint stick with wet 400 grit and ground the drips down close to flat. Then I worked those areas with 800.

Then I wet sanded the whole panel with 800, 2 passes. Cleaned the whole thing with glass cleaner.

Two passes with 1000, two more with 1500 and one more with 2000. Cleaned it between sandings and looked for trouble spots.

Then I compounded with a "rough" sponge pad, 2 passes. Cleaned again with glass cleaner. Then one more with a medium pad. Cleaned.

Once over with a fine pad with polishing compound. Then a buffing wheel to finish.

It's not close to perfect. I'll probably have to re-shoot the drip spot at least.

But it's not terrible.

@edsnova posted:

Spent about three hours messing with it. First I sliced off the runs with a blade. Then I wrapped a wet paint stick with wet 400 grit and ground the drips down close to flat. Then I worked those areas with 800.

Then I wet sanded the whole panel with 800, 2 passes. Cleaned the whole thing with glass cleaner.

Two passes with 1000, two more with 1500 and one more with 2000. Cleaned it between sandings and looked for trouble spots.

Then I compounded with a "rough" sponge pad, 2 passes. Cleaned again with glass cleaner. Then one more with a medium pad. Cleaned.

Once over with a fine pad with polishing compound. Then a buffing wheel to finish.

It's not close to perfect. I'll probably have to re-shoot the drip spot at least.

But it's not terrible.

My bodywork teacher told me that color sanding/cut and buff was good inspiration for getting your gun set right the first time.  A**hole.

When I did my class project (Mercedes Hood and Rear hatch) I messed up getting the gun back together right and my first clear coat had some globs in it. He had me just lay on a few extra coats, extra thick, to leave enough material to wet sand it out.

Worked great except the finish product turned out nicer than the OEM finish in the rest of the car.

Last edited by dlearl476

Neato. Did you make that?

I did look into making one but for the money Fibersteel made more sense.

And, for the record, I do not have the stones to actually jack the car with it. Yes, it should work, and it can obviously hold the car up, but the angle you start at with that little cup on the jack point does not inspire confidence.

For the picture I lifted the right side with a floor jack and then slipped the lever jack under the left side.

.

.

Ed Garageshopped the pic.


I don’t want the truth.

I can’t handle the truth.

Ed uses words like ‘barber pole vinyl’, ‘autopulse fuel pump’, Wendler badge. He uses these words as the backbone of a life spent defending something.

Deep down in places I don’t talk about at parties, I want Ed in that garage.

I need Ed in that garage.

.

Last edited by Sacto Mitch

Three Saturdays ago when I tried to back into a space at Cars & Coffee my shift lever popped off. Disconnected at the base, stranding me 15 feet from my destination. Luckily it was in neutral. I dragooned a couple of bystanders to push the Spyder into the slot.

I quickly found it wasn't broken. Just disassembled. The lever screws into a socket near the floor of the shift housing, and somehow it had backed out. A few minutes later I'd turned it back into place with some borrowed pliers (thanks to this kindly UniMog-with-grenade-launcher owner).

IMG_9230

And I was happy, because I now understood why my reverse lock-out feature had been getting funky.

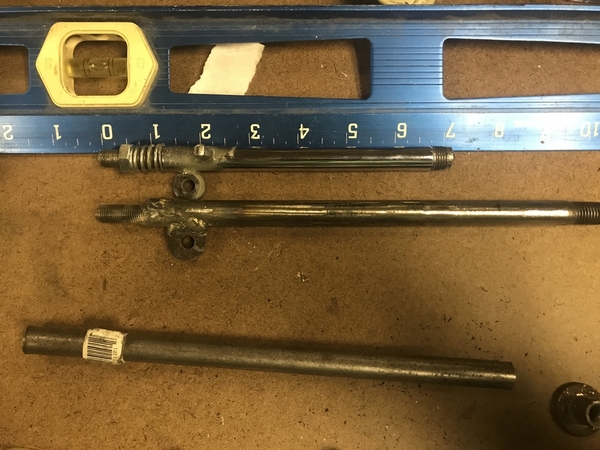
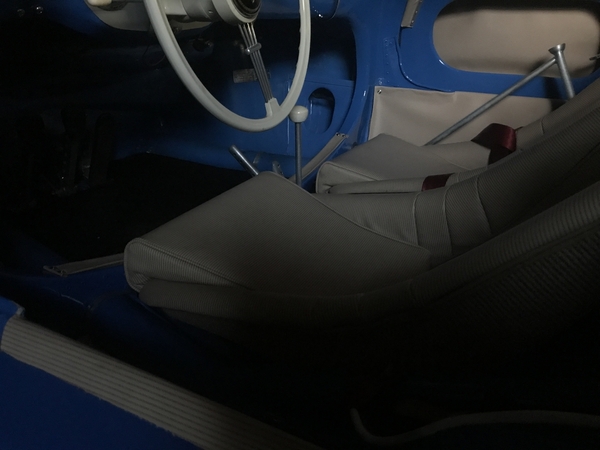
The stock Brandwood shift lever is a complicated thing. Really it's two levers, one nested inside the other, so the outer one can be pushed down to allow the lock-out nub to dip below a gate to get reverse gear. As the inner shaft unscrewed it made the whole thing slightly taller—too tall to allow the outer shaft to be pushed down far enough unless I opened up room above it by backing the knob off a turn or two.

IMG_9285

I had cut and welded on that box several times during the build in an effort to make it more compact and Spyder-like, yet never took it apart to see how it worked. Now, seeing how it went together, I also realized how easy it would be to replace with a longer stick.

One of the silly things I added to the box was a reverse lockout lever, the similar to the originals. Turns out it works as intended, so to make the shifter "realer" all I needed was a simple stick, not a nesting doll arrangement.

The other night I got to work.

From what I can gather by photos, the real cars' shifters were about an inch and a half taller than the one I was using, including the extension I scabbed on during the build.

Out of the spare parts bin I grabbed a likely-looking old shifter and cut off the ball end.

The shaft screws in with a 3/8-inch threaded rod at 24 tpi; standard SAE fine threads. Of course I had every kind of bolt but that one, so I ran to HD and spent $3 on two Grade 5 (they didn't have 8) zinc-plated bolts.

Cut off the head of one. Drilled out the bottom of the cut shifter and mocked up the parts.
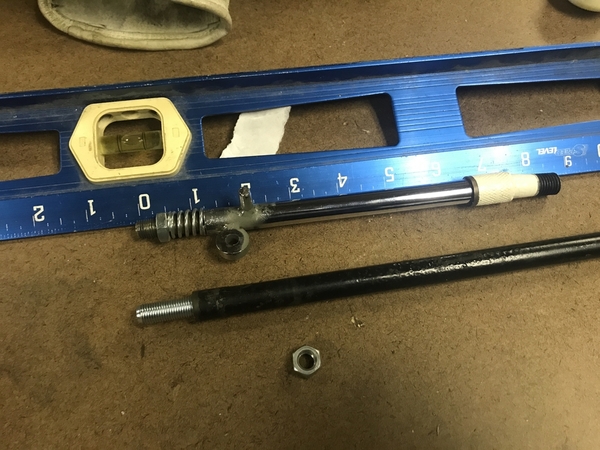
IMG_9287

That loop thingie is what controls the big fore-aft cable. It's about a quarter inch thick. I was going to use a nut for my version but found a piece of quarter inch plate with the requisite quarter-inch hole drilled through it on my work bench. A little surgery with the angle grinder and...
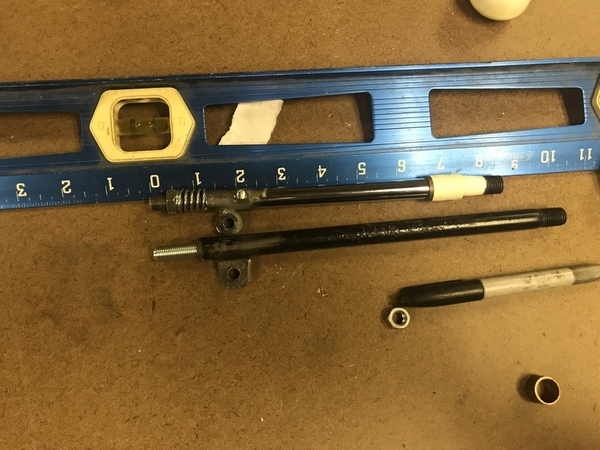
IMG_9288

Shortly:IMG_9293

And then:IMG_9294

IMG_9317

Once installed, the loop for the cable keeps it from backing out.

IMG_9319IMG_9321

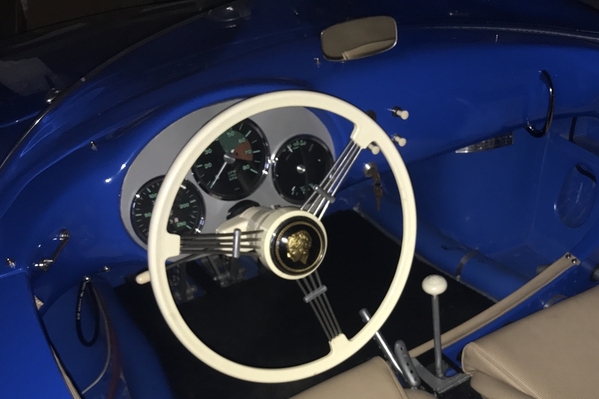
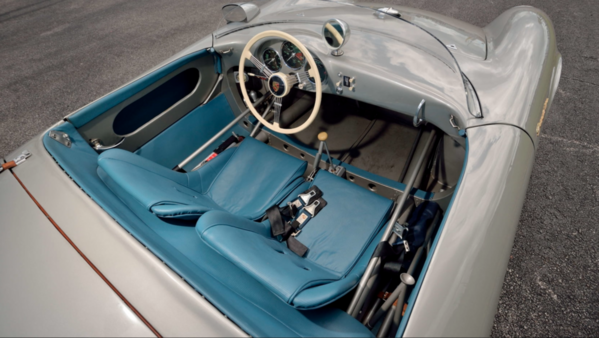
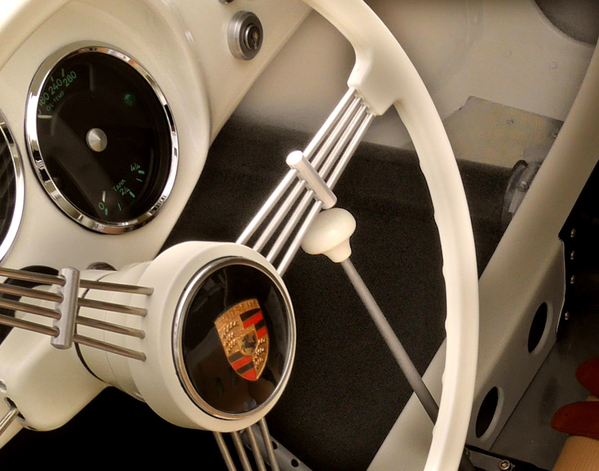
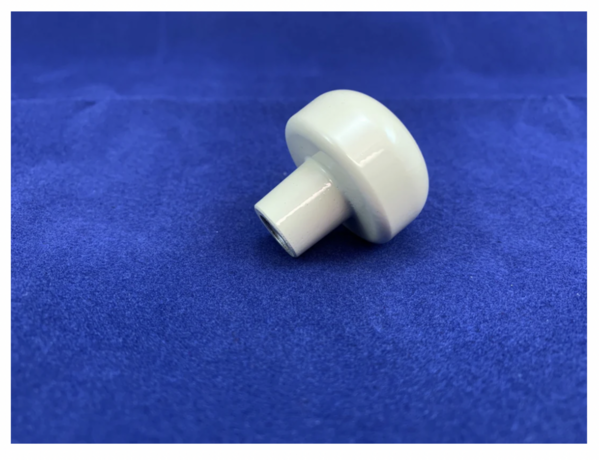
The only thing missing now is the correct mushroom-shaped knob. I believe they are available commercially, but if anyone has one loitering about their spare parts bin, I'd sure like to have it. 12mm threads.IMG_9318

Attachments

Images (10)
  • IMG_9285
  • IMG_9230
  • IMG_9287
  • IMG_9288
  • IMG_9293
  • IMG_9294
  • IMG_9317
  • IMG_9319
  • IMG_9321
  • IMG_9318

Fibersteel does make some nice stuff. I have a set of drumskins from them. Also, the front jack points(faux style, not for actual use).

But honestly that shifter is a STOCK-style VW shifter in a cheap steel box with a fancy $2 plastic custom-made knob. $1455? They are a bit too big for their britches over there. They could sell it for $500 and make a ton of profit on it.

And that is why I won't buy anything from them today, they've added the P-tax for replica stuff.

I bought a custom 3D-printed gauge pod, intended for a GTI, and installed it in my Cayman. It was $75 delivered in a week. I'd wager anyone with a 3D printer could sell the knob alone for less than $50 and do quite well.

Get me some white plastic or better yet some aluminum stock and I'll make it for you on my lathe. Then paint it white(I think Marty did this in his former IM).

Last edited by DannyP

So you've operated a lathe Kelly?

Plastic sometimes is rough after machining, aluminum is sturdier, finishes better and will hold up to more abuse. Just one opinion...

Powder coat it ivory and clear and it will last almost forever.

Find Ed some ivory-colored nylon(it has to be the CORRECT ivory). Good luck with that.

Last edited by DannyP

My first real job was in a machine shop that made automatic valves for all sorts of industrial applications. (Natural gas pipeines, refineries, nuclear power plants)

We made seals and shims out of all kinds of plastics:  Teflon, Abs, Nylon, Viton.  Some of it you had to turn really slow, some really fast.

But I have to say, 3D printing would probably be a better way to go with a mushroom shiftknob.

Last edited by dlearl476
Post Content
×
×
×
×
Link copied to your clipboard.
×
×