Surely the rack will help on center feel and steering precision just off center.

You're out of luck on the beam, though, Stan.  The beam can be made to work reasonably well, but it has a major design limitation that cannot be overcome sufficiently to rival a double A-arm design. To wit, the camber of the wheel on a beam front end remains constant to the car throughout the travel of the suspension. That would be fine if the car was parallel with the road at all times, but it isn't. The car rolls around its roll center during cornering (we won't even get into roll center issues). That means that if you had set -1.5 degrees of camber, and the car rolled 5 degrees in a corner, the outside front tire is now at +3.5 degrees camber. The only way to avoid this is to avoid body roll by stiffening the ride and anti roll bar rates.  That solution has its obvious limits. Caster can also effect camber as the wheel is steered, but nothing like the amount needed to compensate for body roll.

The double A-arm system has a camber increase relative to the car built into the travel which keeps the camber of the tire relative to the road constant as the suspension compresses (or increases it, or does whatever the designer has in mind within the limits of packaging and geometry).

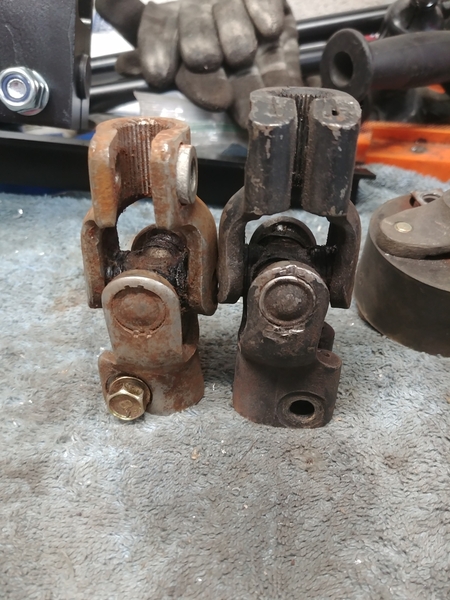
My reserve Kia U-joint was supposed to arrive last Saturday. It finally showed up today. USPS is a little slow these days, eh?

Anyway, the Kia joint is 16mm but it's 36 spline like VW and Porsche. I don't know what out there would be 60 spline except for maybe an OE VW Polo joint.

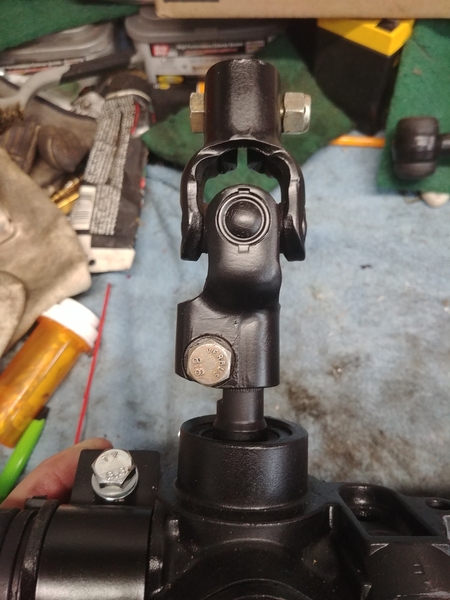
It is 1/4" shorter than the 911 joint, which may be useful once I get into it. We'll see.20210929_15061120210929_150647

Attachments

Images (2)
  • 20210929_150611
  • 20210929_150647

Yes, de-rusted and painted 911 U-joint.

Mike: those are extra Weber mains, emulsions, airs, and idles. Could come in handy for some poor soul. I just put them away! They're in my tune-up box: tach/dwell, timing light, vac/pressure gauge, spark plug gapper, points file, feeler gauges.

All stuff I don't need. Any. More. LOL!

I was going to start the rack today, but I changed the oil instead. Also swapping out the leaking oil tank. Speedway Motors brand, not impressed. I bought a new Saldana, the same model I used on my customer 2276 Spyder.

Last edited by DannyP

Did you find that filter top?

I was under the front of my car resetting the FR camber and tightening all of the ball joint bolts that weren't. Then doing an alignment. Laying there staring up into the limited space behind the front beam, I was fantasizing about rack and pinion steering. I even know exactly the area that you have to cut away to make room for the left tie rod.

Hopefully it'll stop raining in the next couple of days so I can go out for a test drive. Then maybe I'll change my oil.

Can't you repair the leaking oil tank?

No, I didn't find it yet. I have several places to look still.

The Speedway oil neck leaks a little, or the cap leaks onto the neck. It's not designed well.

However, the Saldana tank doesn't leak, it has O-rings to seal the bolt-on top, threaded filler cap, and threaded drain cap. The fittings are AN12 welded right on. The Speedway tank required pipe thread adapters(with LONG tubes on the tank,  and bulky and longer fittings. Even though I need AN adapters, the overall look is cleaner and the tank physically fits nicer. It's just a better design. I'll use it on any future Spyder builds, too. It's the same price as the no-longer-available Speedway tank. Hmmmm, wonder why it's NLA?

https://www.speedwaymotors.com...DEAQYASABEgIxIvD_BwE

Saldana

There aren't any 3/8" pipe thread fittings as it says in the description. There are four AN12 fittings, I adapt to AN10 on the bottom to feed the pressure stage and the two returns to AN8 up top. The top fitting is also adapted to AN8 for the breather.

There is a skinny O-ring just inside the bolt circle on top of the tank. First, I took the tank apart and cleaned it, there were a couple aluminum chips inside. When I put it back together I used Permatex thread sealant on the bolts. Very well made stuff.

Attachments

Images (1)
  • Saldana
Last edited by DannyP

There are two panels.

One on top, nothing in the way except the hatch opening and the sail panels/side sloping window.

The second one is behind the seats. Flip them forward, pull an insulated carpet, unbolt the panel. The alternator comes right out the front. A wrench on the serpentine tensioner and the belt is off. Two bolts, a plug and a 13mm for the hot lead. Disconnect battery first!

The 987 isn't quite like this, but close enough. No need to disconnect the wire in Figure 2 on the 987.

https://www.pelicanparts.com/t...-ELEC-Alternator.htm

@Carlos G I FOUND THE CARB TOP A COUPLE MONTH'S AGO! Thank you!

Last edited by DannyP

I'm bringing this thread back from obscurity. I had some time to play with the steering on my Spyder. It finally got warm enough for me to work WITHOUT turning the heat on in the garage!

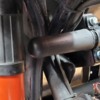
The rack WILL fit, but it will take a bit of work. There is less room to work in a Spyder, the footwell is physically closer to the beam. There is less than 1/8" between the brake master cylinder and the lower beam tube.20220428_172222

The steering box takes less room than the rack, obviously, but there will be enough room after I cut some fiberglass. I'm sure that @aircooled and @LI-Rick cars will be WAY easier to install the rack at the outset of construction.

20220429_103437

Looking from the passenger side, you can see the pickup point for the inner tie-rod and the steering arm hole for the outer ball joint. You can clearly see that there would be interference. If it clears with the wheels straight ahead, that's all you need. The steering arm moves forward when it swings either left or right.

Clearance also needs to be made for the U-joint. Also, the steering tube needs to be shortened at least an inch so the U-joint can be clamped to the steering shaft.20220429_103513

The passenger side has PLENTY of room, nothing needs to be done there at all.

20220429_100943

This is the VW steering box clamp on the stock VW steering gear box. @Michael McKelvey I didn't count splines, but this looks EXACTLY like the splines on the rack input shaft. I think this is 16mm x 62 spline(according to a Shoptalk.com post). The VW rag joint clamp slid right on the rack. Besides the splines, there is a large flat that the clamp bolt rides against.

I'd love to be able to use the VW rag joint, it would certainly simplify the horn button wiring. But the steering shaft/rack angle is somewhere between 10 and 15 degrees, which is not acceptable to me.

20220429_103657

20220429_102345

No matter which way I approach this, the steering shaft and the steering tube must be cut. And fiberglass needs to be cut and re-glassed to make clearance.

If I use an actual U-joint(which I'm sure I will), about 5" needs to be cut from the shaft and about 2" from the tube. It's also possible that I may need to remove the VW column and replace it with the shorter 911 column(I have one) and use 2 U-joints.

I discussed the fiberglass work with Greg. I have some flat 1/4" fiberglass panel left from my old car to use. Greg says to cut it and fit the new, then hot glue it in place. Then glass over both sides with several layers. I'll finish with some paint or bedliner. There is enough room above and behind the pedals for this, and even a little below the column, the column is between the clutch and brake pedals.

I also have to shorten the tie-rods themselves, due to my 2" shorter beam. I had asked Alex to shorten each side 1 inch, but he did not. So I'll have to remove 1/2" from each end of the round solid tie-rod. This is a minor inconvenience and a bit of disappointment, it's extra work.

Don't worry folks, I'm NOT going to be using a rag joint. Those photos are there just to illustrate the distance and spacing required.

I hope not, but I may end up putting the horn button on the dash. A lot of other stuff has to be accomplished before worrying about that.

If the rack could be installed 1/2" higher(it can't) I could use the rag joint and it would be easier for sure. I could just change the angle of the column so it lined up though, that would work. That may be the best solution.

Sorry for the lengthy post, but it's all part of pioneering things.

Attachments

Images (6)
  • 20220428_172222
  • 20220429_103437
  • 20220429_103513
  • 20220429_100943
  • 20220429_103657
  • 20220429_102345

Are you going to do this before Carlisle or after?

After. I put the steering box back in and went for a ride today.

I think the rack shaft has 60 splines.  It seems strange that VW used 62 splines for the steering box.

60, 62, what's the difference? I didn't count, Shoptalk info. It must be true, I read it on the internet.

It's like Mr. Mom:

"Did you wire it for 110, or 220?"

"220-221. What's the difference?"

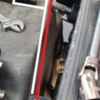
This should help you to see what needs to be cut and re-glassed. The red line is the new tierod. The white line is what needs to be cut. If I lower the column end about 1/2"(changing the steering wheel angle by ten degrees or so) I could use a rag joint instead of a U-joint. That may be the most elegant solution for the horn. The rack can rotate on the bracket to make the input shaft line up. Get out the Sawzall!

Cut

Attachments

Images (1)
  • Cut
Post Content
×
×
×
×
Link copied to your clipboard.
×
×