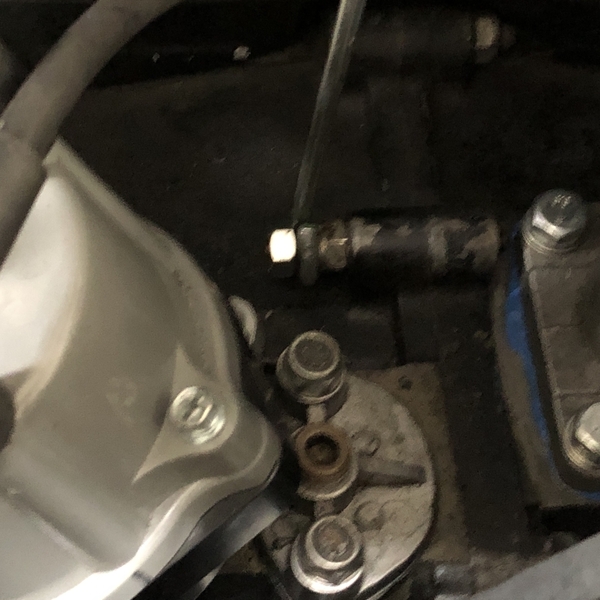
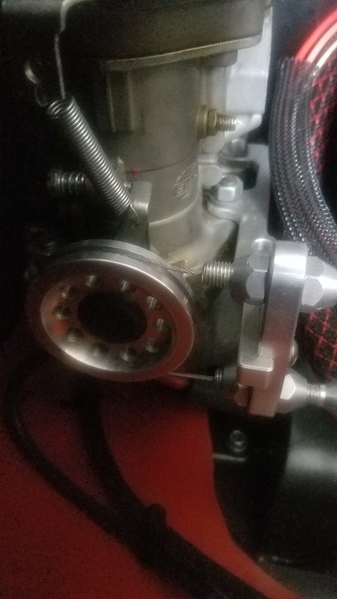
So just for the Heckuvit, I bought a pair of CB Performance "Turbo Hats" for Pearl hoping for a two-part improvement:

1.  Reduce intake noise a little for a quieter cockpit and;
2.  Totally eliminate any chance of rain water getting in to the carburetors

They look pretty sharp in there - A nice, clean look and kinda "Factory":

IMG_1963IMG_1964

So after messing with how they mounted and getting a bit of a spacer underneath to raise them a tad, I did a road test and they're all that and a bag of Tostitos.  Very slightly quieter at low speeds and noticeably quieter with your foot way in it to open up the throats.  Not a bad investment.

So with that done and just returning from a road test, I kinda-sorta wondered how close my Carbs were synced.  The last time I bothered to sync them was when I got them back from Blackline Racing after their rebuild and they've been pretty close ever since with minimal fussing, mostly one air by-pass adjustment and idle twiddling.

So I looked at them and thought, "What Would @DannyP do?" and trudged into the shop to get my snail meter.

They were off.  

Not a lot; a needle width difference between #3 & 4, and a needle width left to right at idle.  Not bad, and easily twiddled.  The I reconnected the linkage, ran it up to 3,000 rpm and held it with a special linkage tool I made to hold it running at any speed I want and rechecked it.  I highly recommend wearing combat boots with heavy socks and a pair of long pants because after a couple of minutes of twiddling at 3 grand, your feet get really hot down there.     Anyway:

Wow!  One side was 12 and the other side was barely at 9!    Twiddled the throttle adjustable link on the down side to bring it up and had to re-set it half a dozen times as each time I tightened the linkage locknuts it would change that side again.  Finally figured it out and got everything synced and tight and the idle reset (twice) to boot.  Success!  totally synced and idling at about 800 rpm.  Wrong time of day for a beer, so went inside and had a salad for lunch, instead.

Took it out for a road test and while it wasn't really that far out of sync before I started, you can really feel the difference in a much smoother engine at all rpms.  

THAT's what Danny would do!

(Yeah, Danny....   I know, you're not surprised.  I'm surprised that I had the patience to do it right (for a change)).

Attachments

Images (2)
  • IMG_1963
  • IMG_1964
Last edited by Gordon Nichols
Original Post

Replies sorted oldest to newest

@DannyP - You (and maybe some others) might be interested in the throttle adjustment tool I made.  It attaches to a longer case stud near the distributor/fuel pump block-off plate and uses a CB Perf hex bar throttle lever to move both throttles, equally.  It doesn't care what the engine is or whether sitting mid or rear.

https://www.cbperformance.com/product-p/3403.htm

Photos below:

Here's the tool - There isn't much to it.  The throttle lever costs under $15 from CB Perf and I modified it with angle grinder (and went overboard in one spot) to allow it to slip onto the hex bar more or less in the middle.  I drilled and tapped for another set screw against a side flat of the bar (the new screw is lined up with the short end of the Allen wrench in the photo).  I got the knob at ACE Hardware and it screws onto the rod, which is threaded for 10-32 at the knob end, and bent into a loop at the case end to slip onto the stud.  

IMG_1965

Here it is installed on the engine.  You can see the new set screw - It attaches in well under a minute.  Simply turn the knob down to increase throttle - It takes only a turn or two to get up to 2 Grand RPM on the engine.  The adjustment rod goes through a barrel fitting (same as on a lawnmower throttle cable - also Ace Hardware) that is just there to guide the rod and keep it from binding.  The bottom of the knob pushes against the top edge of the lever - really simple.  There is a thrust washer under the knob against the lever - just because.

IMG_1966

And here's the bottom end of the rod attached to the engine case stud.  It's pretty easy to double-nut the stud, remove it and install a longer one in it's place if what you have isn't long enough - Locktite Blue the new stud going in.  You could also flatten the rod loop a bit to make it thinner, if necessary, but most case studs stick out a bit, anyway.  If you made the rod loop tight to just fit an 8mm stud you just have to anchor it gently for everything to be stable.

IMG_1967

Once it's installed, just turn the knob down to advance both throttles equally, just like the cable pulling on its' lever.  You can slowly advance it while watching the tach to get to 2 grand and then it holds it right there for as long as you want (or if your shoes begin to melt while standing in the hot air from the heads).  It'll hold securely from idle to WOT and once set, the rpms stay put - also perfect for setting total advance timing at 3,000 rpm, no?   It also makes starting the engine a bit easier as you can give it a 1/2 turn,  just start it up and then adjust the speed.

This was the third time I've used this tool and I've been impressed with how well it works both times.  Easy to make, easy to use and stable as a rock.

Attachments

Images (3)
  • IMG_1965
  • IMG_1966
  • IMG_1967
Last edited by Gordon Nichols

No matter how tight the linkage, there will always be a little slop in there.

At idle, the throttle plates/shafts rest on the idle speed adjustment screws.

As soon as you move the throttles off their stops, the linkage pulls on each throttle(through the cable pull). It is imperative that the actual cable or cable attachment point does the pulling. This replicates what happens when you are driving.

I find it best to have a helper hold the throttle steady, but if that's not possible push/pull from the cable attachment point. Surely a friend or spouse is available for ten minutes or so? Gordon's tool is fine, but I'd like it better if the pull was exactly from the cable. Anywhere else can induce some twist.

Like I said above, 3k rpm isn't necessary, in fact it's better down at 1500-2000 rpm. The smaller the throttle opening they are synched at the better it will be. As the throttle opens synch becomes less and less important. Think about it, at half to full throttle any minor difference is not noticeable. But at a very small opening, any difference in airflow will be noticeable.

Getting it right on makes all the difference. When it's perfect it drives so smooth it can feel like a different car. That is why any and all linkage slop or wear must be eliminated.

Linkage synchronization has nothing to do with which jets are in play, it is ONLY about equal airflow.

Last edited by DannyP

@Gordon Nichols

That is a neat tool you made. I'm sure it works fine because you eliminated 99.9% of slop by using heim joints on the ends of the hex bar.

This is also a good time to talk about symmetric linkage. Both down angles have to be exact for the linkage to work right. Look at it both left and right, the downrods should go straight down, and both be at the exact same angle fore and aft.

You haven't sold me on "the cable is the only way to advance your throttle accurately" thing, Danny.  Mechanically, I see no difference between pulling the cable and rotating the hex bar with my lever so we'll just have to agree to do it each our own way.   I believe that either way will get you a good tune, mine is just more convenient.

One other thing I did a long time ago when fishing a stainless steel nut out of the alternator pedestal (don't ask) was to remove the four studs holding the pedestal to the case and replaced them with bolts.  You can see a couple of those in the third photo, above.  

Why?

Because if you want to remove just the fan/alternator assembly, with studs you have to remove the entire fan shroud and that's a BIG DEAL in a Speedster - There is a LOT more vertical room in a VW Beetle to get the fan shroud out.  In a Speedster, it's way easier to drop the engine, and that's a big deal, too.  There simply isn't enough room between the shroud and the pedestal to get the fan past it and you can't lift the fan/pedestal as a combined unit enough to clear the studs.  The only thing to do is remove the fan shroud with the blower attached.   🤮

I had to pull the fan a week ago to check for debris in there and I had it out in less than 15 minutes.  The only thing I had to move was one end of the hex linkage to get the hex bar out of the way and then the four bolts holding the pedestal and it came right out.  (I also pulled #1-2 plug wires at the Disti to give me more room).  You can Locktite Blue the bolts when you put them in, but I didn't bother - They've got lockwashers.

I would highly recommend this, especially to Speedster owners.  It can make life a lot easier for you if you ever need to pull the fan.

@Bobby D asked: "That is some awesome stuff.  I am not sure I understand one aspect of the syncing.  If you get them synced at idle then adjust at higher rpm, doesn't that throw off the idle sync?  Is it a different process at higher RPM if you are on the main jet?"

You don't throw off the main jet.  All you are trying to do is to get the linkages the same length on both sides and the throttle plates at the same angle/position between carb bodies 30" apart - Easy Peasy.  Idle is set on each carb by the idle stop screw.  The Linkages determine how in sync you are once you get off the idle stops.  Two different things.

Danny P has covered this in detail elsewhere, but the way I do this, is to disconnect the down link from the hex bar to one carb to isolate each from the other.   Then I sync both carbs at idle, starting with 1 & 2 or 3& 4 (doesn't matter).  You sync between throats on a single carb by adjusting the air bleed (right next to the mixture screw on a Dell) to get both throats in one carb body the same - Not close, but THE SAME.  Be patient.  Let it settle a few seconds between adjustments.

Once one side is equal front-to-back, do the same to the other side.

When both sides are equal front-to-back and with the linkage still disconnected on one side, adjust the idle screws to make them equal side-to-side between carbs.

Once they're equal between carbs at idle, re-connect the linkage and re-check at idle to make sure nothing has changed.  If it has, figure out which side is off the idle stop and adjust the down-link on that side to make them equal again.

Step back to allow your feet to cool.

Now you're ready to adjust off idle.  Bring the engine up to 2,000 RPM and hold it steady there (that's where my tool helps to give you a rock-steady rpm).  Use your snail to see where you are left-to-right (LTR).  They probably won't be equal so I tend to adjust the lower side up and re-adjust the idle stops later.  That's just me, YMMV.  Adjust one side by loosening the locknuts on the down link and twist the rod to make both sides equal.  Take your time and let it settle between adjustments.

Once you'r equal LTR, tighten the locknuts and re-test.  You'll probably find them out, again, after tightening the nuts, so figure out how to hold the downlink rod still while you tighten the locknuts.  This usually takes a few tries to get where you want to be and some foot cooling time, but you'll get there.

Once THAT is done and you're OK LTR, drop back to idle and recheck.  Usually you find that one throttle lever is off the idle stop, held up by the linkage.  If you're idling high, turn out the stop that's hitting until idles down to your desired idle speed, and then turn in the other side (if necessary) til it touches the lever.  They should still be the same at idle LTR (because you just made the down-links the same in the previous step and you're just making the idle stops match the down-links.  If not, twiddle until they are.

That's pretty much it.

Dual carbs:

You'll have the best luck doing it with the car at operating temperature. Too cold, and your settings will be off.

Step 1: check your timing. Timing is set at total mechanical advance. If you have a vacuum can, remove the hose and plug it. Set the timing to 30* (+/- 2*) total. That might be 2500 RPM, or it might be 3500 RPM - it's all dependent on the kind of day the political prisoner in the Chinese reeducation camp was having on the day he made it. Likewise where the advance lands at idle - it might be 5* BTC, or it might be 10*. You'll definitely like it better if you got a "Wednesday distributor" and it lands at 10* rather than 5*, but you get what you get and don't throw a fit.

Once that's done, you can drop a down link and sync the carbs at idle. The guys that go to 800 RPM have a distributor that idles closer to 10*, the 5* guys are gonna want something around 1000 RPM, otherwise there's a flat spot off idle that no amount of futzing with the carbs will ever cure. Check all 4 holes. If trumpets on the same carb are sucking differently, open the air bleed a quarter turn or so on the low cylinder. Make sure the bypass screw is full closed on the high one. Maybe you'll get lucky and it'll work - it doesn't always (worn shaft bushings or twisted carb shafts are a thing).

Once they're really close, you can just use the number 2 and number 4 trumpets to sync. Get them as close as you can side to side. Once you're there, reconnect the linkage and check again to see that you haven't moved. You haven't really "synced" the linkage yet, but you should be idling like glass.

If nothing moved, you can go to the "just off idle" sync. Danny wants you to use the throttle pull because the hex bar deflects (even if it's ever so slightly) differently pulling from a different spot. I like Gordon's little tool idea a lot, but I'd set it up so it's as close to the actual linkage pull arm as humanly possible. Going off of one drop arm or the other is going to leave you unhappy.

I don't go by what RPM I sync at so much as by where I am in relation to the throttle stops. If I can pull the throttles just off the stops and sync the linkage there - it's perfect.

Here's an insider tip - the drop legs are where everybody gets lost. The heims can be really sticky after a while, and the treads on the drop legs themselves can get nicked up and might not turn freely. The only way this works is if the RH and LH threads move into and out of the heim joints freely and at the same rate, and if the heims themselves have a full range of motion. If one side of the rod wants to thread easily, and the other doesn't, you'll struggle. I run a 10-24 die down the RH threads all the time, but I don't have a 10-24 LH die. I should get one. It's important.

I've gone so far as to fill a hole on a linkage arm with epoxy, then redrill it about 1/16" closer to (or further away from) the hex bar because the total pull wasn't the same side to side. But as everybody keeps saying - once you're past about 1/4 throttle (probably much less), it really doesn't matter that much. It bothers me though. It might bother you too.

Sync-link solves all of the geometry, flexing, slop, and down-link nonsense (of course),  but almost nobody uses it. You probably don't either. Sync-link is a nice bit of kit, but it ain't cheap. The hex-bar linkage can be made to work exceptionally well. It's just more work.

Last edited by Stan Galat
Post Content
×
×
×
×
Link copied to your clipboard.
×
×