James Bond Rocket launchers?
what are these for?
 Speedster Owners - Automotive Enthusiast Community

James Bond Rocket launchers?
what are these for?
Replies sorted oldest to newest
I believe heat.
Yup - hooks to OEM VW engine heat exchangers (via 2" heater hose) to distribute hot air to footwells (adjustable with a slide assembly either side) and also similar pipe either side upfront for windshield defrosters (at least on FF/CMC).

On my VS, they were never prepared to be used as heater connections. The other welded ends are not open to the frame to allow heat to travel up to the front. None of the other junctions along the way are oped to allow heat to travel up there either. So my question is why (as late as 2014 at least) are these even welded on ? Were they used as the indexed holding fixture during assembly of the body frame or what ? I considered cutting them off at one time to make it easier to work around under there.
If anyone knows for sure let us know..............Bruce
Those are for routing the heat from the heat exchangers to the interior of the car. They routed the hot air through the box steel frame to the large plastic tubing that runs along the rocker panels on each side of the car. They don't route it directly into the car. They are the reason that there is very little hot air flow from the foot well vents, because they severely restrict the air flow.
The engine is pumping out a lot of hot air from the heat exchangers, but the box steel frame is far too small to handle that volume of air.
You can easily route the air directly from the heat exchangers to the rocker panel tubing and bypass that restriction to get maximum air flow.
I showed this to Kirk several years ago and he started bypassing the box steel frame, at least for a while. The only downside is that you get a bit more engine noise inside the car.
I posted this video nine years ago that shows the improved air flow after bypassing the tubes.
And here are several links to previous discussions about this, including pictures.
https://www.speedsterowners.co...2#361021583639747802
https://www.speedsterowners.co...13#10582640009721613
https://www.speedsterowners.co...090#2135445019501090
https://www.speedsterowners.co...277#2135445019366277
https://www.speedsterowners.com/clip/heater-008
Thanks Troy.................Bruce
Do those of you owning Speedsters built like this and not running heat through the tubes plug them up to keep critters from making a home in them?
Jimmy - think I would plus it would result in less engine noise inside.
If you just need cabin heat and not with defrost, you can route your warm air from the engine to a couple of fittings mounted to the bulkhead area of the door jambs. This way the warm air from the engine does not touch any steel of the car's frame and most of the engine's heat will go directly into the cabin.
Jimmy wrote: “Do those of you owning Speedsters built like this and not running heat through the tubes plug them up to keep critters from making a home in them?”
I don’t use those tubes and never had a critter issue - Until last winter, when something set up a condominium in the driver’s side frame member, entering/exiting through that tube above the transaxle. Vacuumed everything out, but those silly tubes now have a permanent plug in them at the rear.
Ahh. That makes sense. Mine are dead ends like Bruce's. Maybe I will cut them off while I having everything out.
Also, does anyone else the a VS have a problem with the clutch cable threaded rod portion getting stuck in the clutch tube just inside the rear tunnel access plate? It looks like the tube has too sharp of a bend from the rear hole angling down to inside the tunnel. Maybe from shortening the chassis?
You need to disconnect the Bowden tube from the bracket on the trans , straighten the tube put a bit of grease in the tube and it will go through then reattach to the trans.
Good idea ! Just remove that tube if your up in that area working on something else.
What David is suggesting is a really good idea. Of course you wouldn't have any defroster heat that way but you would get quite a bit of heat out of the system that way. Using a couple of the round plastic A/C vents from JC Whitney for the openings in the door frame area looks like a nice way to trim it too...........Bruce
sethsaccocio posted:Also, does anyone else the a VS have a problem with the clutch cable threaded rod portion getting stuck in the clutch tube just inside the rear tunnel access plate? It looks like the tube has too sharp of a bend from the rear hole angling down to inside the tunnel. Maybe from shortening the chassis?
Another little trick I developed for a pan based Speedster is a " Bowden tube restraint" part that will prevent the clutch cable tube sliding forward into the bodywork if the weld of the clutch cable tube breaks where it enters the body tin in the vicinity of the front end of the Bowden tube.
In a nutshell, the clutch cable tube is held in position from front to back with several welds along the way and the most aft weld is where the tube ends at the rear end of the "bodywork" right at the front end of the Bowden tube. If the weld breaks there, when you push on the clutch pedal, the front end of the Bowden tube might slide forward and you have no clutch action. The Bowden tube itself needs a slight curve into it also for proper action. If that aft weld lets go, you can't keep that curve either.
I had an older IM pan based Speedster and some of the little things were starting to wear and that aft weld was one of them. To cure the problem and prevent a recurrence I welded up a small tube with a cross bar. The tube captured the front end of the Bowden tube at the body work and the flat bar welded to the tube prevented the clutch cable tube from moving forward for the rest of it's life. An easy $1 fix.
Hope that the pic explains it a bit better. If you're down there messing with the Bowden tube setup on a pan based car this may be an easy / cheap preventative maintenance install. If your clutch cable tube welds go while you're out on the road, you'll be in for a tricky ride home or a wait for a tow truck.

that's a cool idea Bruce.
Alan. Ended up using a steel rod that fit inside the metal tube to ease the bend where the cable was getting stuck. thanks
Gordon Nichols posted:Jimmy wrote: “Do those of you owning Speedsters built like this and not running heat through the tubes plug them up to keep critters from making a home in them?”
I don’t use those tubes and never had a critter issue - Until last winter, when something set up a condominium in the driver’s side frame member, entering/exiting through that tube above the transaxle. Vacuumed everything out, but those silly tubes now have a permanent plug in them at the rear.
Bounce dryer sheets scattered in/around your car are supposed to keep the little critters away once it's put away for the winter. As for them setting up house and running around your garage- a 5 gallon pail partly full of water with a pop/beer can slathered in peanut butter and suspended by a piece of heavy wire (through the middle of the can so it spins) is supposed to be foolproof. Don't forget the ramp up to the top of the bucket.
sethsaccocio posted:Ahh. That makes sense. Mine are dead ends like Bruce's. Maybe I will cut them off while I having everything out.
Cut them off and your car will weigh that much less. And so starts a long journey- a few ounces at a time...![]()
ALB posted:Gordon Nichols posted:Jimmy wrote: “Do those of you owning Speedsters built like this and not running heat through the tubes plug them up to keep critters from making a home in them?”
I don’t use those tubes and never had a critter issue - Until last winter, when something set up a condominium in the driver’s side frame member, entering/exiting through that tube above the transaxle. Vacuumed everything out, but those silly tubes now have a permanent plug in them at the rear.
Bounce dryer sheets scattered in/around your car are supposed to keep the little critters away once it's put away for the winter. As for them setting up house and running around your garage- a 5 gallon pail partly full of water with a pop/beer can slathered in peanut butter and suspended by a piece of heavy wire (through the middle of the can so it spins) is supposed to be foolproof. Don't forget the ramp up to the top of the bucket.

I used that exact bucket trap design in a storage unit where I had a VS last year , lucky I didn't have a mouse issue but do look up that bucket trap on You Tube it's amazing how many mice get caught and they follow each other right it ...
I did the mod Troy suggests several years ago. I get ample heat minimal defrost. I have the original T stat install to help with warm up. Unfortunately with the external T stat controlled air filter, and the extra capacity sump. Below 40F my engine never gets warm enough to produce much heat. . When asked what the larger tubes are visible under the real wheel wells I just tell them they are the intakes for the intercooler.
Consumer tip : if you use 50/50 antifreeze in the bottom of the bucket you won't have the dead mouse smell ~
I was wondering when someone was going to bring up the weight savings argument. I am right there with ya. I'll reweld them up front for better distribution .![]() It reminds me of flats fishing boats, every bit of weight you could move from the back to the front was a win.
It reminds me of flats fishing boats, every bit of weight you could move from the back to the front was a win.
ALB posted:sethsaccocio posted:Ahh. That makes sense. Mine are dead ends like Bruce's. Maybe I will cut them off while I having everything out.
Cut them off and your car will weigh that much less. And so starts a long journey- a few ounces at a time...
sethsaccocio posted:I was wondering when someone was going to bring up the weight savings argument. I am right there with ya. I'll reweld them up front for better distribution .
It reminds me of flats fishing boats, every bit of weight you could move from the back to the front was a win.
As far as weight savings go this is an excellent return for effort spent- a few minutes with a cut off disc or sawzall nets a pound (or a little more). I've got hours and hours into re-working some stuff- the clutch arm on the trans, for example, went from 155 to just under 100 grams, which is a total weight saving of 2 ounces. Drilling holes is the easy part- when you start contouring parts with the grinder and files the hours add up! I'll post a pic of the clutch arm later- I don't think there's 1 in my pics file on my page here. It's an understatement to say you have to be dedicated.
I will leave you with this...
 And something to ponder this fine autumn morning-
 Have a great day everybody!
And PS- Don't weld up the holes after you cut the tubes off, @sethsaccocio- fiberglass over them. It'll be lighter ![]()


"I've got hours and hours into re-working some stuff- the clutch arm on the trans, for example, went from 155 to just under 100 grams, which is a total weight saving of 2 ounces."
Just to put this into perspective, a gram is roughly the weight of a large paper clip.
Jus' Sayin......
But then, all them paperclips add up, after a while, into some serious weight. Like a 3-ring binder, or something.
I'm digging for some photos of Rolex IMSA cars from the garages. They aren't as much into drilling holes as hogging out whole sections. Al's throw-out arm would have every other crosspiece milled away to give large slots, not holes, to save even more weight, but the cross pieces would be "V"d on the diagonal for more strength. Good thing they don't use the clutch very much, but whatever they do has to last through an endurance race.
Al, there's a like-minded guy in the Connecticut VW club who you should meet. He has lightened his '56 sedan about as much as you have your car. Everything then got polished and looks pretty awesome.
Old VW/Porsche guys just let nature do the lightening for them. Have you ever seen an old VW (outside of AZ) that doesn't need new floor pans?
Some on the Miata forum say that Artic White (a single stage paint) is the lightest car over the 3 stage pearlized colors.
I know I could push some of it a little more, Gordon. The clutch arm that my friend Bruce lightened is about 15 grams (1/2 oz.) lighter than mine and an engineer friend at his work figured he hadn't really compromised it's strength, but it comes to the point (for my own sanity at times!) where it's time to move on to the next project.
Is the guy with the '56 bug on the Samba? Do you know his username?
Another tidbit- 
The emergency brake ratchet plate went from 81-55 g, the bowden tube bracket, after trading the heavy one (91g) for the lighter version (69g) now weighs 52g and the cross shaft went from 530 to 377 g (7/16" hole through the middle). The ratchet plate is hardened similar to a lot of the trans parts so don't be surprised when an HSS drill bit doesn't touch it. Again, carbide is the answer, but they are expensive. Be careful when going through the backside, as going from softer to hardened steel is a drill bit breaker if you're not careful!

Wow! Extreme. Al have you added it all up?
Drilling Stainless has always been a PIA. Knowing what kind of stainless you have will help. There are charts on the best (Don't read perfect here) drill speed to use, the best drill angle and chip clearance to use based on the type of stainless you have., If you don't know....well...,good luck to you and I both ! I have found that my little hand held spot welder helps to anneal the metal to a softer disposition. I just use it on the area to be drilled. Most types types of lubricant can make drilling even worse. If it lubricates the cutting surface it is making it even worse than no lubricant because the cutting edge just skips over the lubricated metal. The lubricant is doing what it's supposed to. I still use Crisco for cutting on my lathe and drilling. Crisco doesn't lubricate anything (unless your substituting it for Astroglide) but as it melts with heat, it carries it away heat and that's what you want. It's solid when you apply it and hangs around a bit as it melts. Oh and don't worry about getting it on your hands ! ("It's digestible", so you can lick it off if you wish !) Ha Ha ! Carbide bits are expensive and the angle should be ground to your needs. they work very well and can create a lot of smoke. Some manufacturers recommend no lubricants, only coolants. I have found that on really tough jobs, I start with a very small hole. (More PSI on the tip). and work up in 1/64th's. In the end, I have a bunch of bits that I use only for stainless steel. They are continuously being resharpened and modified for whatever job I need to do.
Last thing. If your regular jobber bit starts smoking, it's time to resharpen and not just a touch-up. Probably the first 1/8" of the bit is blue and all of that must be removed to get to the original temper of the bit so grind off all the blue (without making more of it blue) and then start shaping it either by hand or with a "bit doctor". Stainless is really nice material but there are consequences to it's use..............Bruce
I used Cobalt only on stainless, and go slow. If you overheat the bit or material, you are screwed. You'll break bits, no matter what you do-- it's just the price of business with SS.
I just want to know when Al's car is going to be on the road and driven?
Conflicted Aircooled/Watercooled Bruce wrote: "I have found that my little hand held spot welder helps to anneal the metal to a softer disposition. I just use it on the area to be drilled."
THAT is a great idea. I used a similar trick on the 1/4" thick Stainless mounts for my driving lights:

I didn't have a welder handy, but I did have my Oxy/Acetylene torch and heated the BeJeezus out of it, first, just to bend the damn thing (Lots of swearing and whacking with a 3 pound hammer) and then a bunch more to drill the holes in it. Wrecked an entire set of drills in the process, so the piece of Stainless I got for $10 bucks for two mounts turned into about $75 bucks for finished product. Eventually had a professional sharpen the old drill set so that was another $35.
Live and learn. Stainless Steel is really tough to work with.
sethsaccocio posted:Wow! Extreme. Al have you added it all up?
It's somewhere in the neighborhood of 22 pounds lost through only drilling holes (and sometimes a little reshaping with a grinder or file), Seth. Once I start on a part I can usually count on reducing it's weight by 20-30%- occasionally not quite that, and every once in a while a little more. Originally I had visions of cutting 100 or so pounds off the car in this manner, but quickly realized it's a pretty tall order. I would have to handle 400- 500 lbs of parts (at my present rate) to hit my goal, and I'm not sure if there's that many things on the car to drill holes in/rework.
I still have some ideas- turning down cv joint exteriors, gun drilling axles and stub axles, reworking cv joint cups (cloverleafing the flanges) and seeing what I can do to my irs trailing arms when I narrow them to name a few, so I'm not done yet. I am looking more at aluminum; the weight difference is just too big to ignore. Will I meet my goal- I really don't know. What I do know is the weight reduction program will be a work in progress for a while.
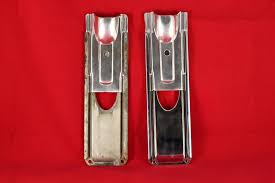
Found this pic a while ago- I know the big one is a 930 cv joint but there's no reason you couldn't do the same thing to the Type 1 unit beside it...


Access to this requires a premium membership.
Supporting members have donated about $4.00 a month ($49.00 US per year) paid annually.
AUTO RENEW: You membership will auto-renew after 12 months. If you prefer not to auto-renew, you can cancel your premium membership at any time and it will remain in effect until the end of the 12 months. To cancel, sign in at SpeedsterOwners.com and navigate to: (Your User Name) > Premium Membership.
PLEASE NOTE: Your credit card will receive a charge from CROWDSTACK PAY, the payment processor, not SpeedsterOwners.com.

