@edsnova posted:

If you want to get it powdered, then for sure keep scrubbing. Your powder coater will appreciate it.

It’s a rare day that I contradict Ed, but if you’re going to get it coated don’t bother.

AFAIK, there isn’t a powder/ceramic coater out there that won’t insist on blasting pre-coat. ANY contaminant in the process, including oil from your hands, will ruin the coat and possibly anything else in the same batch in the oven. It’s built into their price. And no matter how clean your piece, they’re going to do it anyway.

And I’ll second Stan’s advice, and go a step further. I found an old blast cabinet at a yard sale for $5. I added a $50 ACE soda blaster and came up with a killer little setup that’s great for smallish alloy parts. It puts a great finish on anything and, if it matters, a coat of Eastwood’s Diamond Coat will keep that “just blasted” finish, forever.

Here’s my intake manifolds and generator stand freshly soda blasted:

eta: I should have read the rest of the thread.

Attachments

Images (1)
  • mceclip0
Last edited by dlearl476

Nice love it … always dreamed of doing some blasting but everyone I talked to seem to be concerned about all the dust, it makes, etc. etc. but that looks real nice..  I also thought that trying to get all the water out to stop clumping might be an issue with my 60 gallon compressor… outside of cleaning off and blowing air in my tires, which I now have stopped doing due to a recent purchase of a Milwaukee M12 auto Airpump… the 60 gal is under used .

Last edited by IaM-Ray

Hello everyone,

Still waiting on parts, unfortunately the body shop is really busy for the next few weeks so have not dropped it in yet to have the suspension welded on.

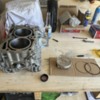
On another note the weather is much warmer so I decided to take the plunge and file down the piston rings. I’ve not been looking forward to this, it took about 3 hrs and I truly messed up my first attemt at the second ring. Try not to laugh too hard when you see the picture, you could drive a tank through the gap 🤣.
IMG_0220
So here is what happened, I filed down the compression ring which took forever as I think it is hardened steel. I had a drill attached to the ring grinder to make it easier. I started on the second ring, to start with it took a while to get a gap, I kept measuring it then suddenly it was way too big, I think this ring is made out of normal mild steel - take heed anyone about to attempt gapping your rings! In the end I used the 0.020 oversize ring I ordered, the ones where I thought the gap was to big, the gap was big but not as big as the gap in the picture. Lesson learnt, the rest of the rings went okay, they might be a little out by one or two thou, but according to the specs the gap can be up to 1mm (0.039). Only time will tell, I’ll keep you all posted if the engine blows up on me!

IMG_0217IMG_0216

While I have been waiting for parts, I’ve been teaching myself how to TIG weld, I bought a new welder recently and it is a multi process welder, I’m quite enjoying it but the learning curve is much more than for MIG welding.

IMG_0218IMG_0219

That’s it for now, I’ll keep you posted as to my progress.

Attachments

Images (5)
  • IMG_0220
  • IMG_0217
  • IMG_0216
  • IMG_0218
  • IMG_0219

Hello everyone,

My crankshaft and conrods have arrived, so I have been cracking on with building the engine.

Here is the old and new crankshafts side by side, bit of a difference;

IMG_0243

I installed the bearings into the case halves, as the crankshaft is new I fitted standard bearings:

IMG_0245

I measured the crank journals, they are all within spec. I thought I would check the oil clearance with plastigage just to be on the safe side. It’s abit of a sequence bolting the case halves together, but I managed it without spinning the crank. On unbolting and measuring the plastigage I was a bit miffed when i measured it:

IMG_0251

Yep, my great luck persists, the clearance is too big. The clearance should be 0.010 - 0.030 mm, mine is reading around 0.050 mm! Gutted, looks like I am going to have to order some oversize bearings.
Before I fork out for another set of bearings, has anyone got any experience with oversize bearings? king do a 0.026 oversize, I presume these would be suitable?

On another note, the heads are at the machine shop getting rebuilt, I was going to get them decked then rebuild them myself but after adding up all the seperate costs, I thought I might aswell get them built by a Subaru specialist for not much more than doing it myself. They should be done next week, I’ll keep you all posted.

Attachments

Images (3)
  • IMG_0243
  • IMG_0245
  • IMG_0251

Decided to get the dial bore gauge out, I find these things a bit tricky to read, mine is imperial, so a little bit of converting needed:

IMG_0254

I measured the main and rod journals earlier, then set my micrometer to 60mm (all of the mains were 60mm), I then set the dial bore gauge to zero when it was resting fairly even in the micrometer, here are the readings:

IMG_2738

all of the clearances are on the left, the one that worries me is the one that reads 0.0027”, that corresponds to 0.068mm. The limit is 0.040mm, even with 0.026 oversize bearings it will still be out of spec. I think the thing to do here is to try and source a single 0.050 bearing………… or measure again after a couple of beers 🍻. That sounds better!

Attachments

Images (2)
  • IMG_0254
  • IMG_2738

Hello everyone,

I’ve been beavering away, mainly with the engine, here is where I am at:

I’ve put the shortblock together, to get the clearances correct on the main bearings I had to buy 3 full sets of bearings, unfortunately I had to buy one set from Subaru (it still upsets me to think about it!)

IMG_0275

The bearing on the left is standard, the next two are 0.026, the silver one is 0.050 and the last one is 0.026. This put all the tolerances within the factory Specification.

As per usual, nothing is straightforward, with the con rod bearings I ordered King Standard X, who new that standard X means that there is 1 thou extra clearance! I was pulling my hair out when I was measuring the clearance as it was coming out at the top end of the specification. New crankshaft, new bearings & new con rods should equal well within specification. Anyway, after a bit or research, turns out that I need just plain old standard bearings, we are within spec now👍IMG_0276

So, slapped it all together with some assembly lube and loctite 518, and here we are:

IMG_0337IMG_0338

Fitted new galley plugs and washers, fitted the large plugs on the bottom to delete the oil cooler and a shorter oilf filter union and fitted a new crankshaft seal.
I didn’t need to buy a new oil seperator plate, I was fortunate that mine was one of the cast aluminium plates, so i gave it a good scrub and fitted it with some ATV.
continued in the next post………

Attachments

Images (4)
  • IMG_0275
  • IMG_0276
  • IMG_0337
  • IMG_0338

I mentioned above that I got the heads refubished at a local Subaru dealer, here is how I got them back:

IMG_0272IMG_0273

As you can imagine, I wasn’t best impressed. The company sent me a form to review the service I had received, I sent one back saying I was impressed with the level of service and the speed it was turned round (2 weeks) but was very unhappy with the returned heads. When I picked them up I had just finished work (I work nights) and didn’t inspect the heads, the shop has a good rep, I asked a few questions about whether the valves and seats had been reground, the answer was ‘they were freshened up’, I should have known right then that I was going to be dissapointed. Over the weekend I purchased tools to start to strip them down to rebuild them myself. Turns out the bolts on the heads are torq plus, I did’nt even know there was a fitting called torq plus! I bought a pretty cool valve spring tool from Toyo tools , and was planning on where to take the heads for a regrind & vapour hone.

Anyway, fast forward to Monday, the owner of the shop phoned me up and said that they would get the heads back in to be done properly. Turns out they farm out their machine work, he didn’t check the heads when they came back and I didn’t check them when I picked them up. So currently they are in getting re done…….

continued in the next post…….

Attachments

Images (2)
  • IMG_0272
  • IMG_0273

These Subaru engines sit quite low to the ground when fitted, what most folk do is either buy a shortened oil pan or do it yourself…………..

Shortened oil pans come in at around $500, I thought to myself, why not, I’ll give it a bash.

To start with I bought a new oil pan and cut about 4” off the bottom:

IMG_0302IMG_0303IMG_0304

The new oil pan I bought had an extra oil baffle, time for the plasma cutter:

IMG_0325

I then made a few measurements to ensure there was enough clearance and shortened the oil pickup:

IMG_0323IMG_0324

I took the butchered oil pan down to my local metal benders who cut me a piece of 10 gauge plate steel to shape, this was before I bought my plasma cutter:

IMG_0311

I then welded it on:

IMG_0326

I then welded on a drain plug, but this is where things started to go wrong:

IMG_0335

In my haste, I ended up cross threading the the drain plug, what an idiot! I looked at the different solutions, including cutting out the plug I had just welded in. In the end I decided to buy an 02 sensor thread chaser M18 x 1.5, and thread it from the other side. Fortunately this worked, and I am now going to fit a Valvomax oil drain so that I don’t need to unscrew a drain plug again.
close call, that one!

The body shop I am using to weld on the suspension is currently moving, I’m hoping to get it in at some point in July.

That’s us up to date.

I’ll keep you all posted with my progress👍

Attachments

Images (9)
  • IMG_0302
  • IMG_0303
  • IMG_0304
  • IMG_0325
  • IMG_0323
  • IMG_0324
  • IMG_0311
  • IMG_0326
  • IMG_0335

Ray, I usually love the gadgets you find.

But this one is not a problem that for some reason is searching for a more complicated solution that is destined to fail(at least more often than a simple drain plug).

I throw on a pair of nitrile gloves, take out the drain plug, then wipe it with a rag. Throw gloves away.

@Vic7672 Spectacular work, sir! Keep the updates coming, can't wait to see what you do next!

Hello everyone.

Chassis is off to the body shop tomorrow to get the front welded on and the back sway bar mounts welded on. I’ve bought some new seat rails so I will get those welded in at the same time.

As per usual nothing  is ever straight forward, turns out the triangular kafer bar mounting plates use a 1/2 inch bolt fine thread. The shock mounting bolts on VW are M12 x 1.5, 1/2 inch is a bit fatter, so I had to drill the hole in the shock mount towers out to 1/2 inch.

When I ordered the rear suspension, it did’nt come with any mounting hardware, Kevin from Coolrydes said he would send it, which was good of him,  but as I’m buying brakes shortly I told him to hold off and send it all together. I was reading on the Samba last night, other people have had the same issue about drilling out the towers, so Coolrydes came up with another version of the Kafer bar mounting plate which is M12, looks like I got palmed off with an old set! Here is a few pictures, the bump stops on the shock towers will be removed at the body shop.IMG_0350IMG_0351IMG_0353

The middle picture is the reason I assembled it all, these are the sway bar brackets that need welding on, I put  it all together to position them for the body shop.

Now lets talk about the bottom picture, I could do with some opinions on this. The bar that attaches from the frame horn to the mounting plate is about 2.5 inches from the plate. Has any one had this problem? How did you fix it? Here is a few more pictures:IMG_0352IMG_0355IMG_0354IMG_0348

I’m thinking of asking the body shop to bend the mounting plate on the framehorn more to fit. But I would be interested in hearing opinions.


Thanks everyone.

Attachments

Images (7)
  • IMG_0350
  • IMG_0351
  • IMG_0353
  • IMG_0352
  • IMG_0355
  • IMG_0354
  • IMG_0348
@edsnova posted:

Turn the bar so it gets longer.

🤣I’m not that much of a dunce! In the last picture the bar is actually the correct length and would line up with the hole on the mounting plate, but as you can see it is 2.5 inches away from the plate. To make it fit I would have to bend the bar, if I tried I would probably snap the yoke on the end of the bar.

I think I’ve answered my own question, I’ll just increase the bend on the connector that fit’s on the frame horn, should fit no problem.

@Vic7672 posted:

Hello everyone,

I’ve been beavering away, mainly with the engine, here is where I am at:

I’ve put the shortblock together, to get the clearances correct on the main bearings I had to buy 3 full sets of bearings, unfortunately I had to buy one set from Subaru (it still upsets me to think about it!)

My friend, mentor, and former instructor that plays with Porsches told me he regularly goes through 4-5 sets of bearings before he gets a set that’s just perfect.

As for Fumoto valves, I’ve had 3 in service for about 10 years now. Never any issues. But Danny is right, you have to make sure they’re well clear of the bottom of the car.

My 968 used to require two belly pans to be removed to get at the plug. I got a valve, cut an access hole in the rear pan, and installed it. Now I attach a hose, undo the locking clip, and flip the lever. By the time I’ve R&R’d the filter, the sump is drained. 15 minutes vs 45 to an hour.  And no missing hardware!

Last edited by dlearl476
@dlearl476 posted:

My friend, mentor, and former instructor that plays with Porsches told me he regularly goes through 4-5 sets of bearings before he gets a set that’s just perfect.

As for Fumoto valves, I’ve had 3 in service for about 10 years now. Never any issues. But Danny is right, you have to make sure they’re well clear of the bottom of the car.

My 968 used to require two belly pans to be removed to get at the plug. I got a valve, cut an access hole in the rear pan, and installed it. Now I attach a hose, undo the locking clip, and flip the lever. By the time I’ve R&R’d the filter, the sump is drained. 15 minutes vs 45 to an hour.  And no missing hardware!

You have to have clearance for sure for a fumoco... but this is the reason for using one as the belly pans can drive you crazy at time, but I also find that for a lot of cars you can test an oil extraction unit to find out how much oil is left in the pan if you decide to use it. On my GTI I know it is less than 4 oz. and with the filter on top of the engine, it makes the job really really fast.

@IaM-Ray posted:

You have to have clearance for sure for a fumoco... but this is the reason for using one as the belly pans can drive you crazy at time, but I also find that for a lot of cars you can test an oil extraction unit to find out how much oil is left in the pan if you decide to use it. On my GTI I know it is less than 4 oz. and with the filter on top of the engine, it makes the job really really fast.

I bought the OEM extractor fitting for my ML. I doubt it’s even 4oz on that. (Mercedes designed the motor to be changed from the top.) Maybe it’s my compressor but the Fumoto is way faster.

BUT, if you do the extractor bit you can finish off with the drain plug without getting hot oil down your arm. Like you say, there’s a minimal amount left. (I checked)

@Vic7672 posted:

🤣I’m not that much of a dunce! In the last picture the bar is actually the correct length and would line up with the hole on the mounting plate, but as you can see it is 2.5 inches away from the plate. To make it fit I would have to bend the bar, if I tried I would probably snap the yoke on the end of the bar.

I think I’ve answered my own question, I’ll just increase the bend on the connector that fit’s on the frame horn, should fit no problem.

Sorry Vic, no shade intended.

Hello everyone,

Heads are back from the shop, what a difference, originally they were going to paint them, but they were vapour honed instead. What a difference!

IMG_6462IMG_6463IMG_6464

I’ve just ordered the headgasket kit, so will be fitting them this weekend, more to follow.

The body shop has nearly finished the rest of the work, the pan is currently being sandblasted and powder coated, here are some pictures:

IMG_2782IMG_2783IMG_2784IMG_2785IMG_2786

Getting there, still a long way to go though!

That’s it for now.

Attachments

Images (8)
  • IMG_6462
  • IMG_6463
  • IMG_6464
  • IMG_2782
  • IMG_2783
  • IMG_2784
  • IMG_2785
  • IMG_2786

Hello eveyone,

I’ve been researching transmissions for my build, turns out Subarugears don’t sell individual parts to convert a transmission anymore, you have to buy a complete transmission.
I have a question, I have a choice to either fit a transmission using a clutch cable or convert my chassis to use a hydraulic clutch. There are basically two different types of transmission. Can anyone recommend either of these two options?

There is a bit of work involved in fitting a hydraulic clutch, I’m just wondering if it is worth the extra work.

Thoughts and opinions welcome.

Here is picture of hiw the hydraulic clutch would look;IMG_2777

Attachments

Images (1)
  • IMG_2777

Add Reply

Post Content
×
×
×
×
Link copied to your clipboard.
×
×