Late last season, I noticed some weird, gray, fuzzy material showing up in the engine compartment from time to time.  I looked high and low and couldn't find a source, but noticed that it looked a lot like the fluffy stuff that mice carried off from my wife's Subaru (it used to be her firewall noise blanket), most of which showed up in the heater blower of my Nissan.

Anyway, I could see it pushing out around the edges of the tin over the heads and thought, "Oh, oh.....    That ain't good!" and decided to pull just the fan shroud and see what's going on.  Let me tell you, after a couple of hours of fighting with it I decided it is a LOT easier to just pull the engine (something I know I've told others in the past, but I tried to do a "quick and dirty" fix and failed - I should-a known better.

So it's out on the floor, I pulled the shroud and tins off and #3 cylinder was maybe 40% covered in fluff while #4 was about 10% covered.  The passenger side was clear.  I'll get it onto an engine stand later today and give it a once-over and clean things up before returning it.  Besides, it's a LOT easier to replace the fan shroud with the engine up around 3 feet to get at the underside tins.  I think it is over ten years since I last pulled the engine, so I'm not feeling bad about this, but it was a LOT easier to do this ten years ago.  Getting old sucks.

I'm glad I went to all this trouble though, and, of course, found a bunch of other things to fix along the way making this a 3-day process, but Whalla-Hey?  It needed to get done and now I can figure out how to put a screen over the fan opening.

DAMN YOU, MICE!

Driver's side photo:

IMG_2138

Attachments

Images (1)
  • IMG_2138
Original Post

Replies sorted oldest to newest

Glad you noticed this. Mice nests can overheat an air-cooled engine in no time. I place plenty of mice killing devices and poison around my garage and own 2 outdoor cats to boot! Mice have cost me plenty over the years and I have learned to take extreme measures to rid my garage of them. I had to have the dash removed on a BMW sedan some years ago after they built a home in the Heat/AC blower fan. They will always build on top of our VW engines, and it is easy to not see the nesting material and wonder why the engine is running so hot. Corvair engines were always prime real estate for the critters.  Your engine loves you for all the work you are doing Gordon. Happy spring motoring to all!

356 Porsche engines have a screen on the back of the fan shroud ,

Dune buggy guys did the same thing ,

one of the things I do when checking out an unknown motor is to check and see is anything got sucked into the fins of the fan ,

I have found string , shop rag , plastic bag pieces and things like that.

probably something that needs to be on your tune up list of To Dos

I thought that a “Dune Buggy Screen” would be a good idea but the reviews on the few that are offered are poor (they don’t stay mounted) so I’ll fab up a better one over the opening and screw it to the fan shroud.   The challenge is to make it look “factory”.

Unfortunately, or fortunately, depending on your point of view, I keep finding other things to fix, like a Kennedy clutch that looks like it has been slowly chattering and self-destructing for over 15 years, a couple of cheap Asian, cracked, cylinder cover tins and a deep sump and three pushrod tubes that have leaking gaskets.  Maintenance stuff, really, but they need attention and are easy fixes with the engine on a shop stand.  And all these I found just this afternoon.  Can’t wait to see what else pops up tomorrow!!

I will say, that I was shocked, SHOCKED, I say! At how easy it was to pull the engine using the lift to get the car way up out of the way, then simply wheel the engine away on a motorcycle jack, everything level.  I never had that luxury before.  Sure makes life easier for an old guy pulling wrenches…….

I ripped out the hood insulation from my 4-runner because of mice building homes with it on top of my intake manifold almost nightly one winter. I even noticed my interior fan slowly developing a wobble. Of course, mouse house. My emergency toilet paper was once made into a mouse house in between my seats. I don't know how how in the heck they got into my truck. Luckily they haven't started chewing any wires, yet.

I started zip tying clumps of peppermint here and there to keep them at bay.

A buddy of mine that LOVES Corvairs, finds epic mouse houses in field cars that he finds and gets back on the road.

I didn't have any mice when I had the peppermint in the engine compartment or inside the cab. But, where do you get fresh peppermint in the winter time?

I have a patch of it in the driveway that I've actually tried to get rid of, without using chemicals, and just can't get that last bit of root. I've just accepted it now and just try to keep the patch in check. It's supposed to keep away mosquitos too, but keep it in a pot if you decide to grow it.

went to the gas station a while back to fill 'er up, popped the lid, and out scampered about 6 or 8 almost hairless baby mice.  They split in a real hurry and I never saw where they ended up.  So I've dealt with chewed oil rags and kleenexes for a while.  My method now is barbaric: good old fashioned mouse trap next to the car with irresistible peanut butter.  Put the proceeds in the garbage. Ain't pretty, but it works.

@Carlos G posted:

I didn't have any mice when I had the peppermint in the engine compartment or inside the cab. But, where do you get fresh peppermint in the winter time?

I have a patch of it in the driveway that I've actually tried to get rid of, without using chemicals, and just can't get that last bit of root. I've just accepted it now and just try to keep the patch in check. It's supposed to keep away mosquitos too, but keep it in a pot if you decide to grow it.

Carlos is (as usual) 100% spot-on. Mint will overtake everything unless you physically contain it. We've got a small patch we use dried for tea and fresh for mojitos. We cut it back probably 3x every summer, so that the leaves are supple and soft when we harvest.

Creeping Charlie is related to mint, which is why it's a multi-year affair to get it out of the yard.

I thought that a “Dune Buggy Screen” would be a good idea but the reviews on the few that are offered are poor (they don’t stay mounted) so I’ll fab up a better one over the opening and screw it to the fan shroud.   The challenge is to make it look “factory”.

Look at Ebay listings to get an idea how the Factory did them , its pretty basic unless you are trying to find " Metric" screen !   Hahaha

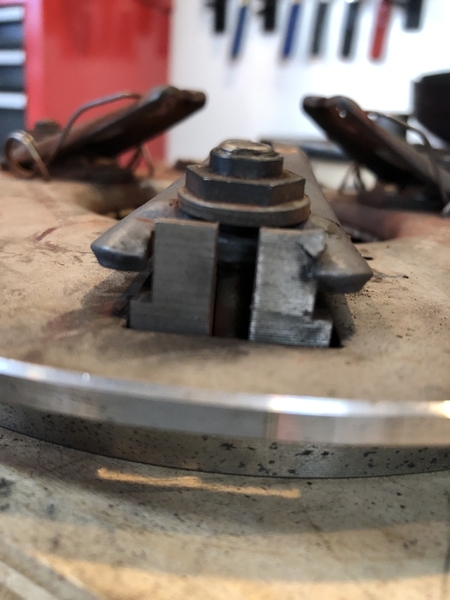
So my Kennedy 1,700 pound clutch has had an uneven engagement chatter for over a decade but I just learned to live with it.  It was slowly getting worse last Fall but I was prepared to ignore it this season, too, until I had to pull the engine anyway, looked at the clutch and had a “WTF? ” moment.  Here is a side shot showing one clutch plate lever sitting a LOT lower, at rest, than the other two levers and the other end of that lower lever has chewed into the plate actuator so it’s no wonder the plate is failing - it seems to have been manufactured poorly in the first place and has had an uneven engagement since day one.  
IMG_2142

Here is a shot from the outside end of that lower lever.  There should be a small anti-chatter spring on the lever like the other two, but that was destroyed sometime, too.

IMG_2143

and here is the same shot of a “good” lever with the spring intact.
IMG_2144

So I have a new Sachs 200mm clutch kit on order, along with a growing list of other stuff, but this clutch thing was a real biggie.  

Attachments

Images (3)
  • IMG_2142
  • IMG_2144
  • IMG_2143

Oh man..........I remember when I had a mouse in my garage and was too lazy to find the bastard, so I threw the cat in there (yeah literally threw her in) and closed the door for an hour or so.

I opened the door to her strolling out the garage and when I turned on the light I found the mouse. She had killed it, and then proceeded to eat it on the bonnet of the speedster, there was blood going down the light and the hood, it looked awesome. So I left it for a week or so before wiping it down.......sure got some looks at the shops.

Yeah, we need a cat.  Maybe two or three of them.

I also need another hole in my head - Can you tell I'm not a willing "Cat Person"?

I put the Speedster up a couple of feet on the lift for the winter and that seems to keep them out, but I am not sure about that - They're crafty devils.

After several bouts of a  heater fan chock-full of mouse-nest in my daily driver (MAN!  How they rumble and shake when there is a nest in there), I got really good at removing the heater blower.  Out, cleaned and back in took about an hour in a Nissan Rogue, but the Rogue just got replaced by an Acura RDX so I'll have to learn that stuff all over again.  The good news on the mouse front is that there was no nest in my lawnmower when I opened it up yesterday.  

Getting the Speedster back together is taking forever due to "supply chain issues".  I got the new Sachs clutch kit in less than a week (from JBugs) but had been waiting on new cylinder head tins and other goodies for a couple of weeks from a different vendor.  Just cancelled from there and re-ordered from JBugs who's website shows them in stock.  I hope they'll show up at the end of the week.  In the wait time, I've been re-painting things that were last painted 20 years ago and replacing all of the heat shield gaskets.  Mine are, of course, unique, because I designed them before I found this forum to make it easy.   🙄   I will also be replacing the sump gaskets today.  

OK, back to twiddling my thumbs and waiting for parts.

Have you tried Dune Buggy Warehouse(Ohio), CIP1.com, or Appletree Automotive(Michigan)?

Dune Buggy warehouse has an IRS Sachs kit for $140. Looks like it's in stock.

I've been attempting to stay away from California vendors lately. They seem to be really slow the past few years. I ordered an oil cooler block off plate from Scat on 3/21. It STILL hasn't shipped.

Last edited by DannyP
@DannyP posted:


I've been attempting to stay away from California vendors lately. They seem to be really slow the past few years. I ordered an oil cooler block off plate from Scat on 3/21. It STILL hasn't shipped.

Maybe they're still testing whether or not, if it's licked, will it cause cancer or any future reproductive harm to small pets and children.

Last edited by Carlos G

I got the sachs part numbers for clutch, disk and TO bearing from Carey and verified that was what is in one of the kits from JBugs for a 200mm clutch at around that price.  That arrived a week ago (Maybe four days after ordering) but I have the engine on a build stand which means I had to remove the clutch to fit it to the stand.  That's how I found that the old pressure plate had failed.  

Things are coming along, just at a snail's pace.

Spent an hour today with a sheet of exhaust gasket material hand-making a bunch of gaskets for the collector-to-muffler joint on my Berg Extractor exhaust because NOBODY around here has one like it and I don't feel like ordering a few from Berg.  Made up a template to center the holes and they came out pretty spiffy!  I only need one, but it's just as easy to make six.

Last edited by Gordon Nichols

...................PROJECT RECAP EDITION....................

"You have to remember, that it all started with a mouse....."

Mickey and Walt

No, not that mouse, but this kind of mouse:

Field-Mouse Cute little bugger, right?

One of those built a "Mouse Condo" nest on top of my cylinder heads by sneaking into the fan shroud through the fan opening.  I've now placed a metal screen over that opening.  The only easy direction from there is onto the driver's side cylinders (3-4) and that's where the nest was.

That morphed into pulling the fan out of the shroud (I couldn't see anything from there because of the shroud design), then pulling the engine to get the shroud off which then showed that I had a significant oil leak between the case and the deep sump and probably another one from the pushrod tubes on one side.  

Getting the engine onto my engine stand meant that I had to remove the clutch and THAT showed that I had a defective clutch.   🤬    But it worked OK for the past 20+ years so who am I to gripe?  Onward to a new clutch kit.

So, while waiting a couple of weeks for parts to show up, I decided that, after 22 years, my el cheapo but highly effective heat shield gaskets could really stand to be replaced.

And if I'm doing that, then I could sand the shields down and repaint them.  Besides, I can't do much else until new parts arrive, like sump gaskets and clutch and stuff, right?  I've gotten pretty good at painting things at 50F-ish without clogging up the rattle-can.

Well, finally, some parts are trickling in and the first thing I found is that I ordered the wrong sump gaskets and got sets that are too big.  🤬   BTW:  I used mushy silicone sump gaskets about 12 years ago and they sealed well for a while, but then the oil attacked them and they became distorted and leaked - I'm re-evaluating the nuts I used to secure the sump to the case, too and hope to use something better.  Live and learn - So I dug around in my part stash and came up with three sets of paper gaskets that fit, and those will be applied with some black, max-oil-resistant Permatex RTV (the silicone gaskets didn't need RTV, but they didn't last, either).

While cleaning the bottom of the case I decided that I just HAD to really fix the leaking pushrod tubes.  I have everything to do that, just have to take the time.  Mine are the 2-part, threaded versions.  They're OK, no more, no less, but they lasted ten years and I have all new o-rings, so......

So starting this journey, I thought this would be an easy, pull-the-shroud, vacuum-the-stuff-out, get on the road again, but that was only the beginning of this prolonged journey that has been ten or twelve years in the coming.  My entire workbench is covered with things that want to go back together but the pushrod tubes are first on the hit parade, then the sump (now drying after degreasing), then putting the shroud and fan put back, then refurbished engine tins (there are a LOT of little tin pieces involved, here) and on and on.  I hope I can remember where everything goes and how.  Last, when the engine is off the stand and onto my motorcycle jack to re-install it, I'll install the new Sachs clutch and bearing.

I can't install the intake manifolds until after the engine is back in (it's a CMC with limited frame clearance to the carbs) and then will install the linkage and start buttoning things back up and then I'll probably find that the clutch adjustment is all wrong for the new clutch and have to re-do that, too.  

I'm beginning to feel like @majorkahuna out at Lake Tahoe:  I might get back on the road in June, at this rate.....   Just about the time the snow will melt off of his lawn.

Unless I find something else to fix along the way.  That's become a daily occurrence!

Attachments

Images (2)
  • Mickey and Walt
  • Field-Mouse

Before I installed my engine in the car for the first time, it was sitting with no plugs.  I happened to look through one of the spark plug holes and saw that I had mouse poison pellets on top of the piston.

When I had a somewhat rusty Beetle, a mouse got stuck halfway through a hole in the kick panel.

I have an ultrasonic mouse repeller in the garage.  I don't if it really works but I haven't noticed evidence of mice in the garage.  I do find mouse turds in the garage attic.

Last edited by Michael McKelvey

It is so nice to finally be putting things back on the engine after a long period of just removing and cleaning stuff and waiting for parts.

Sump is back on, new pushrod seals, couple of new head tins arrived today and are already installed and now I just have to play with the 3-4 head tin to make it fit just a bit better in one spot.   After that, try to remember how the other ten pieces of cooling tins all go together in their 3-D puzzle to get all the tins back in place and the shroud back on.

I came up with an anti-mouse screen over the fan inlet while waiting for parts, so maybe this will never happen again, but I never would have gotten in there to fix these pesky oil leaks otherwise, so everything’s good.  

Heading to Newport, RI tomorrow to visit the Audrain Classic Auto Museum with a couple of friends and will post a few photos later.  Maybe I’ll see Donald Osborne or Jay Leno there, right?

Today was a day of “deja vú all over again” (with a hat-tip to the inimitable Yogi Berra).  

My old engine upper cylinder tins were bought in 1997 from Latest Rage Imports, were chrome because I liked the look (chrome engine parts were all the rage, back then) and seemed to work well - I never had cooling problems with them, but they were quite thin and eventually fatigued and began to rust and fall apart.

When I originally installed them, they needed a lot of “massaging” to get them to just fall into place like OEM tins, and then I had to really beat the heck out of them to fit my intake manifolds past the tin and onto the mounting studs.

Fast-Forward 26 years and those snazzy chrome cylinder tins were falling apart, so I got a new pair of snazzy black versions from JBugs and started fitting them, today.  All those metal bashing memories came back to me as I started moving things this way and that to get them to just fall into place with no gaps like OEM tins.  Now that that is done, I’ll be out there tomorrow relieving them between the spark plugs so that I can easily get the moosey, dual-port intake manifolds in there past the tins with enough clearance that you can install them by feel, because you sure can’t see anything over there when the engine is back in the car, so it’s all done by feel.

In the middle of all this, today, I remembered going through all of this way back then and messing with them for a couple of nights until I finally got everything to fit right.  The only trouble this time, is that back then I made up a press jig to re-shape the area between the spark plugs to give the intake manifold enough room.  That jig got pitched when we moved to Rhode Island  😡 along with a lot of other stuff I never expected to use again, so now I have to come up with something else.   Sigh…..   😔

Deja Vú is not always a wonderful thing…………..

Didn't want anyone to think I'm being a slacker or something, so a quick update:

My new cylinder tins arrived and needed moderate "adjusting" to get them to fit right.  I also realized that I had previously installed the engine breast plate and rear heat shield tin in the wrong order (the rear tin goes under the breast plate - Who knew?  Most photos don't show this well).  This required that I re-work the rear tin to fit properly to the breast plate (and beat the crap outa the breast plate to un-do what I had done 20 years ago to make it fit around the deeper Berg oil pump) and then "adjust" the head tins to fit everything else.  Lots of Dremel cutting and hammer forming has been done lately.

This turned into a BIG F'in DEAL to get everything to fit right, especially because my headers have rusted together and cannot be removed without wrecking them (the slip joints no longer slip) so there's very little space to fit everything in.  It required that I remove the crankshaft pulley for better access.

What I found is that, if you run a stock VW oil pump, all of the after-market tin sort of fits with minor/almost no adjustment.  Add a Berg 30mm oil pump which is a lot deeper and it interferes with the breast plate behind the crankshaft pulley, requiring a lot of tin rework (translation - You need to beat the crap out of it).  Reworking the breast plate tin then requires reworking of the rear tin to get it all to match up.  🤬  This means putting a 1/4" "step" in a piece of 19 ga. sheetmetal with limited tools (mostly, a vice, a hammer, a torch and patience).

So I'm almost done with these little, time-consuming "adjustments" but now the tinwork will need stripping (powered wire brush or maybe I can find a sandblast booth) and re-painting before everything goes back together.  The toughest part was getting the head tins and the rear tin to match up where they meet, to have a continuous, flat surface to match the rear heat shields.  I hope to have everything done by the end of next week, just like a week ago I hoped to have all this done by the end of this week.

Time flies when you're having fun......   🙄

@Gordon Nichols, a little too late to ask, but do we really need the 30mm oil pumps? I've got one on mine, too, but I've heard various opinions about whether we really need the bigger pumps.

Imho, if you need a 30mm pump to obtain good oil pressure, your bearing clearances are too large. I think Berg used to say a 21mm pump could supply plenty of oil for most engines. He recommended using his pressure relief cover any time a 30mm pump was used.

Rick is absolutely correct. I had a 26mm pump with the Berg pressure relief cover and it worked great.

CBs dry sump uses a 26mm for the scavenge side and a 21mm for pressure. That works FINE in the 2276 I built a couple years ago.

My Autocraft dry sump has 52mm scavenge and 26mm pressure side. That works awesome, especially with the JayCee pressure relief oil filter mount. That dumps anything over 80 psi back into the tank.

There is simply no need for anything bigger than a 26mm pump gear.

FYI, the Formula Vees run 6500 rpm with a 21mm gear pump and full flow filter and cooler.

Unfortunately, none of you experts were around when I was originally building my engine (1998) OR when I converted it to Full-Flow (2003).  

Mostly, all I had was articles (glorified ads, really) in "Dune Buggys and Hot VWs" magazine and everyone was pushing 30mm Melling pumps back then.

Al wrote: "(Berg) recommended using his pressure relief cover any time a 30mm pump was used."  That's true, and I got that from his tech notices.  All the magazines were pushing 30mm pumps and I had one when I built the engine.  I actually bought Berg's complete (GB233A) Full-Flow kit, so I looked up the sales invoice (COD people never through anything away) and it says I have a "26mm pump with the outlet tapped and plugged for use with a full flow GB pressure cover".  

I stand corrected on the size, but it's still pretty deep and whatever I used for the breast plate tin (which fits a stock engine) didn't fit until I whomped the heck out of it to rearrange the bottom half.  There is a big protrusion on top of the cover for the pressure valve and the nuts holding the cover stick out quite a bit, too.   All that was fixed back when I full flowed it to clear the pump and the pulley, but I had the stack-up of the breast plate and rear tin all wrong (never saw a photo of what was right, back then, just guessed) so the creative tin adjustments went out from there as best I could.  Now, with 20-20 hindsight and a few more photos from the Interweb, I've seen what I did wrong and while it worked ok, it's always nice to get things right, right?

I'll post a couple of photos later on (it's Mother's day, after all) of what I've been up to, but the biggest thing is returning the rear tin to the original stepped shape where it meets the head tins so that the compartment heat shields make even contact all around the engine.  One side's done, and I'm finishing up the other side now.  That transition is hard because there is a 1/4" step down at the end of the metal sheet and really hard to duplicate accurately without the proper dies so a lot of hammering, trial and error, swearing, etc.......

Last edited by Gordon Nichols

Photos!

Here is what I've been spending most of my time on lately.  3-4 Head tin (driver's side) on the left, rear tin on the right.  

IMG_2222

I need to get both top surfaces close to even with no screws on top so my heat shield will lie flat and seal.  The piece on the right needed a 1/4" step in it at the ends to put the screw tab on the bottom.  That means that I screw them together from underneath (the nut is captive to the head tin), but that's no big deal.  Making that step in such a short span is a MAJOR PITA when you don't have proper dies and a press.  Getting two precise bends like that with a hammer and improvised die (1/4" steel bar stock) is really hard.

There's a slight bulge towards the center of the engine to clear the exhaust pipe flange and the rear lower tin piece below the head tin is not yet in place.  All this is to fit the CMC-Style, horse-shoe shaped, rear heat shield that slides up and onto the top of the tins from the rear, then screws into the bottom of the body frame member making a seal.  Sounds complicated, but it slides in pretty easily and allows for engine movement while staying sealed.

Below is a shot of the modified breast plate that still needs a few tweeks to make it pretty, but it's close and just drops right into place.  It had been pounded out of round to fit the rear tin on top, which is wrong.  The rear tin goes underneath so I'm re-shaping it back to more like original to fit the rear tin better - Almost there.

IMG_2223

That silver bulge left center is clearance for the oil pump external fittings.  Berg offers a "special" 45º cover and fitting for T-2 that might have cleared better, but I didn't know about that until years after full-flowing it.  I can't easily remove the exhaust headers (they're rusted together) so I took this route instead, which works fine with the pulley removed.  So I need to finish up the passenger side of the rear tin, make a few adjustments to everything to get them to match up and not hit the pulley and then sand blast, re-paint and assemble everything in the correct order so they'll all go together, happily.  Gotta love German engineering.   🙄  

It's a good thing I'm not in a hurry......

Attachments

Images (2)
  • IMG_2222
  • IMG_2223
Last edited by Gordon Nichols
Post Content
×
×
×
×
Link copied to your clipboard.
×
×