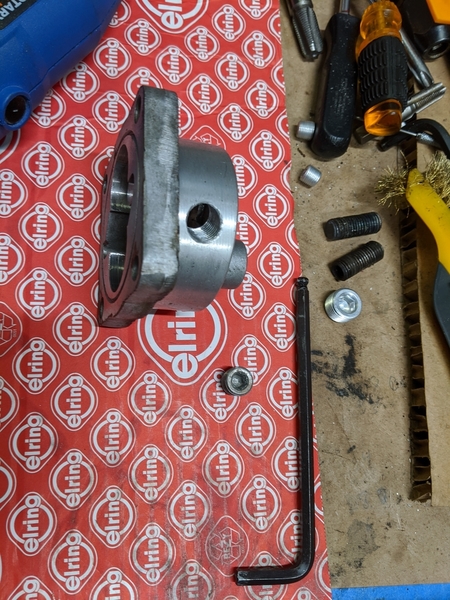
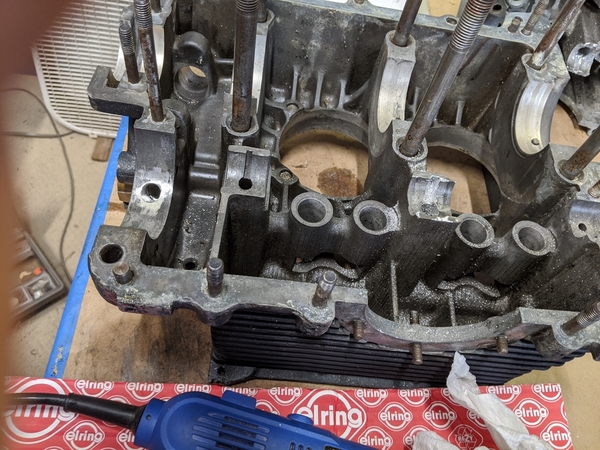
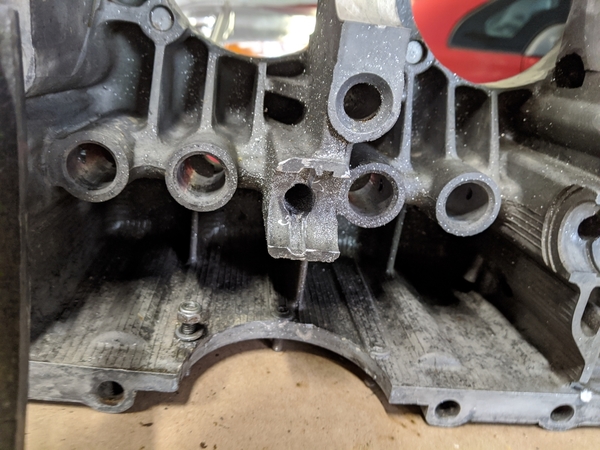
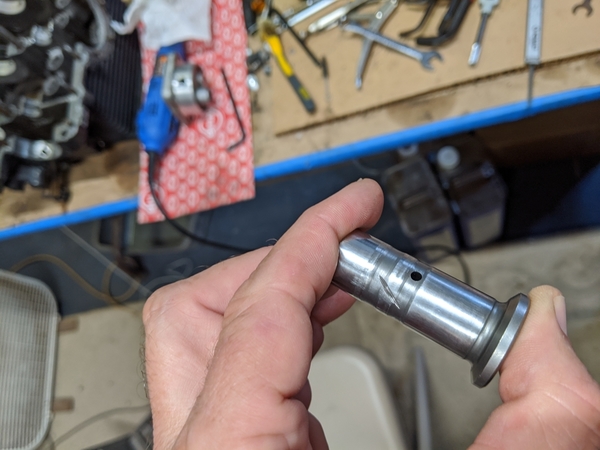
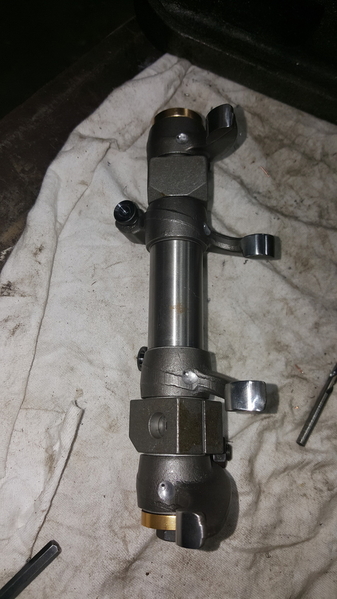
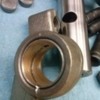
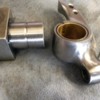
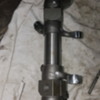
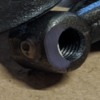
I've started the Hoover mods to the case, lifters and rockers. If you've never read through Bob Hoover's blogs, you might want to take a look. Brilliant work and observations from a guy who converted VW type 1 engines for aircraft use in Alaska. Here's a link to the HVX "Hoover mod" oiling post: https://bobhooversblog.blogspo...007/05/hvx-mods.html

Lots of folks have taken the mods and clarified things, created video instructions, etc, but I enjoyed going to the original source and getting a feel for the guy who came up with them. He passed away from cancer in 2010 and the last 18 months worth of blog posts have updates on his fight with the disease in addition to a wide ranging set of observations on how to build engines and planes that won't kill you. An amazing guy.

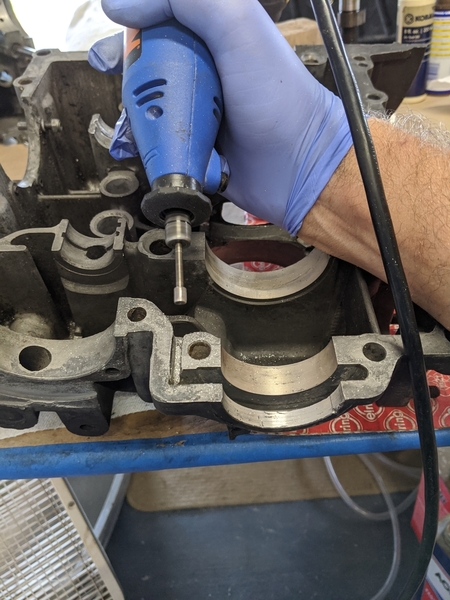
In any event, my 12" long 7/32" drill bit arrived and I slowly and carefully extended the right side cam oil gallery and then did the treacherous plunge drill down to intersect the new gallery extension without breaching either the internal or external case walls (phew!). Not hard at all, just a little nerve racking. One absolute key is to go slow and frequently pull the drill back to clear the magnesium dust and chips so they don't think about igniting. I did not use any cooling liquid, I just was very patient. The bonus was a big pile of magnesium dust and chips that made a serious fire display when ignited outside with a propane torch.

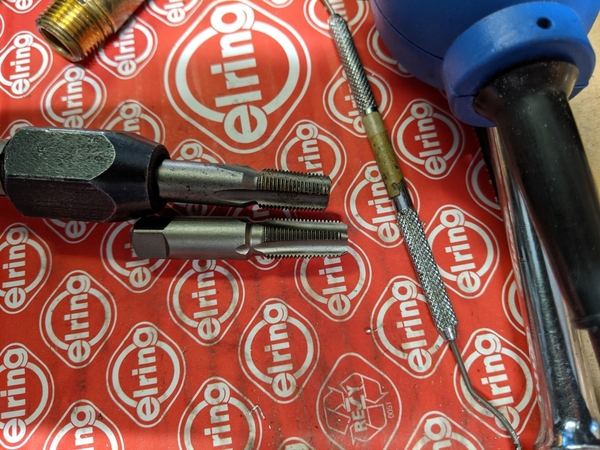
Next I'll be finishing up the various case, lifters and rocker arm tweeks that allow the new oil gallery to cool and lube the right head adequately. Then drilling and taping for the replacement NPT gallery plugs and a thorough cleaning of the oil galleries and other engine parts before the final air blow out and securing the new gallery plugs. There's a great link for gallery plug steps and comments on the #4 bearing restriction plug question (many different opinions on how to handle this plug that restricts the amount of oil that gets to the #4 bearing in an attempt to prevent oil leakage from the front pulley as the bearing wears).  I'm inclined to drill a 3mm hole in a plug to limit the oil flow even though the #4 bearing itself has only a 2mm hole. @ALB, I saw you commenting on this 15 years ago on samba or shoptalkforums, any thoughts these days? Also any thoughts about best approach for rockers and rocker shafts mods to take advantage of the new oil flow?

Here the gallery plug link I thought brought a lot of info together: https://www.shoptalkforums.com...hp?f=34&t=132558

You'll see a little discussion about whether Bugpack or EMPI plug kits are better. I think this is now moot since the Bugpack plugs are also now EMPI labeled and appear to come in the same sizes. General wisdom seems to favor aluminum plugs secured with Loktite blue.

Mike

THIS is what happens with Magnesium chips/filings when ignited.

It is wicked hot (over 1,200ºF)

Adding water to the mix causes the water to separate into Oxygen (pretty flammable) and Hydrogen (wicked flammable).  Keep watching to see the TRAINED FIRE FIGHTER shoot the flame with water, not somebody who says, "Hey!  Hold my beer and watch THIS!"

And you guys are still weird.........

 Here's some more wing-nut stuff to play with. A couple years ago I built a 6" tapered tube about 3 ft. long, installed a centered nozzle in it and an igniter from a propane grill. Hooked this up to a propane tank with 12V solenoid valve. Set it up on the beach and pulled the trigger. Got (approx) a 10ft flame plume. I wanted 60ft high plumes but with the valve restrictions in the propane tank and 1/4" pipe fittings on the solenoid.  I was disappointed.  Next time I modified a 5 Gal. propane tank with a 3/4" pipe outlet and a 3/4" solenoid valve. I fill this tank from a std propane tank each time I "fire" the apparatus.  With this I get a 60 ft vertical fire plume !  Scary as hell at night on the beach !  After two firings, everything ice's up and have to wait about an hour to fire it again. I'm about 50 ft. away from the apparatus with hard wired remote control of the ingniter and solenoid.  It's good for 6 firing's until the propane pressure gets too low.

I may build one that runs on compressed air and gasoline. more simple, cheaper to operate and won't ice up. I'll start by making a carburetor style Venturi to pull the gas out of a remote tank.

I don't know if this is of any use to anyone but something I always do to avoid getting gasoline IN or ON me when trying to siphon gasoline is this.  If you have a pretty good supply of compressed air you can do this to start the siphon action. Put the siphon hose into the tank. At the other end  (which you want lower than the gasoline level in the tank).  Hold the air nozzle at a 90 degree  (or slightly less) to the end of the hose and blow air across the tip of the hose. This creates a Venturi effect and vacuum in the siphon hose and will pull the gasoline up and down the hose to start the siphon action.  I have found that if I have to use a larger hose, I cut the tip to get a diagonal shape. Blow the air from your nozzle against the side of the hose that is the highest. This is a rudimentary venturi shape..................How's that for some nuts info ??..........Bruce

A old guy guy in my town was a "Rock Breaker".   It said so on his Business card:  "Arthur Harris  - Rock Breaker".  I believe he was also a Navy Construction Battalion  Veteran who liked to build things.

He had a torch that he built that included a round, 5-gallon tank built onto a dolly, with a pump in the tank that looked similar to a bicycle pump, a pressure gauge, a sealing filler cap and an outlet connection with a 15' hose.  The torch sounded similar to what Bruce built, but it had a steel fuel line going towards the front, did a 180º turn-around, then made into a 3"-4" diameter coil about 8" - 10" long going back towards the base, did another 180º and then had an end that looked a lot like an oil burner fuel nozzle.  The nozzle was aimed so that the flame went right out through the middle of the fuel line coil to pre-heat the fuel and add a little fuel pressure.

Fill the tank 1/2-3/4 full of Kerosene and pump it up to 15-20 pounds of pressure, turn on the valve and light the thing.  It would give a big "POP" and a pitiful flame (2 - 3 feet) and a little whoosh until that coil up front got hot and then the tip pressure increased one hell of a lot and the flame would grow to 6' - 10' long and sound like a Sabre Jet.  It was pretty hot and went Orangy-Blue when it was really cooking.

He then had a tripod stand to hold the torch end and aim it at a rock....Say, the size of a Prius or so.  He would get the rock warm enough in one area to show the stress fissures and re-aim the torch right at a fissure, pump it up a few more pumps to get a flame ball about 4' in diameter and then sit back, smoke his pipe and read the newspaper, occasionally give it a pump or two.

Every once in a while (you can't rush this stuff) he would pick up a 5 pound hammer and walk over to the rock, look at the fissures and, if it was ready, give it a good rap at the end of a fissure and, more often than not, a huge chunk of the rock would break off.  He would re-position the torch head and repeat.  Breaking up a rock the size of a Prius took less than an hour.  I think it also gave him a nice, tan, too.  He said that the granite rocks would hold their heat for a day or so after his visit.

That's what they did before inventing pile-driver rock crushers, I guess.

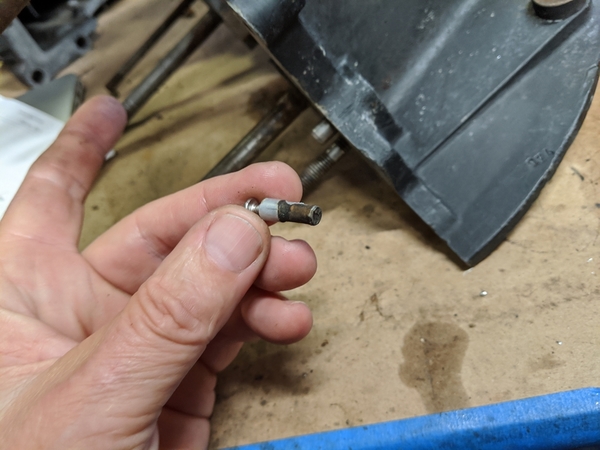
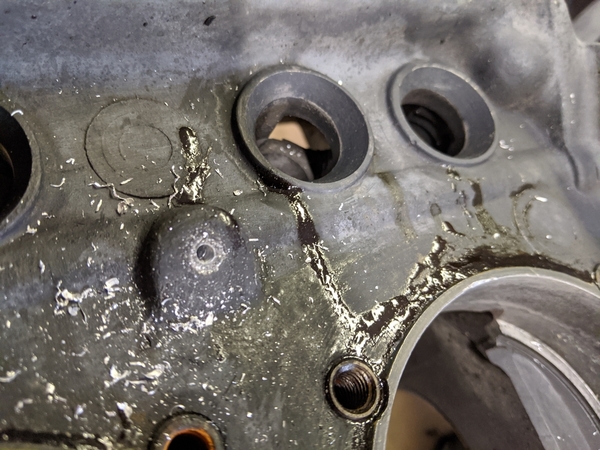
Gradual progress on the Hoover oiling and cooling mods. All of the engine plugs have been pulled and holes tapped for reassembly. I completed the case mods by enlarging the oil return passage from the oil slinger, enlarging the oil grooves under some of the cam bearings, creating 3 oil passages between the two grooves on each of the lifters, tapping and plugging the original oil pump inlet and the matching passage in the case and matching the main bearing oil passages with the case.  If anyone is interested, I can do a step-by-step with pictures. Otherwise, I'll just post a few shots and the best links to review.
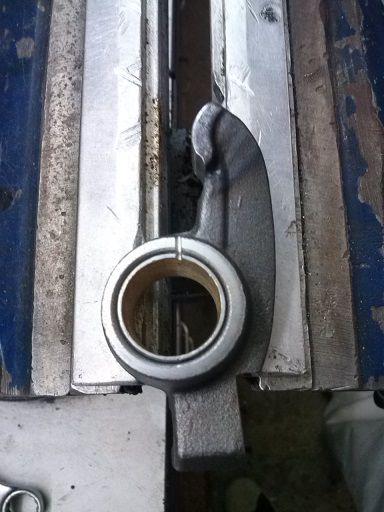
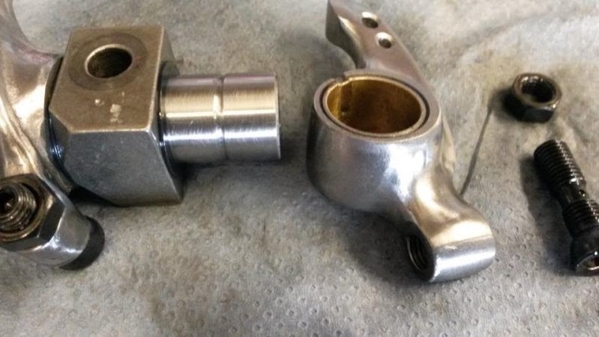
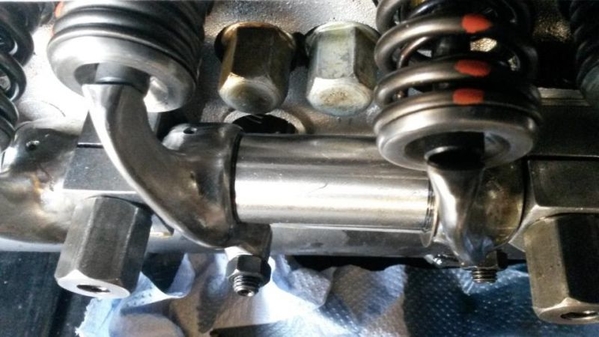
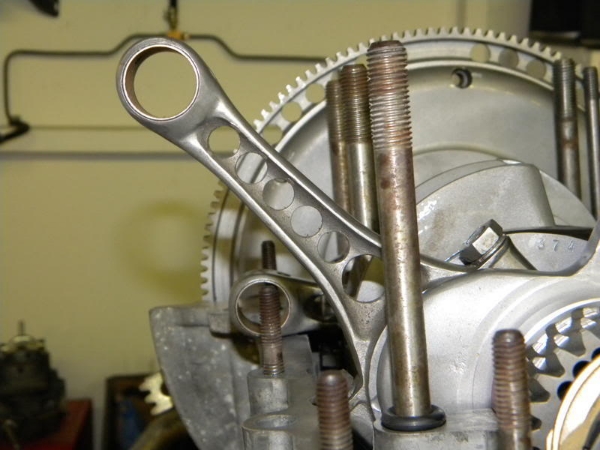
Next to do is grinding oil grooves under the rocker shafts and grooves inside each of the rocker arms. The extra oil (Bob Hoover said approximately 8x the original amount to the right head) goes around the shafts and into holes in the swivel feet where it then sprays onto the back of those pesky 1-2 valves. Hoover mentioned Ford and Subie oil carrying swivel feet adjusters, but I found that CB Performance carries a set for their heads and rocker setups so I just ordered from them. And everyone, I did check one last time to see if Pachittos came with the rocker setups included, they don't. Oh, well. 

After hearing about flame thrower and magnesium bonfires I've just been dumping my case shavings into the trash can. Sounds like some of you guys have been hanging around Burning Man!

Mike

IMG_20191203_155828IMG_20191203_155914IMG_20191203_160000IMG_20191203_160017IMG_20191203_160138IMG_20191203_160224IMG_20191203_161858IMG_20191203_162313IMG_20191203_164357IMG_20191203_171239IMG_20191204_101103

Attachments

Images (11)
  • IMG_20191203_155828
  • IMG_20191203_155914
  • IMG_20191203_160000
  • IMG_20191203_160017
  • IMG_20191203_160138
  • IMG_20191203_160224
  • IMG_20191203_161858
  • IMG_20191203_162313
  • IMG_20191203_164357
  • IMG_20191203_171239
  • IMG_20191204_101103
Last edited by Michael Pickett
mppickett posted:

I've started the Hoover mods to the case, lifters and rockers. If you've never read through Bob Hoover's blogs, you might want to take a look. Brilliant work and observations from a guy who converted VW type 1 engines for aircraft use in Alaska. Here's a link to the HVX "Hoover mod" oiling post: https://bobhooversblog.blogspo...007/05/hvx-mods.html

Lots of folks have taken the mods and clarified things, created video instructions, etc, but I enjoyed going to the original source and getting a feel for the guy who came up with them. He passed away from cancer in 2010 and the last 18 months worth of blog posts have updates on his fight with the disease in addition to a wide ranging set of observations on how to build engines and planes that won't kill you. An amazing guy.

In any event, my 12" long 7/32" drill bit arrived and I slowly and carefully extended the right side cam oil gallery and then did the treacherous plunge drill down to intersect the new gallery extension without breaching either the internal or external case walls (phew!). Not hard at all, just a little nerve racking. One absolute key is to go slow and frequently pull the drill back to clear the magnesium dust and chips so they don't think about igniting. I did not use any cooling liquid, I just was very patient. The bonus was a big pile of magnesium dust and chips that made a serious fire display when ignited outside with a propane torch.

Next I'll be finishing up the various case, lifters and rocker arm tweeks that allow the new oil gallery to cool and lube the right head adequately. Then drilling and taping for the replacement NPT gallery plugs and a thorough cleaning of the oil galleries and other engine parts before the final air blow out and securing the new gallery plugs. There's a great link for gallery plug steps and comments on the #4 bearing restriction plug question (many different opinions on how to handle this plug that restricts the amount of oil that gets to the #4 bearing in an attempt to prevent oil leakage from the front pulley as the bearing wears).  I'm inclined to drill a 3mm hole in a plug to limit the oil flow even though the #4 bearing itself has only a 2mm hole. @ALB, I saw you commenting on this 15 years ago on samba or shoptalkforums, any thoughts these days? Also any thoughts about best approach for rockers and rocker shafts mods to take advantage of the new oil flow?

Here the gallery plug link I thought brought a lot of info together: https://www.shoptalkforums.com...hp?f=34&t=132558

You'll see a little discussion about whether Bugpack or EMPI plug kits are better. I think this is now moot since the Bugpack plugs are also now EMPI labeled and appear to come in the same sizes. General wisdom seems to favor aluminum plugs secured with Loktite blue.

Mike

Good morning Mike- I've done the oil galley extension with a 3/16" drill in a junk case; I know Bob talked about using 7/32" (or even 1/4" if the smaller size isn't available) but  all the reading I've done says the 3/16" is more than enough to keep the right side rocker area continually bathed in oil. I'm not criticizing what you did- I'm not sure it really matters what size you make those passages, as long as you're feeding oil constantly to the head. I chose the smaller drill size to make the likelihood of breaking through the case less (which was still only 1/16- 1/32" thick after we drilled through to see, although filling the depression with epoxy makes it a moot point), but I've also wondered if the larger galley size would actually give more oil pressure at the rockers, with better spray patterns toward the valve stems and springs, given the number of outlets we create with these modifications? So many questions...

I worked for a short time in a friend's VW shop (winter '79/80), took apart a fair number of high mileage engines in preparation for rebuilding and more than once Don made the observation that there was always more scoring and wear on the rockers out of the right side head. The solution at the time was to polish the shafts, reverse them and as long as the bushings in those rockers weren't totally fubar, install them on the driver's side head. We talked about how there must be inadequate oiling on the 1 side, but since so many engines went 100,000 (and more) miles before needing refreshing never gave it much more thought (that would have cut into after-hours beer time, and we couldn't have that!). 25 (or so) years later, first time I read Bob's "HVX Mods" article, the light came on pretty quickly and I've been a believer ever since.

On the Samba, STF and Cal Look Lounge I have either started or participated in threads discussing the Hoover modifications and not 1 person who's done them has reported any downside (other than the danger of going through the outside of the case, which is easily fixed with a little epoxy). The drilled passageways and notching the lifters provides full time oil to both heads and the rocker detailing eliminates so much wear (and heat). People have drilled pushrods for valve spring oiling and heat removal, while others have either notched the rocker sides or drilled through the rocker bodies to the same effect. With more oil in the right side head comes more stable temps and the a/f mixture will be closer to ideal more of the time, meaning the engine will make it's best power more of the time.

This is not the first time I've said this- even stock engines will benefit from these modifications. And yeah, if you took the time to put together a how-to (with lots of pics, of course!) I'm sure it would be appreciated. I'm looking forward to hearing your observations once it's been running awhile. Al

Last edited by ALB

Thanks, @ALB, I always appreciate hearing your thoughts on a topic. As you can tell, I'm not looking for big horses out of this engine and hadn't planned on splitting the case if I didn't have to. I am the kind of guy that likes to make things better (as opposed to best) while I'm doing something, hence the Hoover mods.

I do have another question for the group, having decided not to spring for Pachittos at this point, should I do any head/port work while I've got it on the bench? As a reminder, the engine sat, rebuilt, for 14 years without being turned over before I bought it. It has dual 40 Kadrons and Mexican 043 heads. I've done the Kadron manifold porting to improve idle.

Would you recommend any touching up of the heads or head ports before I put it back together?  My gut says to just port match the Kadron manifolds and the heads, but I thought I'd see what folks think before I take the time to do it. I don't want to leave any easy hp on the table, but don't want to mess up low end torque either. Thanks!

Mike

Matching the manifold passages to the head ports is always a good thing, especially if there is a big difference, but I wouldn't go nuts - you're not changing anything else regarding flow through the engine that would take full advantage of port matching like a hotter cam (are you changing the rocker arms?) or more aggressive extractor so I believe that a port-matching might not gain you all that much on that engine, unless there's a huge difference between head port and intake manifold opening.

Unless you're looking for more to do with your Dremel cable-drive and mini-rasp - You seem to be pretty good with it!   


Last edited by Gordon Nichols

If you have the time (and the inclination- which you seem to have) there is power to be gained by some port work. Have to go look at a car (the wife was hit in an accident 3? weeks ago and her Mazda CX5 won't be returning to us; she's still pretty sore from the airbag). We're trading up a couple of years- same model, but going from a 2014 to 2016. More later. Al 

Last edited by ALB
ALB posted:

If you have the time (and the inclination- which you seem to have) there is power to be gained by some port work. Have to go look at a car (the wife was hit in an accident 3? weeks ago and her Mazda CX5 won't be returning to us; she's still pretty sore from the airbag). We're trading up a couple of years- same model, but going from a 2014 to 2016. More later. Al 

@ALB hope the wife heals sooner rather than later. The daughter has the 2016 cx5 was and loves it. It got 2 right tire punctured due to bad road hazard and force her to change tire. The ride of the cx5 got much comfortable /all season tires. 

Thanks everyone, for the thoughts and prayers. An 18 year old kid turned into her in an intersection so she came to a stop from a 30 mph or so in an instant- Beth never even got a chance to hit the brakes. The airbag did it's job, allowing her to walk away from it relatively intact (no broken face or crushed sternum/chest), although very beat up from the airbag, and being a mother and convincing the 18 yr old she was alright, it wasn't the end of the world and his mother would be happy he wasn't seriously hurt. Recovery time from the airbag injury is 4-6 weeks and she is at week 4. Coughing and sneezing in the beginning was debilitating, but now only hurts and doesn't backtrack her a day or 2 and she's much more mobile, although picking up and carrying any weight is still a little ways off.

Beth really liked the 2014 CX5 she had (a replacement for the Mazda 5 our oldest wrecked- she seems to be going through cars about every 2 years or so- you'll have to wait patiently for the next installment, as our youngest has just turned 16) so we're not complicating it with looking at anything else- moving a little newer to a 2016 and getting it in red (she settled for a silver one because it was such a clean, low mileage car) is the objective. We think we may have found THE ONE today.

@Michael Pickett- first and most important thing, Mike is to make sure the heads have a good 3 angle valve job. There are a couple of good threads on the Samba on porting stock heads- I'll have a look later. If you get to the point of unshrouding the valves you'll be adding cc's to the combustion chambers so the heads may need to be flycut to get the compression back up for maximimum benefit. 

Hope this helps. Al

Last edited by ALB

Good morning again @Michael Pickett- Hey, Mike, over the years I've saved into the computer several pics of rockers modified for better oiling and cooling the springs, so I thought I'd show some different ways people have done it. Note the notch aimed at the spring- 

rocker 2 

Another- 

rocker

The 1 below was modified by a road racer; as well as the oiling tricks, he's contoured/lightened and polished them for more rpm's. I'm diggin' the holes through the area up near the pad- I don't see them really taking away any strength, but even I think that takes balls!

rocker modified for oil flow Spanners

And then- instead of notching the side there's drilling right through the forging to aim the oil at the spring. These look like they've been reworked to be lighter as well.

rocker modified for oil flow  

and yet another way of doing it-

rockers with squirters drilled

Attachments

Images (5)
  • rocker 2
  • rocker
  • rocker modified for oil flow Spanners
  • rocker modified for oil flow
  • rockers with squirters drilled

I was checking out the validity of the so-called fully balanced engine. Over 20 grams difference on one piston/rod/wrist pin combo and a pretty good spread on the others. The crank had been dynamically balanced, but 20 grams, jeeez!  After today's attention, all the pistons/rods/wrist pins are now less than a gram away from each other. The thing that took the longest was figuring out how to reliably measure the rods' small end/big end weights. Grinding and drilling was easy...

'When tires are out of balance, they often partially lose traction with the road, increasing fuel consumption. 1 oz of imbalance at 60 mph usually causes 7.73 pounds of excess force per revolution. And for every extra 7.73 pounds, a vehicle will use an equal amount of excess fuel."

NOW for engines I don't know but 20 gms is pretty close to 28.35 gms which is 1 oz. 

Sure lot of shaking going on    No it's Whole lot of shaking going on. 

Last edited by IaM-Ray
edsnova posted:

Wow! But where did you find 20 grams to grind out of a piston/rod combo?

Fortunately (?) It was spread across all of the parts with 3g coming off of the outside of the rod small end, 9g coming off of the bolt sides and the bottom of the big end, 6g drilled out of the piston crown and 2g ground out of the inside of the wrist pin. I wasn't impressed with the previous builder.

mppickett posted:

I was checking out the validity of the so-called fully balanced engine. Over 20 grams difference on one piston/rod/wrist pin combo and a pretty good spread on the others. The crank had been dynamically balanced, but 20 grams, jeeez!  After today's attention, all the pistons/rods/wrist pins are now less than a gram away from each other. The thing that took the longest was figuring out how to reliably measure the rods' small end/big end weights. Grinding and drilling was easy...

edsnova posted:

Wow! But where did you find 20 grams to grind out of a piston/rod combo?


A production run of pistons will usually have a much greater weight variance, but are  grouped so the set isn't more than 4 or 5 grams from lightest to heaviest and (again, usually) there's more than enough places on the underside to match them up. There is material purposely cast (or forged) in and left during the finish machining so there's somewhere to remove weight. I have heard of guys having to drill into the backside of the piston top to remove material, but as long as it's just a little and they are evenly spaced out opposite the 'quench pad' area of the head (so the heat and pressure of combustion isn't affecting any area of reduced thickness) they seem to survive. There's normally a little variance in the pin weight as well, and sometimes just matching the heaviest pin with the lightest piston gets everything a whole lot closer. And I know 5 grams may sound like a lot, but a piston (along with the pin, rings and clips) will weigh somewhere in the neighborhood of 450- 500+ grams so even a 5 gram difference is only 1%. If this is the only weight variance in a lower rpm production engine it will never really be a factor. 

IIrc rods weigh about the same as a piston assembly  (a little less? a little more? Mike, can you help me out here?) and are also made with areas for machining for those wanting to match weights exactly. Of course, it's more complicated, with there being big ends to match (so the rotating assemblies on the crankshaft are the same), small ends to match (so the forces created by the up and down movement of the pistons is the same), and overall weights to match. There is usually a bigger weight tolerance in rod sets, but with steel being roughly 2 1/2 times heavier than aluminum, there is enough excess material that normally allows a rod set to be balanced to within 1 gram (or even 1/10 gram if you so desire). It's a very time consuming process, especially if you're not set up for it. How long did it all take, Mike?

@ALB, the rods ended up at 578.5 grams each, the pistons at 381.3 grams (Mahle flat tops) and the wrist pins at 131.2 grams. It took me about 8 hours including setting up a 4x4 wood block with pins at the right heights to support the rod ends that weren't being measured. Everything got touched to bring things to an even weight. A bit obsessive, but I'm waiting on a bearing set and was left unsupervised, so what are you going to do :-)

It's not obsessive, Mike; it keeps you out of trouble and you'll be rewarded with a really smooth running engine. Since you are waiting on bearings and your rods are really heavy you could lighten them a wee bit- lightened rod

I don't know exactly how much weight was taken off (as with many others, I stole this pic off this big interweb thingy) but I think between the holes and 'shaping' it looks like a fair bit. Along with the lighter flywheel and drilled timing gear I'll bet the thing revs like there's no tomorrow!

Attachments

Images (1)
  • lightened rod

@Michael Pickett- Good morning again, Mike. I forgot to ask earlier- do you remember how close in weight the piston pins were? I've always thought you could lighten them slightly by  countersinking the insides of the ends 45°. Probably wouldn't lose much weight, but every little bit helps. You could also drill them out a short ways but leave the middle ¾ part.

When you're looking to take weight off of a car there aren't many things that give big reductions (like changing to an Odyssey battery or getting thinner glass made for the doors/side windows and molding the back window out of Lexan); you generally have to think ounces, or even grams. If, on average, you can remove 20-25% (sometimes you'll hit 30% or even a little more) of a piece's weight, to remove even just 25 lbs means working with 100 lbs of parts. That's a lot of holes to drill.

Oh, Lord, here I am rambling on again... Al


Last edited by ALB
Post Content
×
×
×
×
Link copied to your clipboard.
×
×