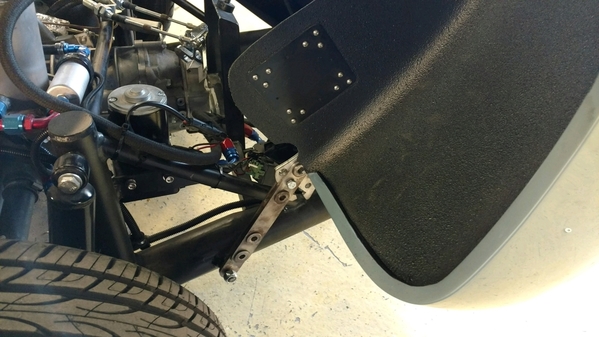
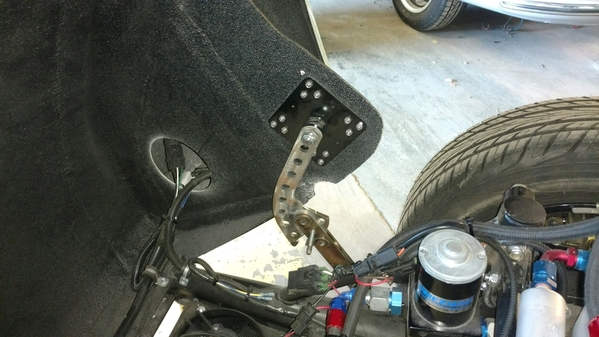
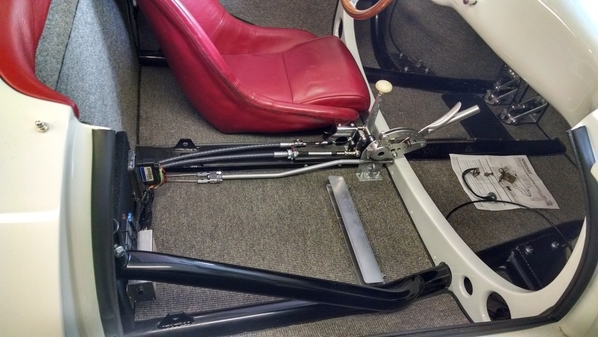
More rivets. The interior aluminum is now done. Also dry-fit the pedals one last time to make sure it all fits. Propped up the Empi gas pedal as a possible dead pedal but I don't think so. The dipper switch works good.

IMG_0630

All the bulkhead-to-frame tube plates are done now, including those in the footwells. Rivets on rivets, but they look cool. Unlike that Empi gas pedal/footrest.

IMG_0634

Yesterday I spent time fiddling with the fuel filler.

IMG_0615

Sits a little low so I shimmed up the whole tank. But I didn't like that so I made a 3/16th steel flange for my buddy to weld to the top of the tank over the sheet metal he spent a lot of time welding earlier.

IMG_0617

Also test fit the headlight buckets. I'll be damned! They fit nice. IMG_0611

Ordered some H4 halogens to fit in them.

Also today I got my rear latch cover plates:IMG_0635

One I locate those I'll be all-but-done with the drilling of the holes on this car. After these it's down to the license light, switches and emblems.

Speaking of switches...

IMG_0613

This is next. The car's pre-wired but two of those already-wired switches are marked "lights." An adventure, this is.

Attachments

Images (7)
  • IMG_0630
  • IMG_0615
  • IMG_0617
  • IMG_0634
  • IMG_0611
  • IMG_0635
  • IMG_0613

I totally agree with Gandalf.  Home Brew something cool.

Bruce, that's a very clever design.  Simple and totally does the job.

I see Ed doing something more in the "Steam Punk" vein - Something that will take, surprisingly, HOURS to complete.  Kind of like my hand-tooled, polished Stainless Steel, driving light brackets that took about a day each:

New Bracket

Attachments

Images (1)
  • New Bracket
Last edited by Gordon Nichols

Didn't work on her the last couple days. Power outage Friday afternoon lasted until noon today, and had to do some maintenance on the wife's DD.

Did get the fuel tank back to the welder with instructions on how to get the flange on it. Also roughed-in those rear latch covers.

Guys, I'm looking for the door striker bolts now. I don't seem to have any in my boxes of parts & still not exactly sure where the correct part is from. Seems to be a single bolt, about 1/2-inch thick, with washer. Any help appreciated.


I've always thought those latching hinges were pretty slick.

It's amazing, Ed, that you were able to cut out some simple shapes, put them together, and actually make them work as intended.

The thought that went into the original design is impressive. How did they come up with something like that out of thin air? How many other builders would have bothered? I guess the hinges are a tiny example of the design principles at work throughout the whole car - how to do more with less.

Keep up the good work. Your detailed progress reports are revealing parts of that design that many of us would otherwise never get to see.


Last edited by Sacto Mitch

Here's the Beck part, which (last I checked) was a $350 option on your build, $250 out the door. It's a beefier part and a stronger design than mine (albeit not-quite-period-correct), with a couple pounds weight penalty. If I had a job I'd probably have bought it rather than spending the 13 or so hours copying the original part, enjoyable though they were. It helped too that I already had the perfect piece of 1/4-inch thick aluminum plate and a big sheet of 1/16 stainless just loitering around the scrap pile, so my material cost is only about $4 in fasteners. Your mileage may vary.

Beck clam stay2Beck clam stay


Attachments

Images (2)
  • Beck clam stay2
  • Beck clam stay

Yeah, that's the one I have on the new car. It really looks the part, and yes, it's steel. It isn't that heavy, though. It is VERY cool you made yours from aluminum. And by hand no less!

I painted mine with hammered silver, to look more vintage. I really like the way all the parts look with that finish on them.

I drilled an extra hole in mine for a lock pin I keep in the driver's door. I worry that one day at a car show the wind will hit it just right and lift it up enough then SLAM down it goes. Or somebody will lean on the clam and mistakenly push it up, then SLAM! So now I don't worry at all, just slip the hitch pin in and lock the bail.

Interesting, given the pic shows a bolt through it. He must've added that after you got yours.

I had the same concern; added the lock pin to mine the other day. Re-used the chains that came on the door handles Carey sent me. I'll probably rivet the chain end in next to the clam stay, and drop the pin in one of the spare tire mount lightening holes for storage. Then it's right there when I pop the clam open.

BTW, here's what's next:

IMG_0789

Attachments

Images (1)
  • IMG_0789
Last edited by edsnova

Nice, I have some of that too but never installed it. I think I have 6 feet or so, but it's used so not all pretty like yours. I was going to attach it to my trailer hitch for when I flat tow the Spyder, but never did.

Good luck installing that around the suspension, it looked like too much of a PIA to me. Are you doing the full engine undertray as well????

Thanks, Pete. 

Oh yeah, we're into the fun stuff now.

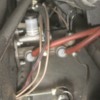
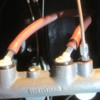
IMG_0875IMG_0878

...apparently the above is wrong because there is no "bubble adaptor" on the clutch mater cylinder. Two such adaptors were supposed to be supplied "with the kit," according to the build manual, but none were. 

Anyway, I am enjoying learning the finer points of SAE/NPT vs Metric flare standards...Anyone wanting to accelerate my learning curve, I'm all ears.

Attachments

Images (2)
  • IMG_0875
  • IMG_0878

Wilwood uses 1/8" -27 for all their stuff. So you need a metric female(10mm x 1.0 I think) to male 1/8 pipe thread adapter.

If you do the AN flex hoses, they are AN-3 usually and they have adapters on the ends. Some guys will tell you that they must be done with no adapters but they work fine. You can get hoses in any length you need, I used Pegasus Racing. They also have any adapter you could possibly want. Pipe thread, male/female, bubble, 45s, 90s, banjo ends, all of it.

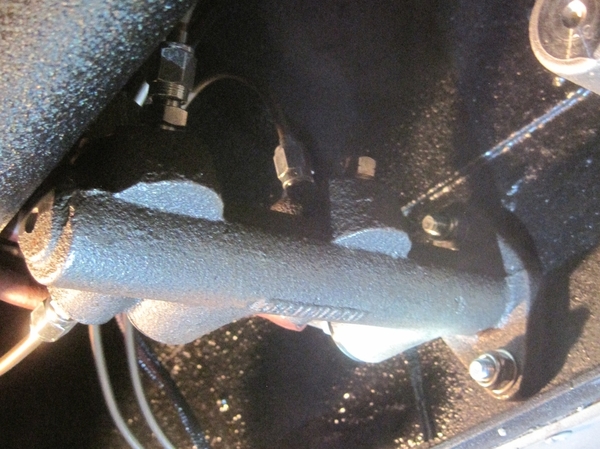
UPDATE: on closer inspection, three of the five ports appear to be restricted: down inside the small hole you can see there's a smaller hole. 

So the bottom ports, front and back, are "large" (unrestricted) while both middle ports and the front top port have the smaller holes. 

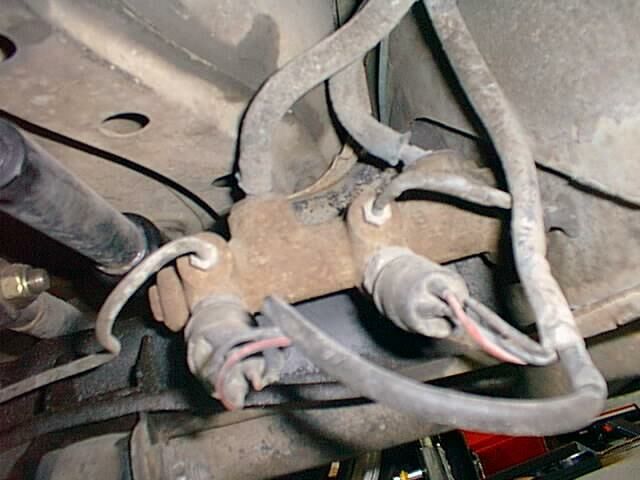
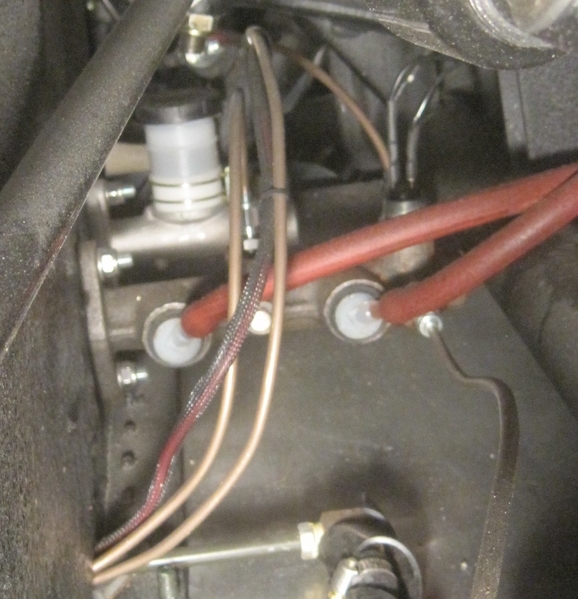
I have seen photos of VW MCs rigged up all over the internet and I don't think I've ever seen a T fitting on front brakes. Always two ports. But if my MC is typical, always one of those ports would be flowing about 1/3 what the other flows. 

UNLESS the large ports on the bottom are exclusively for the switch?

Man, I'm dumb.

you mounted it sideways! I didn't even know you could do that.

Thanks.

Next order of business: Those with the Fibersteel (or similar) original 550-style E-brake: how do you route your cables and/or through what and/or what is the cable pn?

Just got out the cables from the kit and I believe they are standard swing axle bug cables. They fit the brakes neatly but appear on the short side. Do you-all have extenders? What's the end hardware that interfaces with the stick?

More significant: most of the cable is unsheathed. There's no way to get from the brakes to the firewall with the sheathed part, so the cables would tend to saw through whatever you routed them through.

Looks like the way forward is to get a 1/2-inch steel pipe or tube (conduit, maybe?), Y it into the firewall and extend it to the flexible sheath in such a way that it won't interfere with the engine/exhaust, etc. 

But before I start, I'd love to see how some of you have yours routed. This is particularly true if I'm thinking wrong.


I didn't mount anything, it came like that. But, it does make it easier to replace the brake light switch when it does fail. I didn't have to rebleed the system when I replaced mine. I did add a few drops of fluid to the hole and I prewet the business end of the switch before I installed it though.

My E-brake cables run through two steel tubes from the cockpit, through the firewall then left and right along the firewall, then they turn down the frame towards the brakes. I can send pictures, but If your trying to duplicate what they did back in the day, it might be better to find some vintage shots.


Thanks Carlos and Gordon. Def would like to see pics. 

So I found the threaded rod that came with the e-brake handle; shortness of cables is not longer an issue.

In the box was also a piece of steel pipe that just fits over the flange ends of the cable sheathes. I already cut a little off to make something or other, but it looks like easy to find stuff. Harder to bend than 3/8 brake line though; hoping I won't have to bend much.


This is what my car looks like. It's a coil spring instead of a torsion spring like yours, so I have a little more room in that area. You also have more of a fiberglass shelf than I do. My rear hydro brake lines also "T" at the firewall, which I think is typical.

Engine comp s

I would like to redo my fuel line situation in the near future. Lessen some of the rubber hose. I also prefer the spring clamp versus the worm drive clamps. I also need to shield my clutch hydro line in a spot where it gets pretty close to the exhaust.

E brake cables

Where the two tubes come through the firewall, I would've liked them to have been stacked vertically instead of side by side, and a little closer to the center of the car. This would make for a little more clearance with my passenger seat.

When I bolted the rear of my seats to the floor, and tilted them back, I had to make a metal shield so the turnbuckle on the cable adjusters wouldn't tear up the leather on the seat. This might be a point of interest for you since you have the opportunity to correct this, if it applies to your seating situation. 

I think your seats will be farther off of the floor than mine are, so you might not even have an issue.

Attachments

Images (2)
  • Engine comp s
  • E brake cables

Ed, I believe the ports you want to use are lined up with the fluid input ports and 90 degrees to them. The ones at a 45 degree angle are for the brake switch or switches. I think one of mine is plugged and I only have one switch.

With respect to the rear e brake tubes, mild steel is fine. You can bend it quite easily if you heat it to a warm red with a MAPP torch and bend very slowly along as you move the heat. Heat the inside of the curve more than the out. MAPP gets hotter than straight propane. I hope these pics help, I don't have a good one of my MC.

Fuel lines are on the bottom, then the clutch line, the ebrake tubes, then the brake T on top above the shifter cables. You can see the metal fuel lines going up the firewall with my backwards Ford filters(with nitrile condoms!). Like Carlos, I prefer minimal hose(German woven cloth) and I used the spring clamps. Not a single worm clamp in the fuel system.

I made a T from aluminum for the Ebrake and welded some 1/4-20 nuts to the tube on both ends. It works well, keeps it low and away from the seat.


IMG_20170430_130358724IMG_20170515_125933573_HDR

Attachments

Images (2)
  • IMG_20170430_130358724
  • IMG_20170515_125933573_HDR
edsnova posted:

I don't know if I'm better than you, Gordon, but I'm def. better than me a year ago.

My buddy-who-welds-all-day-for-a-living's due in the shop in the next few weeks to use the lift and I'm going to show him my seat belt anchors first. I'll let you all know if he laughs and redoes them. IMG_0962


That's why the "grinder" was invented!

E-brake is in with cables and tested. It pulls 'em. Will need a little fettling still but it's basically ready for grease and final install.IMG_0981

Throttle cable comes in a few days. Also battery cable. I'm going to try and tighten up all my fluid lines and test my flares and stuff ahead of that. 

From there we're into wiring and final body prep and paint.

Still awaiting delivery of the upholstery material, however. 

Attachments

Images (1)
  • IMG_0981

As much as I would love to own a Spyder AND Bridget, this car was bought to build and sell. It's a beta test for a Merklin-like side business I conceived when I still had a regular job (and when Alan was about to be "retired" and we know how that turned out).

It's also a beta test for a lot of my own personal theories about how true-to-Wendler a Beck-design Spyder replica can be made to look and feel (by a guy who doesn't actually know what he's doing). 

Turns out, these two beta tests are in conflict, as Alan warned me they'd be.

If I were smart, and had followed Alan's advice, I'd have done a simple, clean build, finished by mid November or early December, titled, registered and sorted it, and have it listed already at a decent price that would net me a decent profit for my hours. But no. 

I wanted to make a special car.

And so here we are. You can call me "Special Ed."

At this point I think (pending upholstery) it will be done in late spring and listed after that, after peak season, at a somewhat-higher price than would have been possible without all the detail work and rivets. And at that point we'll probably see how right Alan was.

Meantime, though, I'm enjoying myself quite well. 

Today I finished off the E-brakes, then took them apart. Then I finished (again) the clutch line, tightened-up the fittings, filled the MC, bled and tested. And it works.

Which means my flaring skills might just be OK after all. (Just like my flux-core welding skills).

Checked the shifter and managed to get all 4 gears and reverse, so after I drill just a couple more mounting holes to keep it all solid (and fiddle a bit with the reverse lock-out), that's coming out as well for prep and paint.

In non-Spyder news, I also arranged today an editing gig for Friday—$250 for six hours—and applied for (yet another) tech writing job. 

Rest of today will be on little stuff. Like, the front brake hoses need a wider groove at the inside fitting in order to work with the stock retaining clips. It's either that or grind off the powder coat off the frame under there, and I ain't doing that anywhere I don't need to.

Little stuff like that eats up a lot of hours. I mean, I could skip it, probably, and get away with that. But nah.

And that's why I'm serious when I say "dented tubes...hopefully not a deal breaker." I've made a lot of little mistakes on this car. Just like any builder on any car. And after a while on a build you can lose sight of whether a given glitch is a super important, glaring blunder that will make people point and laugh,* or is something that literally no one will ever notice.

My usual motto, "good enough for who it's for," is not applicable. Which is why I want everyone here to mix in a little vicious honesty with your applause.

Thank you.


*Some may recall a surly dude who bragged all over the site about his Speedster build and engine building prowess, who shimmed his windshield in with I-can't-even-remember-what, and then showed-off his handiwork to all of us. 


Special Ed wrote " And after a while on a build you can lose sight of whether a given glitch is a super important, glaring blunder that will make people point and laugh,* or is something that literally no one will ever notice."

That must have been the philosophy of "Horst" and "Gunter" at the Porsche factory when building the Pre-A 356s.  Especially how the front fenders aren't exactly mirror images (neither are the doors) and how the hood handle is 1/4" off-center on a large percentage of the cars.  Maybe Horst and Gunter had eyes like Marty Feldman...

Marty Feldman

* You're 'special', Ed, because when you do something you do it as if someone cared. "Texas George"?  He didn't have a clue about anything like that.

Attachments

Images (1)
  • Marty Feldman
Last edited by Gordon Nichols

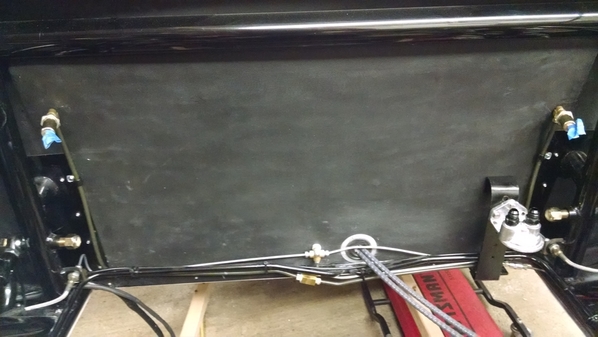
Little stuff today: Tapped another hole in the floor to make the e-brake handle stay put, re-routed the shifter cables a bit to make room for the engine, dry-fit the accelerator cable, made brackets and stuff for the brake and clutch lines and mounted the Accusump. I also made a plate to mount the seat heater switches behind the shifter. 

It's all starting to look pretty tidy and reasonable on the firewall and on the floor of the tub. I still have to make a few tabs for the wiring harness and the fuel line, plus some reservoir mounts in the frunk, but this is all fun stuff. 

IMG_1019

The bad news: The lift is leaking at the main seal. Dang. 

Attachments

Images (1)
  • IMG_1019

I have one.  I'll try to find photos.  Mine is a CMC rollbar that was already painted and installed so and I used the window channel used in a car door to let the glass ride in it going up and down.  It is notched and flexible enough to bend around the top corners of the roll bar/glass and gives it a finished look.  Used the same stuff on the bottom and simply drilled and tapped the rollbar for screws to hold everything together.   Got it at a glass place that does auto glass.  Works great.

calmotion posted:

@Theron I had them installed and love it. Nice addition. Next would be the wind breaker behind the seats 👍. I think James Dean won’t like that either not a good match with the hair style 😎

I have them too. I don't give a whit what Dean would have thought. Unlike some Spyder guys, I dislike the association.

Ed, keep on trucking.

Post Content
×
×
×
×
Link copied to your clipboard.
×
×