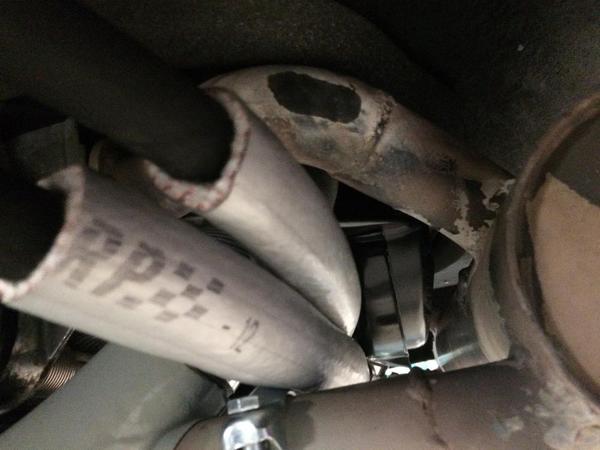
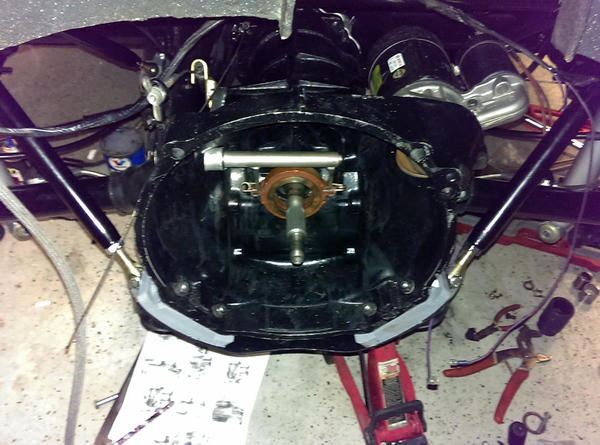
Day 30 - Things look hopeless. Decided to clean up the carcass a bit.


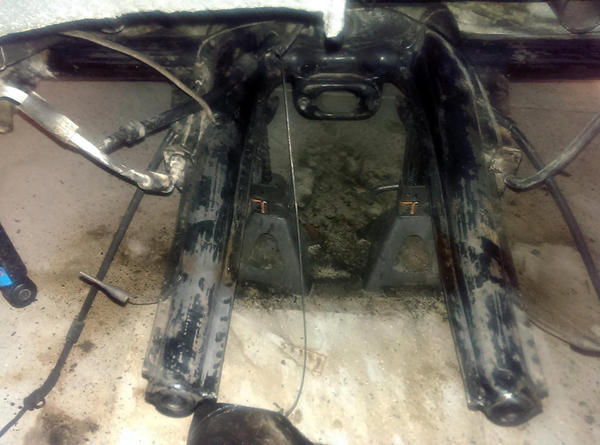
The first shot shows how the frame horns looked after I removed the engine and trans. The frame horns were CAKED with years of grime and grease. The surrounding area is littered with nuts, bolts, discarded tools and surgical gloves. 


IMAG0617


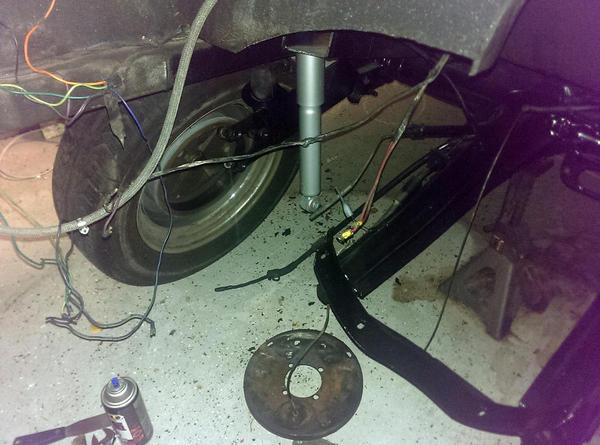
The second shot shows the same area after I a good cleaning.


IMAG0619


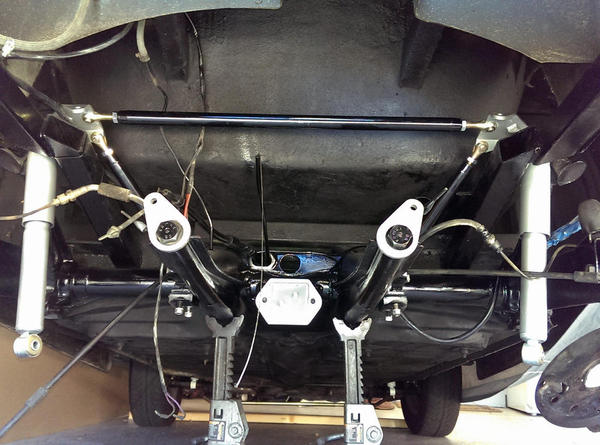
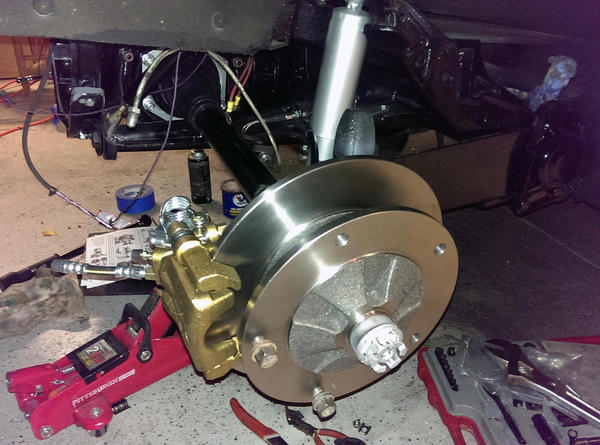
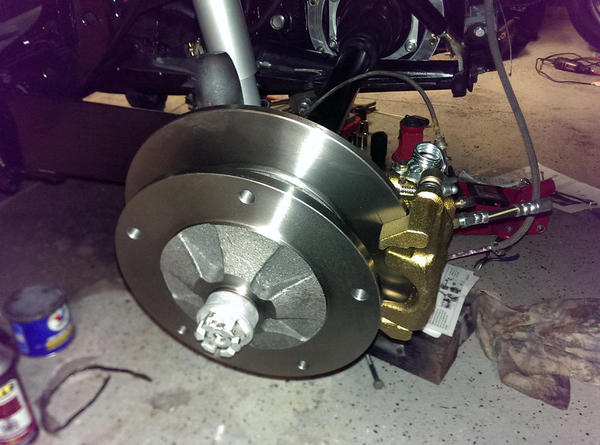
The final shots are after cleaned everything with a good detergent and hit it with some high temp primer and paint. In hindsight I wish I had used Satin or Matte Black.


IMAG0640

IMAG0644

IMAG0645


Sorry for the horrible image quality. Cellphone camera in low light.


Today I will install the Kafer bar (most of it...) need to leave two bars off until the trans is back in place.


Then I need to clean up the wiring loom. Can't wait to get rid of the old drum set up. New e-brake cables and rear disks will really clean up the area.


Oh, some of you will notice that I still have the rather long and gangly full length fuel tube. Should shorten it down closer to the frame horns and run some fuel hose instead of that gnarly crooked tube? I saw Teby's set up and it looks a lot more sanitary.


Thanks for checking in,
Ted

Attachments

Images (5)
  • IMAG0617
  • IMAG0619
  • IMAG0640
  • IMAG0644
  • IMAG0645
Last edited by TRP

Ted- Looks good! The gloss is nice because it wipes up better, so don't sweat it. I use an ice cream bucket for loose stuff and find it helps immensely. I've never seen the fuel line left like that, but then I haven't seen that many other Speedsters. Cutting it shorter, using fuel hose and putting the fuel filter in that area is probably the better way to go. Next time you see Teby could you get a pic? It's always interesting to see how other people have done things. What's the status on the gearbox?

Looks like a good place to put in a plug for our local guy here in Fresno.  His name is Scott Sebastion and his phone number is 559-313-3301.
Scott has worked on many of my Speedsters, Anand's (Spyder), Teby's and Bob Eiland's cars (Vintage, Beck and JPS). He is very familiar with our cars and is the go to guy in the Fresno area for all the VW guys.
He does it all, including carbs, fuel injection, turbos and full rebuilds, but his specialty is transmissions.
He does lots of work for Pat Downs at CB Performance and besides doing good work, he is honest, tells it like it is and his pricing is fair.
Like Jim said, he is very busy, but he is nowhere near retirement age.
 
Originally Posted by Jim Kelly 2013 SAS coupe-Fiji:

There aren't many of us who do all our own work.  No matter how talented the owner is, sooner or later, something needs to be shipped to "the guy", who rebuilds whatever it is that went south.


Of course, "the guy" is much in demand, since there aren't many still offering his unique services.  The market is shrinking, new mechanics want to learn the newer technology, etc.  So, as a result, we must approach this magician with hat in hand, as it were.


To further complicate matters, most of us don't live close enough to the maestro's shop to just drop in and see how the job is progressing.  Does that mean that we have a tougher time getting high enough on the list to actually warrant someone looking at the broken piece?  Of course, the answer is a resounding YES!

-----------------------------------------------------------


Last edited by Troy Sloan

Here is a link to an extensive "mental masterba...tion"  about the need for disk brakes.

I was on the fence when I asked the question, but now agree that rear disks are an improvement.  I originally posted the question based on the thought that "if you can lock up your rear drum brakes, how will having disks stop you any quicker?"  What convinced me was the fact that over heated rear brakes may not be able to lock up and would not help stop you at all if that was the case.


https://www.speedsterowners.com...-a-need-talk-it-over


Originally Posted by TRP:

Day 30 - Things look hopeless. Decided to clean up the carcass a bit.


The first shot shows how the frame horns looked after I removed the engine and trans. The frame horns were CAKED with years of grime and grease. The surrounding area is littered with nuts, bolts, discarded tools and surgical gloves. 


IMAG0617


The second shot shows the same area after I a good cleaning.


IMAG0619


The final shots are after cleaned everything with a good detergent and hit it with some high temp primer and paint. In hindsight I wish I had used Satin or Matte Black.


IMAG0640

IMAG0644

IMAG0645


Sorry for the horrible image quality. Cellphone camera in low light.


Today I will install the Kafer bar (most of it...) need to leave two bars off until the trans is back in place.


Then I need to clean up the wiring loom. Can't wait to get rid of the old drum set up. New e-brake cables and rear disks will really clean up the area.


Oh, some of you will notice that I still have the rather long and gangly full length fuel tube. Should shorten it down closer to the frame horns and run some fuel hose instead of that gnarly crooked tube? I saw Teby's set up and it looks a lot more sanitary.


Thanks for checking in,
Ted

Ted, is your left rear tire rubbing on something? Maybe just the optics of a phone camera or my aging eyes?

Kafer bar 2/3rds of the way installed.  Need to wait until the trans is back in before I can wrap up the final install of the two rear bars. I also need to trim the rear trans mount to properly clear the clevis ends.


Maybe next I'll  install the new calipers, stainless lines, and emergency brake cables.


Need to stay busy until Ken is done with the trans.


Is there any sort of market for nearly new rear 67 drums, backing plates and cyls?


IMAG0664

Ted

Attachments

Images (1)
  • IMAG0664
Last edited by TRP

Hello Ted:


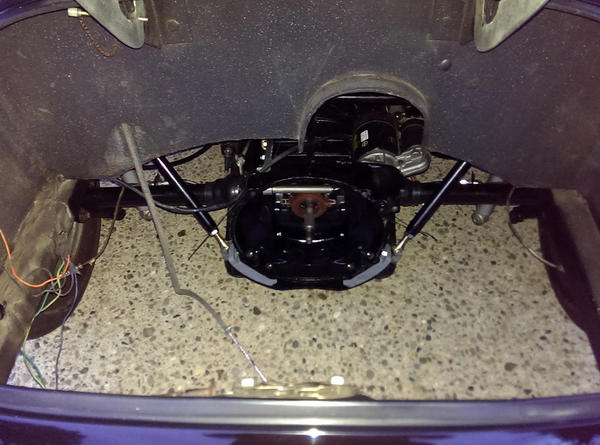
Great project, and that last shot really shows the configuration of the fiberglass body especially as it relates to the engine firewall and the passanger compartment rear deck and rear seat area. 


If you have not installed something like Dynamat underneath the carpet in the rear passanger compartment area, did you ever consider installing it underneath the car in these areas now that they are exposed and easily gotten to while the engine and trans is out ? 


I only ask because I am thinking of doing this with my speedster, but the the major obsticle is engine removal.


Grant

Originally Posted by LongTimeLurker:

Ted, I'm in South San Jose, and I think one of my rear drums may be warped.  If they are compatible it ay be easiest for me to drive out and get them for a few bucks and lunch in Morgan Hill.  Mine is a 70 IRS pan.  Looking at parts on-line I think 65-67 rears may not work on a 70. 

Ted's drums may be wide 5, while yours may be 4x130mm if they are both original to their respective pans, so make sure you know what you have. 

Yesterday I took the time to install a new fuel pump, distributor, the type 4 oil cooler, and the valve covers on the 1915. Maybe this week I'll get started on the rear disks.


I read Troy's thread on rear Disks. A common theme was that I needed to update my master cylinder to a 'big bore' unit. I have a second unit that came with the front disks. Does anyone know what part number I should be looking to install?


The Kafer bar is from Kevin at CoolRydes. It is a Mendeola unit. Super easy to install. Very high quality. Overkill for my motor, but that's why they call it madness.


I have considered adding dynamat to the rear seat area. My carpet isn't in the best shape. It's original CMC carpet from the early  90's. It's due to be replaced this winter. Once I pull the carpet I'll install the dynamat in the cabin area. I was talking with Anthony a little over a month ago about adding dynamat to the tin/fiberglass that engine surrounds the engine bay. The thinking would be to install a heat barrier to knock the engine bay temps down a bit. The A1 puts off a lot of  heat and it rises straight into the engine bay. I look forward to seeing if I can correct some of that.


I'm going to call Ken Porter today and see if he's going to have the trans completed this week. I'm hoping that he didn't have any unexpected surprises.


Ted
IMAG0669

IMAG0670

Attachments

Images (2)
  • IMAG0669
  • IMAG0670

I just spoke with Ken Porter, in Eldorado Hills.


The trans is torn down and all of the machine work has been completed. Nothing too surprising inside the box. He's confident we'll be on track for me to pick it up on Friday. Sweeeet! I'm going to leave out of Morgan Hill early so I can get up there and back before traffic starts to suck.


Hard to imagine that it's possible that I may have the trans back in this coming weekend?!?


I guess I'd better figure out what I'm going to do about that Master Cylinder.


Ted

No SuperDiff. I just didn't see the need for the added expense. I had a beef-a-diff and some 10 tooth spider gears installed with 15 tooth side gears. Beefed up side plates and a heavy duty hockey stick. Other than that - welded up 3rd and 4th and threw in some steel forks.


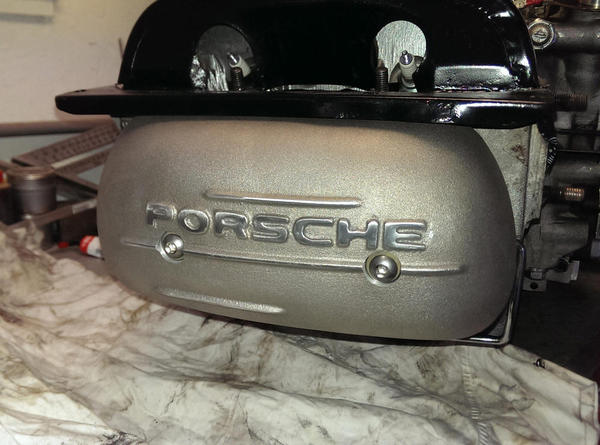
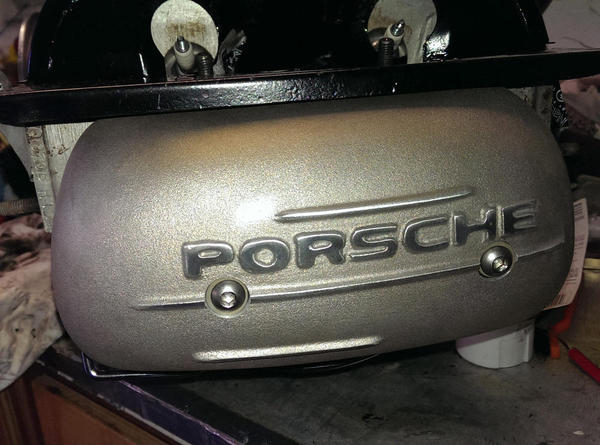
Something I noticed while working on the 1915 last night - one of the elephant feet wasn't centered on the valve stem. I will try to get a photo of it this evening. Maybe you guys can tell me if I need to get a set of shims and move it over another 1/8" or so?  Anything I should worry about?


Anybody know where I can get some heat shield like this?


IMG_1918


Thanks

Ted

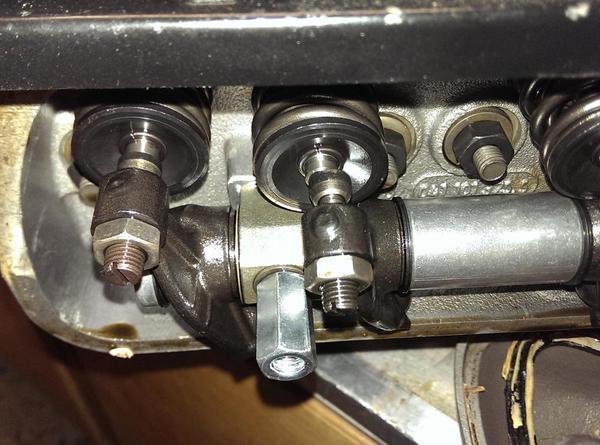
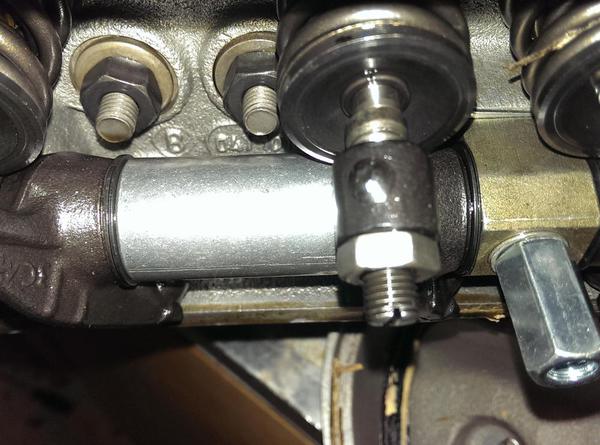
Here are the shots of the 'elephant feet'. The first one that is really off center is the second from the left below. 


IMAG0674


The other one that is just a wee bit off is the one in the center below. It's just on the edge of the valve head. Not too bad really, but not centered.


IMAG0675


Do I need to order some shims to adjust them over a bit or are they fine as they are?


Thanks

Ted

Attachments

Images (2)
  • IMAG0674
  • IMAG0675
Originally Posted by TRP:

No SuperDiff. I just didn't see the need for the added expense. I had a beef-a-diff and some 10 tooth spider gears installed with 15 tooth side gears. Beefed up side plates and a heavy duty hockey stick. Other than that - welded up 3rd and 4th and threw in some steel forks.


Something I noticed while working on the 1915 last night - one of the elephant feet wasn't centered on the valve stem. I will try to get a photo of it this evening. Maybe you guys can tell me if I need to get a set of shims and move it over another 1/8" or so?  Anything I should worry about?


Anybody know where I can get some heat shield like this?


IMG_1918


Thanks

Ted

I'm not sure if it is just my computer but the picture is missing.

Ted- the adjusters shouldn't be exactly "centered" on the valve stem; they're supposed to be slightly offset to promote the valves spinning a little every time they're lifted and let down. If one is way off to one side, then shim it over a bit, even if it means taking a little off the side of the rocker.


PS- Looking at the pics above (hadn't seen them before), I'd say the top one could stand to be moved just a bit; but make sure it's still not quite centered.

Last edited by ALB

I bought a rocker arm shim set from CB. It should be here in a few days. I'll go ahead and adjust them a bit and make sure they are ever so slightly off center. I'm strongly considering the 1.25:1 rockers since I'm going to have the rockers out anyway. Not sure if I really want to try figure out push rod geometry or not. While I was there I picked up a new sump plate for the 1915. I got one with the center drain. This is only after buying a replacement Clyde's buggies sump plate and the super screen. About 45 bucks wasted. Maybe I can put them on 'The Samba' and move 'em on down the line. Combined those are the same price as the new sump plate.


The last thing I need to purchase for the 1915 install is the temp shield for the two oil lines that pass close to the exhaust header. I ordered the oil cooler from Carey this morning. 


Another day. Another parts order.


The madness is full blown at this point. I blame ALB and MUSBJIM.

Originally Posted by David Stroud Ottawa Canada '83 IM Soob:

Ted...how do we inflate your Avatar ? Is that Annaliese ?

LOL - No. That's Audrey Hepburn. It's a colorized photo of one of her old photos.  I saw the image in color the other day and it was only then that I realized how stunning she was.  So much more class than the tramps in Hollywood today.


Ted


Q4cHvNu

Attachments

Images (1)
  • Q4cHvNu
Last edited by TRP

Colorized, eh ? You don't hear that too often. The young Lads on this list likely would not know what that means. We've got an old VHS movie at home called Captains of the Clouds starring James Cagney and a few other notables filmed mostly in Canada and our home town, Ottawa too. WW2 stuff about the BCATP. Loose filming, shoddy prop control / cheating a bit. EG...they showed a bush pilot flying a Fairchild 71 in one part and that was a plane with a single pilot seat in front, two buckets side by side behind with a bench for two behind that.


The plane took off and when the camera got in, Cagney was at the stick flying the airplane talking to the other actor ....sitting right beside him...the whole "cockpit"  was likely sitting on a hay wagon in the studio getting pushed around by Hepburn wannabees.

Hey Ted. Looks like you are going through same thing I just did..

it was a month as well cleand the hell out of my car before re installing the trans and engine if you need any ideas or help let me know....


I worked on my car with Scott he made me clean every nut and bolt. Lol. If it looked bad we simply replaced it   We replaced a lot of hardware... 


or pics

tebs

Last edited by Teby S

Installed a new master cylinder today. In and out in 30 minutes. I put if off and dreaded it for no reason! While I was down there found a torn boot on the lower ball joint. Pulled the arm out to get a new one installed. Found the needle bearing on that arm was completely frozen. Cleaned it and put it back in. I suppose this would be the appropriate time to do check all four of them... before I get it realigned.


This afternoon I need to finish bending up the rear lines and then I can refill the system and bleed the air out.


Also picked up a case of Brad Penn. Once the Setrab arrives this week, I can start plumbing the oil system and get the motor back in.


I should really post some photos of the progress... I'm just a messy mechanic and the only photos I took had pretty messy garage floor. Littered with tools and rags.


IMAG0677

IMAG0678

IMAG0679

IMAG0682

IMAG0683

IMAG0684

IMAG0685

IMAG0686

IMAG0687

IMAG0688


Ted

Attachments

Images (10)
  • IMAG0677: Need to fab up some new hard lines...
  • IMAG0678: Need to fab up some new hard lines...
  • IMAG0679: I'm a messy mechanic...
  • IMAG0682
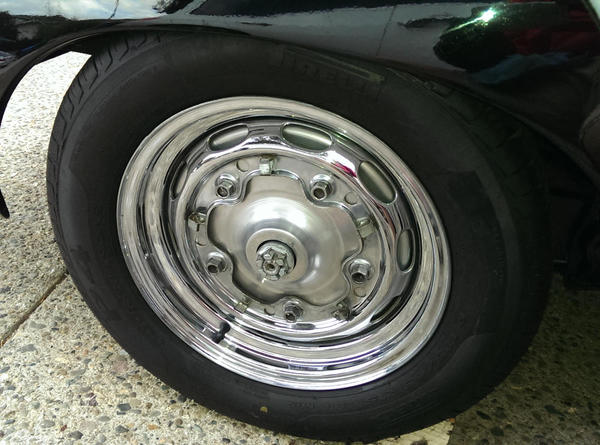
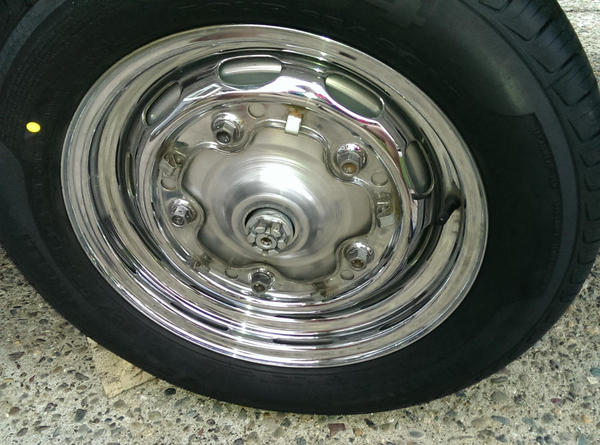
  • IMAG0683: Wheel cleaned!
  • IMAG0684: Need to clean the rims and blacken that castle nut
  • IMAG0685: Need to clean the rims and blacken that castle nut
  • IMAG0686
  • IMAG0687
  • IMAG0688
Last edited by TRP

Thanks Ed!


I'm kind of torn at this point. At this point I have a few options I could go with:

  • I could rush it and put the 1600 back in and be on the road next weekend. It could be today, but I have the front end also pulled apart to get a ball joint replaced. 
  • I could take a few more weeks and get the 1915 in there.
  • Or I could give in and assume it'll be off the road until the spring and take some time to do up a nice firewall treatment and really detail out the engine bay. Before putting the 1915 in there.


There is another development to consider - I have two sets of Kadrons. A set with less than a year on them. They are set up for the 1600. I have the venturis and the jets to 'upgrade' those for the 1915. I also have a set of early early Kadrons with the "Mariner" guild mark on them. Those need to be rebuilt. I'm not sure which way to go with those. Do I use them on the 1600 or the 1915? It's a toss up. My thought was to use the older carbs on the 1600 because it's set up to look like a 1600 Super motor anyway (with the 356 oil filter, etc.)


Too many options. Madness for sure. 


Ted

Hey Ted.  


Look great. Nice a clean shiney and new!!  Can't wait to see it!! 


Yes its important to clean and fix while you are there (so to speak). It may drag the project on but your better off in the long run..  While. I was working on my car Scott kept reminding me of the importance of Check, Clean, and replace..  Most of the time it was replace.. I had not been under my car as intensely as I should have been..  So a massive clean up was in order. I'll send pics of it,  Super clean.  


Also helps to refresh the paint in areas that can be seen ie engine compartment..


By the way. I know you will need new heater box hose. You can get it at Napa its part #815-5008. Comes in 6ft leangth  you need two..   


Looks great Ted..  Wish I lived closer I'd come help!! 


Tebs


Add Reply

Post Content
×
×
×
×
Link copied to your clipboard.
×
×