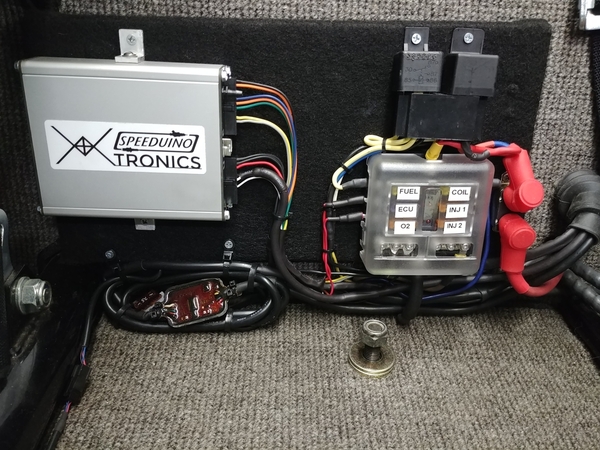
IMpressive most impressive Danny.
Famous last words:
"Hey! Hold my beer! I'm gonna change my engine performance profile!"
![]()
Here's a couple videos.
The first start:
The AFR display:
Danny, you are a snake charmer dealing with all those wires. I'd have made a mess of this project way early!
However I am undertaking the daunting task of replacing my gas tank fuel sending unit with it's two or three wires. Big time project for me. Could take as long as 10 minutes!
Wish me luck, I'm going in.........
That is really cool Danny, Great stuff.
I took a couple days off, but now I'm back at it. Here's a picture just for @IaM-Ray:
All covered up. I've got to add about a dozen more wires for the injectors, temp sensors, TPS, and stepper idle control. That will get done soon.
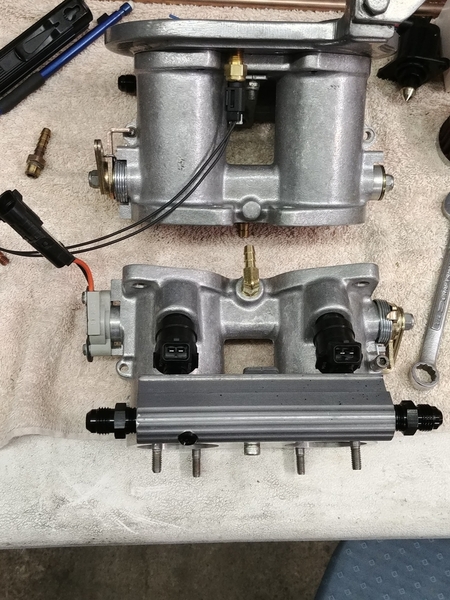
I've started the plumbing with the injectors and rails on the throttle bodies. After some looking around I decided to use good old Permatex case sealer on the threaded fittings as it is gasoline, oil, and alcohol proof. There were quite a few recommends on H.A.M.B. so good enough for me.
I like black fittings. I never liked the red and blue that a lot of people use. I even found some nice black anodized Allen-key pipe plugs.
I decided to install the IAT(intake air temp) sensor into the air filter base for a cleaner look. Electrical harness time tomorrow.
Time to unbolt the carbs and start the fuel system.
Attachments
Oooo nice cover ! Great looking wiring for sure Danny.
@DannyP posted:No. Not OBD. No emission testing either. There is a USB connector on the ECU which I used for initial setup and testing.
But then I did purchase, program and install a Bluetooth transceiver. It cost about $10, and is I link up with either my laptop and Tunerstudio OR my phone with MSDroid(MegaSquirt Droid) app for on the go access and changes. I can store and load multiple tunes that way.
That, sir, is slick AF
The last couple times I fired the car up I noticed the valves were a little noisier than usual. I figured I'd post this even though it isn't specific to EFI. But it'll run better either way.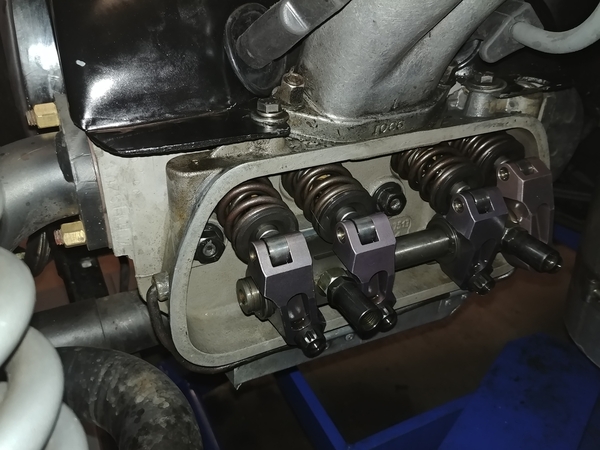
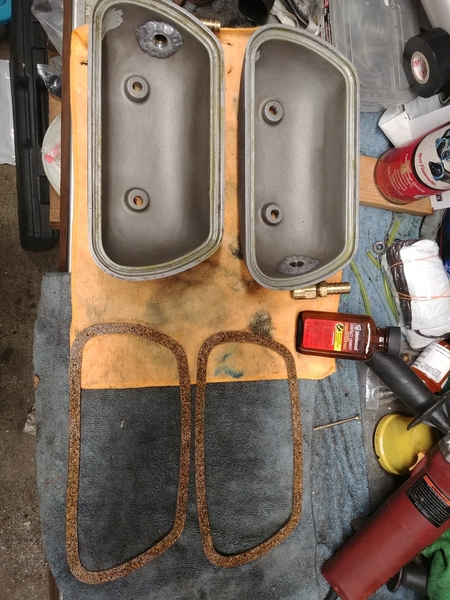
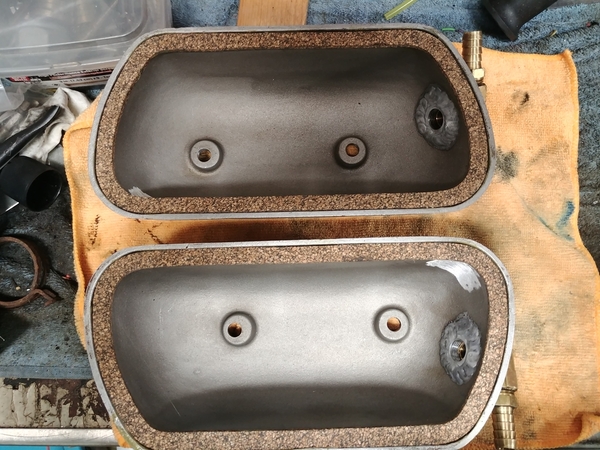
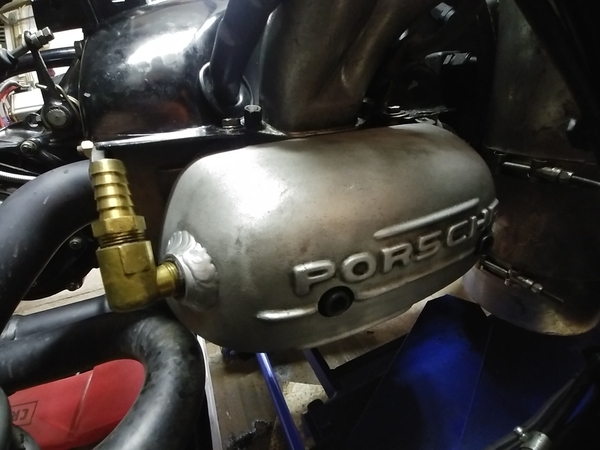
Those are Pauter 1.5 rockers from 2002. They have roller tips and roller bearings and they used to be bright purple-anodized. I had a couple that were a tiny bit too loose.
The contact cement on the valve covers cleans up with a rag and a couple squirts of carb cleaner. The glue literally slides right off. It took me twenty minutes to do the whole job, plus ten minutes for the glue to tack. Thin layer on the cover and the gasket, wait, and stick. I grease the gasket on the head side.
Look at the first photo, notice how there is basically no oil in the head? Dry sump, my friends. That huge pump sucks the oil out immediately. There is plenty of oil on all the moving parts and friction surfaces. It just gets evacuated and doesn't have a chance to pool and leak.
I really need to get my exhaust ceramic-coated.
We're getting about 6 inches of snow tomorrow so I'm sure to be in the garage working on the EFI.
Attachments
Looks like out-of-the-box parts.
No pictures to go with today's summary, sorry.
I removed every bit of the old fuel system, except the carbs(only 8 bolts). Besides, the carbs protect the intakes from stuff getting dropped in there.
I pulled a line off one carb and ran the fuel pump until the tank was empty, I had about 5 gallons in there. The snow blower, BMW bike, and gas can are all filled up with Ultra 93 now. Yes, it was treated with Stabil.
Fuel tank is out, hose, filter, pump, hard line down the middle to a threaded brass T, and hard lines across and up the firewall to just in front of each carb. I also pulled the tunnel covers and the cable shifter over the tunnel. The cable shifter is bolted to a U-shaped steel piece about 1.5 feet long. It looks like I only need to drill one hole in the front and one at the firewall to accommodate the return line.
I'll start installing new stuff tomorrow.
Keep at it. Carlisle is less than three months away - maybe.
I have a feeling my EFI will be running before your coupe arrives from Bremen.
When you emptied your tank with the fuel pump, how much fuel was left in the tank?
I'm just wondering if the placement of the fuel tank exit is in the correct location to use all of the fuel in the tank or not. I'm wanting to do what Ed did and remove the "bump" in the fiberglass that interferes with my foot while using the gas pedal. It's supposed to be there for clearance of the fuel tank exit.
Probably a gallon or so. I agree it isn't in the best spot for a Spyder. Since the tank is angled forward fuel is in the front when the pickup is uphill near the back.
I was thinking about moving the bung to the front until I thought about it. Under acceleration fuel goes to the back. I've never had a starvation problem, probably due to the float bowls but I don't want to chance it. And I don't want to run a swirl pot either.
What we really need is a custom tank with a small well and baffles that also looks the part.
Put two 5-hole sender flanges on it. One for the wrong fill location and one for the correct. One tank to fit them all.
Danny you could make a mold for the space you have and have one molded in plastic like a cell for your car. It would be better if you had like 10 people who might want one so that you can split the cost but a custom tank could be done that would address all those issues.
You would think Carey and Greg could team up on this, I am pretty sure it would fit both cars and Thunder Ranch too. They could plumb it with a feed and return, would work for both EFI and carbs, just plug the return on carburetor cars.
I don't want one bad enough to do the R & D.
It isn’t that bad. You just build a wooden box the size you need test fit it and make sure you know the location of the fuel lines and the sending unit then get quotes. Or styrofoam too
But why?
A custom tank has been on my short-list for years-- but the intent is to use the real-estate an IM has behind the beam (assuming one has such a thing, and I do) to get the fuel lower in the chassis and open up some more trunk space.
I understand that this is mostly just a project for me, as are most such things. A custom Spyder tank would pay for itself after about 1000 cars, assuming every car they went into was for somebody as passionate as Danny or Carlos or Ed. I can tell you with 100% certainty that not many people are.
I have found that when I'm building custom things, it's best to just assume you're going to be making one, and not 100 of the thing, and proceed accordingly.
True except when I did the research for my IM to make a new tank IM made a wooden test box and I found the custom tank maker and 10 units was the magic number. The. I found out about the existence of a larger filler pipe and cap and had one sent to me after the build . Just saying
After all of this I found out I could have done the tank in injection molded material for the same cost with even more fireproofing that an all aluminum unit
That's all well and good, but it won't be on this car. Fitting the through-hood filler is not something I want to do on a finished car.
Danny I agree through the hood filler would make it really much more complex but then, your the guy doing EFI. ![]()
I'm not doing anything more difficult than Mike Pickett already did. He pushed me over the edge, just like my friend Stan "Dry Sump" Galat.
I will say the learning curve is steep on this EFI stuff, and Mike already had a bunch of experience compared to my zero experience.
You will find—and I guess you already have found—the pump, filters and lines are dead simple. I'm very keen to see how your electronics go.
@DannyP posted:I'm not doing anything more difficult than Mike Pickett already did. He pushed me over the edge, just like my friend Stan "Dry Sump" Galat.
I will say the learning curve is steep on this EFI stuff, and Mike already had a bunch of experience compared to my zero experience.
Well Danny your still way ahead of most of us guys here ![]()
@edsnova posted:You will find—and I guess you already have found—the pump, filters and lines are dead simple. I'm very keen to see how your electronics go.
The physical wiring and stuff isn't hard, nor is the plumbing. A bit tedious perhaps, but not hard. The planning of plumbing and wiring paths is where most of the effort goes, at least for me.
It's gonna be the maps and tables and LEARNING what does what and how and why.
The cool thing is there are some very knowledgeable and helpful folks on the Speeduino forum, plus I email(pester) Mike from time to time.
@DannyP posted:I'm not doing anything more difficult than Mike Pickett already did. He pushed me over the edge, just like my friend Stan "Dry Sump" Galat.
I will say the learning curve is steep on this EFI stuff, and Mike already had a bunch of experience compared to my zero experience.
Repeat after me, "It's dry sump, it's dry sump, it's dry sump. I know I know I'm being a bit sophomoric. I can't help it sometimes.
@Robert M I don't know if you were being humorous or not, but honestly I didn't ever notice how dry my heads were in the rocker area before.
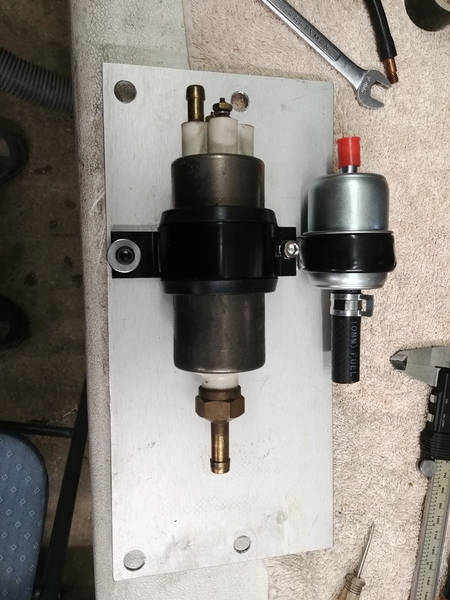
I've started to work on the fuel system. First I had to move one of my horns to the driver's side, the other was already there. Then I had to move the gas heater fuel pump to the front of the beam. The cool thing is that the 4 beam mounting holes are unused in a Spyder, making useful mounting areas.
I cut a stainless strap/mount for the Suby after pump fuel filter, which will mount just in front of the beam. I then mounted a pre-filter and the pump to a 3/32" aluminum piece. That will mount to bottom beam tube with a couple muffler clamps.
Attachments
@DannyP posted:@Robert M I don't know if you were being humorous or not, but honestly I didn't ever notice how dry my heads were in the rocker area before.
I've started to work on the fuel system. First I had to move one of my horns to the driver's side, the other was already there. Then I had to move the gas heater fuel pump to the front of the beam. The cool thing is that the 4 beam mounting holes are unused in a Spyder, making useful mounting areas.
I cut a stainless strap/mount for the Suby after pump fuel filter, which will mount just in front of the beam. I then mounted a pre-filter and the pump to a 3/32" aluminum piece. That will mount to bottom beam tube with a couple muffler clamps.
I was goofing along the lines of something that rhymes with dry sump that a lot of male teenagers experienced growing up. Hence my comment about being a bit juvenile.
Ahh. Thanks for the vision of Stan doing that. Thanks alot. Can I borrow an ice pick to gouge out my eyes?
I worked on the fueling system more today.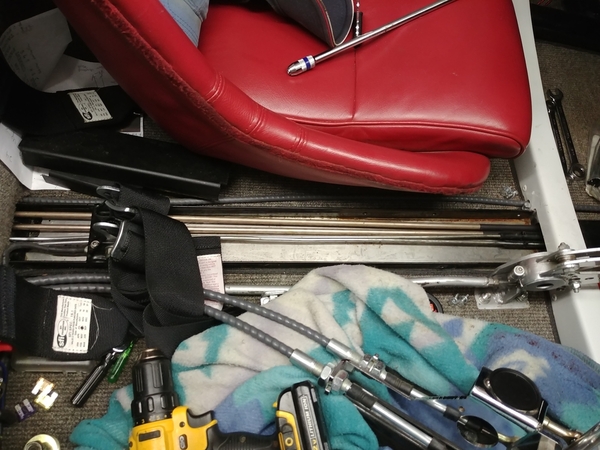
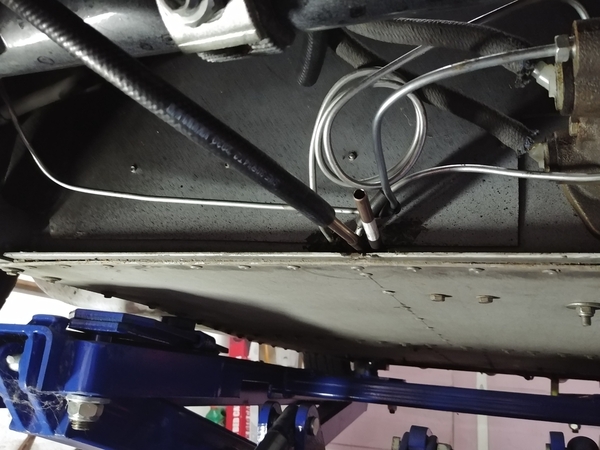
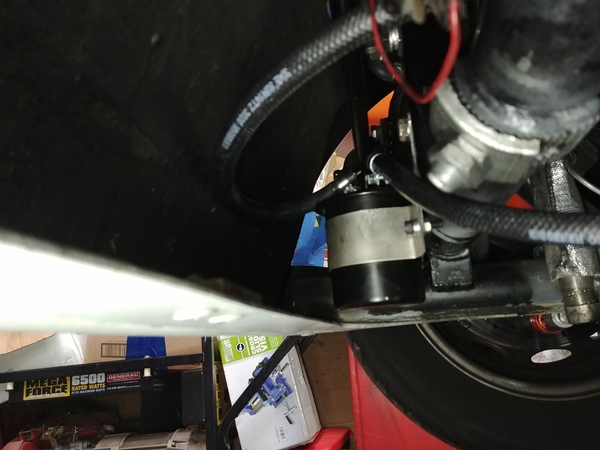
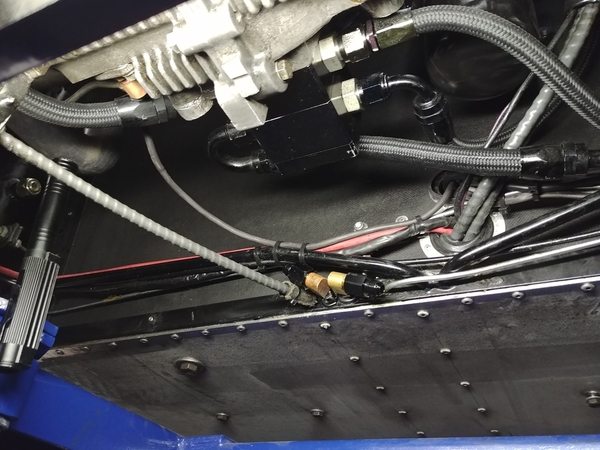
I installed the hard lines through the chassis. They are 5/16" copper fuel/brake lines from Advance Auto. I used rubber grommets in the back by the firewall. I put some heavy heatshrink where the lines go through the cockpit bulkhead and the front firewall. The shifter and center covers are all put back in now.
Back by the engine I installed brass 90 adapters, and aluminum AN-6 adapters. All set for braided hose to the fuel rails.
There really isn't as much room in the beam area as in a Speedster. The master cylinder just clears the lower tube. I had to put the post-pump filter in front of the beam due to the gas heater exhaust.
I'm waiting on the CB fuel injection T for the bottom of the tank. I've decided not to drill another hole in the tank for the return.
I removed the carbs and linkage, then started the throttle body installation. Of course the intake manifold studs are a little short, I have some longer ones to install tomorrow.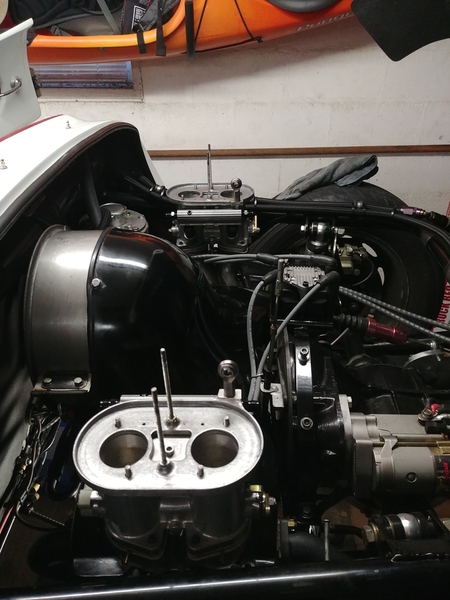
The throttle bodies (roughly 48-49mm) are a port match to the manifolds. I think they look good on the manifolds.
Tomorrow I'll swap the studs and run some braided fuel hose, including the pressure regulator. Then I can finish the wiring and vacuum hose.
Attachments
Fascinating work, Danny. Not just technically brilliant but beautifully made too. Keep on keeping on!
I'm curious where you installed the Webasto and where the exhaust goes.
With my heater mounted right up in the nose, I ran a straight, 1-1/4" exhaust pipe over to the passenger side, coming out just ahead of the right front wheel. Seems OK so far and mostly un-noticeable unless you really look for it.
Thanks, Martin, I appreciate that.
Gordon, the Webasto is under the dash and mounted through the fiberglass firewall. The exhaust goes forward under the tank then down just behind the beam on the passenger side. It sticks down about 1/2" from the aluminum under-pan. I have heatshield sleeves on the corrugated stainless pipe as well as stick-on heat shielding on the top of the footwell and the bottom of the steel tank. It has worked flawlessly for the last three years.
I'll post up some pictures later on to illustrate, but you can just see the pipe in the third phot in my previous post. Look all the way on the right side in the background.
OK, now that I know what to look for, I found it. Mine is a bit less inconspicuous ![]() but you really have to look way under the car to see anything. I also had the advantage of a straight shot, once past the 90º elbow going straight up into the heater, so I could use just a rigid length of exhaust pipe out in the open with no need for insulation. I think I anchored the far end to one of the front bumper mounts.
but you really have to look way under the car to see anything. I also had the advantage of a straight shot, once past the 90º elbow going straight up into the heater, so I could use just a rigid length of exhaust pipe out in the open with no need for insulation. I think I anchored the far end to one of the front bumper mounts.
I ran mine out to the passenger side because the heater air inlet is on the driver's side, right behind the headlight bucket, with a shelf installed for protection. Using a left/right air cross flow keeps any combustion exhaust from finding the air inlet. ![]()
Gordon, my heater exhaust cannot be seen. It runs inside the beam and protrudes from the aluminum undertray about a 1/2". The exit is the only part that can be seen. The exhaust exits right into the slipstream of air under the car. The combustion intake air is from up by the fuel tank and has a muffler on it. The muffler came with it and quiets the "roar" a good amount.
My cabin/heated air intake is from inside the driver's rocker panel, that way I don't have a heat loop. I still don't have a top so it doesn't really matter where that air comes from as long as the intake air doesn't warm too much(like if I had a top!) the heater never shuts off.


